Pages

Saturday, July 27, 2013

Pretty Girl - PTU

This tutorial was made and written by my own ideas any resemblance to other tutorials is purely coincidental.

Supplies Needed
For experienced PSP User
Scrapkit: Pretty Girl by Rebellious Scraps
You can purchase her kit here
Font of choice. I'm using font called Nyala
Plugin: Eye candy 5-Impact-Gradient Glow

Elements used from kit
box of pearls
car
city scene
compact
eyes2
frame2
gown
lipstick2
mascara
nailpolish
paper9
perfume
purse
shoe2

Let's get Started
Open new raster 600x600
Copy and Paste Frame2
Copy and Paste Paper9 drag below frame layer
Adjust size so fits inside 
Copy and Paste eyes2 drag above paper layer
Copy and Paste remaining elements adjust sizes and arrange by sample
Add name I applied Gradient Glow with drop shadow
Add credit info and we are done!

Friday, July 26, 2013

Back 2 School Pink - PTU


This tutorial was made and written by my own ideas any resemblance to other tutorials is purely coincidental.

Supplies Needed
For experienced PSP User
Scrapkit: Back 2 School Pink by Designs by Sarah
You can purchase her kit here
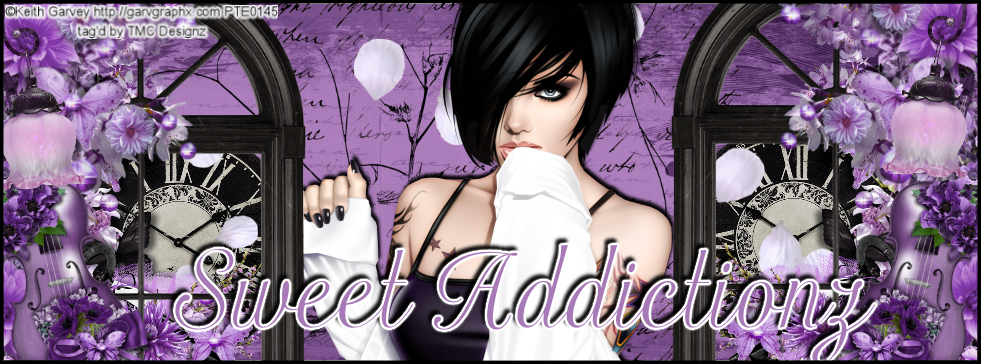
Tube of choice. I'm using artwork by keith Garvey
You can purchase his work here
Font of choice. I'm using font called Kingthings Frontwards
Template Back to School by Sarah's Tags N Things here
Plugin: Eye Candy 5-Impact-Gradient Glow-Textures
Plugin: Xero-Radiance-Fritillary

Elements used from kit
sb_pmt_back-2-school-Pink_board1
sb_pmt_back-2-school-Pink_books1
sb_pmt_back-2-school-Pink_desk
sb_pmt_back-2-school-Pink_Grunge1
sb_pmt_back-2-school-Pink_highlighter
sb_pmt_back-2-school-Pink_notebook1
sb_pmt_back-2-school-Pink_papersheet1
sb_pmt_back-2-school-Pink_PP2
sb_pmt_back-2-school-Pink_PP3
sb_pmt_back-2-school-Pink_ruler
sb_pmt_back-2-school-Pink_scissors
sb_pmt_back-2-school-Pink_stapler

Let's get started
Open template close out credit info/Rasters 10&11
Select Raster 5 layer go to selections-select all-float-defloat-invert
Copy and Paste PP2 hit delete on keyboard 
Apply Gradient glow for border with drop shadow
Repeat same steps on Copy of Raster 5
Select Raster 6 layer go to selections-select all-float-defloat-invert
Copy and Paste PP3 hit delete on keyboard
Apply Gradient Glow for border and apply drop shadow
Repeat same steps on Copy of  Raster 6
Select Raster 3 layer go to effects-plugins-xero-Fritillary
Apply settings to liking and repeat step on Copy Raster3 layer
Select Raster 2 layer go to effects-plugins-textures-brick wall
Copy and Paste remaining elements by sample
On grunge layer duplicate 3x drag to bottom of raster layers 
Copy and Paste tube of choice
I applied Radiance Effect with drop shadow
Add close up preferrably to Raster 2 layer
Double click on tube layer and change opacity to 70
Add name I applied Gradient Glow 
Add copyright info and we are done!


Thursday, July 25, 2013

Almost Famous - PTU


This tutorial was made and written by my own ideas any resemblance to other tutorials is purely coincidental.

Supplies Needed
For experienced PSP User
Scrapkit: Almost Famous by PinkParadox Productions
You can purchase her kit here
Tube of choice. I'm using artwork by Zlata_M
You can purchase her work here
Font of choice. I'm using font called CF Punk Forever
I'm using template Stereo Heart by TheBrutalDesigns here
Plugin: Eye Candy 5-Impact-Gradient Glow
Plugin: Xero-Radiance

Elements used from kit 
AF Cluster
Almost Famous-E1
Almost Famous-E19
Almost Famous-E22
Almost Famous-E24
Almost Famous-E28
Almost Famous-E29
Almost Famous-E59
Almost Famous-E64
Almost Famous-E67
Almost Famous-E69
Almost Famous-E138
Almost Famous-E158
Almost Famous-E165
Almost Famous-E169
Almost Famous-P5
Almost Famous-P6
Almost Famous-P9
Almost Famous-word art1

Let's get started
Open Template close out credit info
Select on Raster11 layer go to selections-select all-float-defloat-invert
Copy and Paste P6 hit delete
Apply Gradient Glow with drop shadow
Repeat same steps on raster layers 12,10
Select Raster2 layer go to selections-select all-float-defloat-invert
Copy and Paste P5 hit delete
Apply Gradient Glow with drop shadow
Repeat same steps on raster layers 3,4,5,6
Select Raster 13 layer go to selections-select all-float-defloat-invert
Copy and Paste P9 hit delete on keyboard
Apply Gradient Glow with drop shadow
Repeat same steps with Raster14 layer
Select Raster7 layer go to paint then select pink that matches P5
Click on layer to fill color then apply Gradient Glow with drop shadow
Copy and Paste speaker adjust size and arrange by sample
Copy and Paste the notes and arrange by sample
Copy and Paste disco balls on Raster layers 8,22
Copy and Paste wordart and place above P9 layers
Copy and Paste remaining elements by sample
Add tube of choice. I applied Radiance Effect with drop shadow
Add name I applied Gradient Glow 
Add copyright info and we are done !

Monday, July 22, 2013

Rock Me - PTU


This tutorial was made and written by my own ideas any resemblance to other tutorials is purely coincidental.

supplies needed
For experienced PSP User
Scrapkit: Rock Me by Designs by Sarah
You can purchase her kit here
Tube of choice. I'm using an exclusive artwork by Arthur Crowe
You can get tube at creativemisfits.aforumfree.com here
Star Template 1 by VixPsP you can download here
Font of choice. I'm using font called Inked God
Plugin: Eye Candy 5-Impact-Gradient Glow
Plugin: Xero-Radiance

Elements used from kit
sb_pmt_rock-me_flower3
sb_pmt_rock-me_grunge1
sb_pmt_rock-me_grunge2
sb_pmt_rock-me_guitar
sb_pmt_rock-me_ipod
sb_pmt_rock-me_musicnote3
sb_pmt_rock-me_musicnote4
sb_pmt_rock-me_pp1
sb_pmt_rock-me_print1
sb_pmt_rock-me_shoes
sb_pmt_rock-me_speakers
sb_pmt_rock-me_star
sb_pmt_rock-me_string1
sb_pmt_rock-me_tribal

Let's get Started
Open template close out credit/background/stars
Select large circle go to adjustments-hue/saturation
Settings-Hue339, Saturation93, lightness26
Go to effects-texture effects- settings- 1,1,70 and colors black
Select pink rectangles
Go to selections-select all-float-defloat-invert
Copy and Paste PP1 hit delete on keyboard and apply gradient glow
Copy and Paste grunges place below wordart
Copy and Paste print1 drag to bottom of raster and duplicate 
Arrange by sample
Copy and Paste string duplicate arrange above pink rectangle layers
Copy and Paste star arrange by sample
Copy and Paste speaker duplicate 
Copy and Paste remaining elements by sample
Add tube of choice place in center I applied Radiance Effect with drop shadow
Copy and Paste tube again place above paper layer 
Double click on tube change blendmode to luminance (legacy) 
Change opacity to 60 
Repeat step for other side
Add name I applied Gradient Glow with drop shadow
Add copyright info and we are done!


Steampunk Twilight - PTU


This tutorial was made and written by my own ideas any resemblance to other tutorials is purely coincidental

Supplies Needed
For experienced PSP User
Scrapkit: Steampunk Twilight by PinkParadox Productions
You can purchase her kit here
Tube of choice. I'm using arwork by Cris Ortega
You can view his work here
Font of choice. I'm using font called DilleniaUPC
Plugin: Eye Candy 5-Impact-Gradient Glow
Plugin: Xero-Radiance

Elements used from kit
Steampunk Twilight-E2
Steampunk Twilight-E12
Steampunk Twilight-E19
Steampunk Twilight-E22
Steampunk Twilight-E37
Steampunk Twilight-E42
Steampunk Twilight-E85
Steampunk Twilight-E94
Steampunk Twilight-E116
Steampunk Twilight-E121
Steampunk Twilight-E135
Steampunk Twilight-F7
Steampunk Twilight-F12
Steampunk Twilight-P11

Let's get Started
Open new raster 600x600
Copy and Paste frames on frame12 place below frame7
Adjust sizes if needed
Copy and Paste P11 drag below frames
Adjust size to fit then use eraser tool to remove outside access
Copy and Paste clock duplicate place on frame layer
Copy and Paste E12 go to image-rotate right place on center of frame
Copy and Paste E37 place under clock layer on left side
Duplicate-image-mirror place on other side
Copy and Paste E22 drag below E12
Copy and Paste flower drag above E12 and  E37
Copy and Paste remaining elements by sample
Add tube of choice I applied Radiance Effect
Add name I applied Gradient Glow with drop shadow
Add copyright info and we are done!


Thursday, July 18, 2013

Mysteries of the Sea - PTU

This tutorial was made and written by my own ideas any resemblance to other tutorials is purely coincidental.

Supplies Needed
For experienced PSP User
Scrapkit: Mysteries of the Sea by CreativeScrapsbyCrys
You can purchase her kit here
Font of choice . I'm using font called lainiedaySH
Tube of choice. I'm using artwork by Alex Prihodko
You can purchase artwork here
Plugin: Eye Candy 5-impact-Gradient Glow
Plugin: Xero-Radiance

Elements used from kit
MOFD_Element_3
MOFD_Element_6
MOFD_Element_17
MOFD_Element_18
MOFD_Element_19
MOFD_Element_20
MOFD_Element_23
MOFD_Element_24
MOFD_Element_39
MOFD_Element_43
MOFD_Element_44
MOFD_Element_46
MOFD_Element48
MOFD_Element_49
MOFD_Element_56
MOFD_Element_61
MOFD_Element_73
MOFD_Frame_5
MOFD_Paper_4

Let's get Started
Open new raster 600x600
Copy and Paste frame
Copy and Paste Paper drag under frame layer
Adjust size and use eraser tool to remove outside access
copy and Paste greenery on above frame layer duplicate-image-mirror
Copy and Paste pipe element place under frame layer
Duplicate-image-mirror
Copy and Paste weeds inside frame layer arrange by sample
Copy and Paste rocks place above frame layer
Copy and Paste sand under rocks
Copy and Paste remaining elements by sample
On fish layer go to image-mirror
Copy and Paste tube of choice.
I applied Radiance Effect with drop shadow
Add name I applied Gradient Glow with drop shadow
Add copyright info and we are done!

Here is her current ad for sales she is currently having :)

Check out the HUGE .99 Cent sale at most of my stores!!! Don't miss out


You will be able to find Lots of New CU packs, kits (Full and Tagger size)
Bundles, Page Borders, Clusters, Stacked Papers and Quick Pages!!!
Great for Printing or Digital Scrapbooking and making signature tags!

Want to save BIG....Only At Scrappin Dollars you can buy my whole store for $20
That is a savings of OVER $400!!!
Grab it HERE


Monday, July 15, 2013

Fantasy Goddess - PTU


This tutorial was made and written by my own ideas any resemblance to other tutorials is purely coincidental.

Supplies Needed
For experienced PSP User
Scrapkit: Fantasy Goddess by PinkParadox Productions
you can purchase her kit here
Tube of choice. I'm using artwork by Alex Prohidko
you can purchase tube here
Font of choice. I'm using font called allura
Plugin: Eye Candy 5-Impact-Gradient Glow
Plugin: Xero-Radiance

Elements used from kit
FantasyGoddess-E58
FantasyGoddess-E59
FantasyGoddess-E71
FantasyGoddess-E90
FantasyGoddess-E96
FantasyGoddess-E98
FantasyGoddess-E106
FantasyGoddess-E108
FantasyGoddess-E111
FantasyGoddess-E122
FantasyGoddess-E123
FantasyGoddess-E124
FantasyGoddess-E127
FantasyGoddess-F1
FantasyGoddess-P1

Let's get Started
Open new raster 600x600
Copy and Paste F1 
Copy and Paste P1 drag below frame layer
Adjust size and use eraser tool to remove outside access
Copy and Paste net place above frame layer
Copy and Paste anchor adjust size and place on net layer
Copy and Paste wave place above frame layer
Copy and Paste remaining elements by sample
Copy and Paste tube of choice place below the elements
I applied Radiance Effect (optional)
Add name I applied Gradient Glow-Inner bevel-drop shadow
add copyright info and we are done!


Saturday, July 13, 2013

Dreams Rain - PTU


This tutorial was made and written by my own ideas any resemblance to other tutorials is purely coincidental.

supplies needed
For experienced PSP User
Scrapkit: Dreams Rain by Disyas Digitals Designs
You can purchase her kit here
Font of choice. I'm using font called leelawadee
Plugin: Eye candy 5- Impact-Gradient Glow

Elements used from kit
Disyas_DreamsRain_DF1
Disyas_DreamsRain_E6
Disyas_DreamsRain_E8
Disyas_DreamsRain_E17
Disyas_DreamsRain_E21
Disyas_DreamsRain_E27
Disyas_DreamsRain_E32
Disyas_DreamsRain_E41
Disyas_DreamsRain_E45
Disyas_DreamsRain_P7

Let's get Started
Open new raster 600x600
Copy and Paste Cluster frame 
Copy and Paste P7 drag below frame layer
adjust size so fits inside use eraser tool to remove outside access
Copy and Paste tree place below frame layer
Copy and Paste leave scatter drag below frame layer
Copy and Paste mushrooms go to image-mirror
Copy and Paste remaining elements by sample
Add name I applied Gradient Glow with drop shadow
Add credit info and we are done!

Fresh Mojito - PTU


This tutorial was made and written by my own ideas any resemblance to other tutorials is purely coincidental

Supplies Needed
For experienced PSP User
Scrapkit: Fresh Mojito by Designs by Sarah
you can purchase her kit here
tube of choice. I'm using artwork by keith Garvey
You can purchase his work here
Font of choice. I'm using font called summertime
Plugin: Eye Candy 5-Impact-Gradient Glow
Plugin: Xero-Radiance

Elements used from kit
sb_pmt_mojito_drink1
sb_pmt_mojito_flower1
sb_pmt_mojito_flower2
sb_pmt_mojito_frame4
sb_pmt_mojito_leaves2
sb_pmt_mojito_lime2
sb_pmt_mojito_lime3
sb_pmt_mojito_mint2
sb_pmt_mojito_pp3
sb_pmt_mojito_ribbon5
sb_pmt_mojito_sugar

Let's get Started
Open new raster 600x600
Copy and Paste frame 
Copy and Paste pp3 drag below frame layer
Adjust size so fits inside
Copy and Paste mint leaves duplicate 2x place on side of frame
Copy and Paste flower2 in between mint leaves
copy and  Paste flowers1 place above flower2 layers
Copy and Paste ribbon go to image-rotate left drag blow mint layers
copy and Paste leaves2 duplicate place above frame layer
Copy and Paste lime1 and duplicate
Copy and Paste lime2 place in between lime1 layers
Copy and Paste sugar duplicate and place below lime layers
Copy and Paste cup duplicate arrange size by sample
Copy and Paste tube of choice place below elements
I applied Radiance Effect with drop shadow
Add name I applied Gradient Glow with drop shadow
Add copyright info and we are done!


Thursday, July 11, 2013

Clockwork Noir - PTU


This tutorial was made and written by my own ideas any resemblance to other tutorials is purely coincidental.

Supplies Needed
For experienced PSP User
Scrapkit: Clockwork Noir by PinkParadox Productions
You can purchase her kit here
Tube of choice. I'm using Group artist permission by Masuimi Max
Font of choice. I'm using font called Inked God
Plugin: Eye Candy 5-Impact-Gradient Glow
Plugin: Xero-Radiance

Elements used from kit
Clockwork Noir-E9
Clockwork Noir-E11
Clockwork Noir-E13
Clockwork Noir-E31
Clockwork Noir-E58
Clockwork Noir-E62
Clockwork Noir-E64
Clockwork Noir-E88
Clockwork Noir-E92
Clockwork Noir-E96
Clockwork Noir-F2
Clockwork Noir-P8

Let's get Started
Open new raster 600x600
Copy and Paste F2 adjust size if needed
Copy and Paste P8 drag below frame layer
Use eraser tool to remove outside access
Copy and Paste flowers arrange by sample
Copy and Paste leaf drag below flower apply drop shadow
Duplicate leaf 2x drag to bottom of frame layer
Arrange by sample
Copy and Paste clock with swirls and duplicate
Copy and Paste remaining elements by sample
Copy and Paste tube of choice place above frame layer
Use eraser tool to remove from bottom of frame if needed
On the frame layer use eraser tool over tube layer so she is above frame
Apply Radiance effect with drop shadow
Add name I applied Gradient Glow with drop shadow
Add copyright info and we are done!

Sunday, July 7, 2013

Tropical christmas - PTU

This tutorial was made and written by my own ideas any resemblance to other tutorials is purely coincidental.

Supplies Needed
For experienced PSP User
Scrapkit: Tropical Christmas by CreativeScrapsbyCrys
You can purchase her kit here
font of choice. I'm using font called JasmineUPC
Mask of choice. I'm using Mask252 by weescotslasscreations here
Plugin: Eye Candy 5-Impact-Gradient Glow

Elements used from kit
TC_Element_4
TC_Element_6
TC_Element_8
TC_Element_21
TC_Element_23
TC_Element_24
TC_Element_25
TC_Element_33
TC_Element_35
TC_Element_37
TC_Element_48
TC_Element_49
TC_Element_50
TC_Paper_5

Let's get Started
Open new raster 600x600
Copy and Paste sand place towards bottom of raster
Copy and Paste palm tree duplicate-image-mirror
Copy and Paste car place beside palm tree 
Copy and Paste towel place above sand layer
copy and Paste flamingo apply drop shadow
Copy and Paste gifts by sample
Copy and Paste flowers duplicate each 2x
Copy and Paste leaf place below flowers duplicate-image-mirror
Copy and Paste remaining elements by sample
Copy and Paste paper5 drag to bottom of raster
Go to layers-load/save mask-load mask from disk
select mask-right click-merge-merge group
Adjust size if needed
Add name I applied Gradient Glow with drop shadow
Add credit info and we are done!

Friday, July 5, 2013

Lavender Fields - PTU

This tutorial was made and written by my own ideas any resemblance to other tutorials is purely coincidental.

Supplies Needed
For experienced PSP User
Scrapkit: Lavender Fields by PinkParadox Productions
You can purchase her kit here
Font of choice . I'm using font called allura
Plugin: Eye Candy 5-Impact-Gradient Glow

Elements used from kit
PPP-Lavender Fields-E4
PPP-Lavender Fields-E24
PPP-Lavender Fields-E26
PPP-Lavender Fields-E28
PPP-Lavender Fields-E32
PPP-Lavender Fields-E33
PPP-Lavender Fields-E38
PPP-Lavender Fields-E47
PPP-Lavender Fields-E80
PPP-Lavender Fields-E85

Let's get Started
Open new raster 600x600
Copy and Paste purple flower frame
Copy and Paste greenery drag below frame and duplicate
Copy and Paste purple flowers duplicate 2x place above greenery
Copy and Paste white lace drag to bottom of raster duplicate-image-mirror
Copy and Paste leaf vines place above purple flower frame
Duplicate-image-mirror
Copy and Paste cluster flowers and candle duplicate both
Copy and Paste sparkle adjust size and duplicate
Copy and Paste cup place blow the leaf layers
Add name I applied Gradient Glow with drop shadow
Add credit info and we are done!