Pages

Showing posts with label CreativeScrapsbyCrys. Show all posts

Saturday, April 19, 2014

Sunrise Summer - PTU

This tutorial was made and written by my own ideas any resemblance to other tutorials is purely coincidental

Supplies Needed
For experience PSP Users

Scrapkit: Sunrise Summer by CreativeScrapsbyCrys
Artwork included in kit
You can purchase kit here

font of choice. I'm using font called Summer

Plugin: Eye candy 5-Impact-Gradient Glow

Elements used from kit
Beachbag2
Beach Umbrella
Fence
Frame2
Medi_tigre lilly 4
Palm Tree
Paper5
Sunglasses
Towel

Let's get Started
Open new raster 700x700
copy and Paste frame
Copy and Paste paper5 drag below frame layer
Copy and Paste remaining elements by sample
Copy and Paste tube of choice
Add name I applied gradient glow with drop shadow
Add copyright info and we are done!

Saturday, March 22, 2014

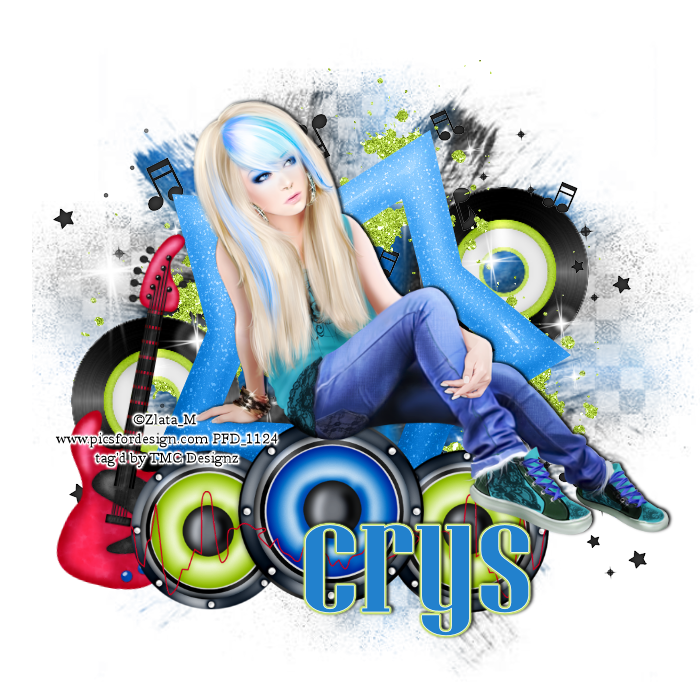
Girls Rock Too - PTU

This tutorial was made and written by my own ideas any resemblance to other tutorials is purely coincidental.
 
Supplies Needed
For experienced PSP User
 
tube: Artwork by Zlata_M
You can purchase here
 
Scrapkit: Girls Rock too by  CreativeScrapsbyCrys
You can purchase here
 
Font of choice. Im using font called Niagara Solid
 
Mask of choice. I'm using mask349 by vixpsp here
 
Plugin: Eye Candy 5-Gradient Glow
 
Plugin: Xero-Radiance
 
Elements used from kit
GRT_Element_1
GRT_Element_12
GRT_Element_16
GRT_Element_18
GRT_Element_23
GRT_Element_29
GRT_Element_30
GRT_Paper_10
 
Let's get Started
Copy and Paste Star element
Copy and Paste Paper10
Go to layers-load/save mask-load mask from disk
Right click-merge-merge down
Adjust size if needed
Copy and Paste elements by sample
Copy and Paste tube of choice
I applied Radiance Effect with drop shadow
add name I applied Gradient Glow with drop shadow
Add copyright info and we are done!

Friday, March 21, 2014

Jenny - PTU

 
This tutorial was made and written by my own ideas any resemblance to other tutorials is purely coincidental.
 
Supplies Needed
For experienced PSP User
 
Artwork: I'm using artwork by Zlata_M
You can purchase here
 
Scrapkit: I'm using kit by CreativeScrapsbyCrys called Jenny
You can purchase here
 
Font of choice. I'm using font called LainieDaySH
 
Plugin: Eye Candy 5-Impact-Gradient Glow
 
Plugin: Xero-Radiance
 
Elements used from kit
J_Element_9
J_Element_10
J_Element_12
J_Element_17
J_Element_23
J_Element_24
J_Element_25
J_Frame_2
J_Paper_2
 
Let's get Started
Open new raster 700x700
Copy and Paste Paper drag below frame layer
Copy and Paste flower cluster place on center of frame
Copy and Paste leaves-duplicate-image-mirror
Copy and Paste remaining elements by sample
Copy and Paste tube of choice. I applied Radiance Effect (optional)
Add name I applied Gradient Glow with drop shadow
Add copyright info and we are done!

Wednesday, January 29, 2014

Wrapped in love - PTU

 
This tutorial was made and written by my own ideas any resemblance to other tutorials is purely coincidental.
 
Supplies needed
For experienced PsP User
 
Tube: Artwork by Keith Garvey
You can now purchase here
 
scrapkit: Wrapped in love by CreativeScrapsbyCrys
You can purchase here
 
Font of choice. I'm using font called LainieDaySH
 
Plugin: Eye Candy 5-Impact-Gradient Glow
 
Plugin: Xero-Radiance
 
Elements used from kit
WIL_Element_3
WIL_Element_4
WIL_Element_23
WIL_Element_38
WIL_Element_48
WIL_Element_53
WIL_Element_54
WIL_Element_55
WIL_Frame_2
WIL_Paper_3
 
Let's get Started
Open new raster 700x700
Copy and Paste frame
Copy and Paste paper3 drag below frame layer
Copy and Paste leaves drag to bottom of raster
Duplicate and arrange around frame
Copy and Paste the doodle duplicate and arrange by sample
Copy and Paste Hearts and arrange by sample
Copy and Paste remaining elements by sample
Copy and Paste tube of choice. I applied radiance effect
Add name I applied gradient glow with drop shadow
Add copyright info and we are done!


Monday, January 6, 2014

Winter Romance - PTU

This tutorial was made and written by my own ideas any resemblance to other tutorials is purely coincidental.
 
Supplies Needed
For experienced PSP User
 
Scrapkit: Winter Romance by CreativeScrapsbyCrys
You can purchase here
 
Tube: Artwork by Verymany
You can purchase here
 
Font of choice. I'm using font called Parisienne
 
Plugin: Eye Candy 5-Impact-Gradient Glow
 
Plugin: Xero-Radiance
 
Elements used from kit
WR_Element_3
WR_Element_4
WR_Element_7
WR_Element_23
WR_Element_30
WR_Element_40
WR_Element_44
WR_Element_58
WR_Frame_2
WR_Frame_3
WR_Paper_9
 
Let's get Started
Open new raster 700x700
Copy and Paste Frame 2 & 3 arrange by sample
Copy and Paste Paper 9 place under frame 3 layer
Copy and Paste pinecones duplicate and place above frame layers
Copy and Paste berries place below frame layer
Copy and Paste remaining elements by sample
Copy and Paste tube of choice. I applied Radiance Effect
Add name I applied Gradient Glow with drop shadow
Add copyright info and we are done!

Tuesday, December 31, 2013

Midnight Resolutions - PTU

This tutorial was made and written by my own ideas any resemblance to other tutorials is purely coincidental.
 
Supplies Needed
For experienced PSP User
 
Tube: Artwork by Keith Garvey
You can now purchase here
 
Scrapkit: Midnight Resolutions by CreativeScrapsbyCrys
You can purchase here
 
Font of choice. I'm using font called Vladimir Script
 
Plugin: Eye Candy 5-Impact-Gradient Glow
 
Plugin: Xero-Radiance
 
Elements used from kit
MR_Element_2
MR_Element_10
MR_Element_18
MR_Element_22
MR_Element_29
MR_Element_31
MR_Element_32
MR_Element_33
MR_Element_34
MR_Element_44
MR_Frame_1
MR_Paper_5
 
Let's get Started
Open new raster 700x700
Copy and Paste frame
Copy and Paste Paper_5 drag below frame layer
Use eraser tool to remove outside access
Copy and Paste city drag to bottom of raster
Copy and Paste star fireworks and duplicate
Arrange below the city layer
Copy and Paste remaining elements by sample
On the hat layer go to image-mirror
Copy and Paste tube of choice
Add name I applied Gradient Glow
Add copyright info
Merge layers down to invisible background
I applied Radiance Effect (optional)
 

Monday, December 30, 2013

Thursday, November 28, 2013

Sugar Plum - PTU


This tutorial was made and written by my own ideas any resemblance to other tutorials is purely coincidental.

Supplies Needed
For experienced PSP Users

Artwork by Verymany
You can purchase here

Scrapkit: Sugar Plum by Creative Scraps by Crys
You can purchase here

Font of choice. I'm using font called JasmineUPC

Plugin: Eye Candy 5-Impact-Gradient Glow

Elements used from kit
Sp_Element_7
Sp_Element_9
Sp_Element_22
Sp_Element_45
Sp_Element_48
Sp_Frame_2
Sp_Paper_14

Let's get started
Open new raster 700x700
Copy and Paste frame
Copy and Paste Paper14 drag below frame layer
Adjust size and use eraser tool to remove outside access
Copy and Paste greenery duplicate at above frame layer
Copy and Paste remaining elements by sample
Duplicate ornaments by sample
Add tube of choice. I applied drop shadow
Add copyright info and we are done!

Upon a Winter Dream - PTU


This tutorial was made and written by my own ideas any resemblance to other tutorials is purely coincidental.

Supplies Needed
For experienced PSP User
Scrapkit: Upon a Winter Dream by Creative Scraps by Crys
You can purchase here

Artwork by Ismael Rac
You can purchase here

Font of choice. I'm using font called Vladimir Script

Elements used from kit
UAWD_Element_4
UAWD_Element_16
UAWD_Element_17
UAWD_Element_19
UAWD_Element_20
UAWD_Element_42
UAWD_Paper_2

Let's get Started
Open new raster 700x700
Copy and Paste frame
Copy and Paste Paper2 drag below frame layer
Adjust size and use eraser tool to remove outside access
Copy and Paste remaining elements by sample
On snowballs duplicate-image-mirrror
Copy and Paste tube of choice I applied drop shadow
Add name I applied drop shadow
Add copyright and we are done!


Thursday, August 15, 2013

Scary Romance - PTU


This tutorial was made and written by my own ideas any resemblance to other tutorials is purely coincidental.

Supplies Needed

PSP 10 any version should work

Scrapkit: Scary Romance by CreativeScrapsbyCrys
You can purchase kit here

Template 131 by Punky Butts
You can download template here

FTU Font JFWildWood

Plugin: Eye Candy-Impact-Gradient Glow

Elements used from kit
SR_Element_1
SR_Element_2
SR_Element_13
SR_Element_15
SR_Element_17
SR_Element_26
SR_Element_29
SR_Element_30
SR_Element_33
SR_Element_34
SR_Element_41
SR_Element_42
SR_Element_43
SR_Element_53
SR_Paper_2
SR_Paper_5
SR_Paper_6
SR_Paper_9

Lets get started
Open Template 131 close out credits and wordart
Select top right square layer
Go to selections-select all-float-defloat-invert
Copy and Paste Paper9 hit delete on keyboard apply gradient glow
Repeat same steps on right left square and small square layers
Select purple square right layer
Go to selections-select all-float-defloat-invert
Copy and Paste Paper2 hit delete on keyboard apply gradient glow
Repeat same step on other purple right square layer
Select orange square right layer
Go to selections-select all-float-defloat-invert
Copy and Paste Paper6 hit delete on keyboard apply gradient glow
Repeat same steps on other orange square right layer
Select white square right layer
Go to selections-select all-float-defloat-invert
Copy and Paste Paper5 hit delete on keyboard
Repeat same steps on other white square right layer 
Copy and Paste elements by sample
On balloons,ghosts,cemetary,spider,web duplicate-image-mirror
Add name I applied Gradient Glow with drop shadow
Add your credit info and we are done!


post signature

Friday, August 2, 2013

School Time Memories - PTU

This tutorial was made and written by my own ideas any resemblance to other tutorials is purely coincidental.

Supplies Needed
For experienced PSP User
Scrapkit: School Time Memories by CreativeScrapsbyCrys
You can purchase her kit here
Font of choice. I'm using font called Chalk-hand-lettering-shaded-demo
Plugin: Eye candy 5-Impact-Gradient Glow

Elements used from kit
STM_Element_3
STM_Element_20
STM_Element_21
STM_Element_22
STM_Element_23
STM_Element_24
STM_Element_27
STM_Element_29
STM_Element_34
STM_Element_36
STM_Element_49
STM_Element_56
STM_Element_61
STM_Element_65

Let's get Started
Open new raster 600x600
Copy and Paste board place in center of raster
Copy and Paste books place above board layer
Copy and Paste flower drag under notebook layer
Place leave under flower by sample
Copy and Paste remaining elements by sample
On bookbag and lunch bag go to image-mirror
Add font ABC on board layer
Add name I applied Gradient Glow with drop shadow
Add your credit info and we are done!


Thursday, July 18, 2013

Mysteries of the Sea - PTU

This tutorial was made and written by my own ideas any resemblance to other tutorials is purely coincidental.

Supplies Needed
For experienced PSP User
Scrapkit: Mysteries of the Sea by CreativeScrapsbyCrys
You can purchase her kit here
Font of choice . I'm using font called lainiedaySH
Tube of choice. I'm using artwork by Alex Prihodko
You can purchase artwork here
Plugin: Eye Candy 5-impact-Gradient Glow
Plugin: Xero-Radiance

Elements used from kit
MOFD_Element_3
MOFD_Element_6
MOFD_Element_17
MOFD_Element_18
MOFD_Element_19
MOFD_Element_20
MOFD_Element_23
MOFD_Element_24
MOFD_Element_39
MOFD_Element_43
MOFD_Element_44
MOFD_Element_46
MOFD_Element48
MOFD_Element_49
MOFD_Element_56
MOFD_Element_61
MOFD_Element_73
MOFD_Frame_5
MOFD_Paper_4

Let's get Started
Open new raster 600x600
Copy and Paste frame
Copy and Paste Paper drag under frame layer
Adjust size and use eraser tool to remove outside access
copy and Paste greenery on above frame layer duplicate-image-mirror
Copy and Paste pipe element place under frame layer
Duplicate-image-mirror
Copy and Paste weeds inside frame layer arrange by sample
Copy and Paste rocks place above frame layer
Copy and Paste sand under rocks
Copy and Paste remaining elements by sample
On fish layer go to image-mirror
Copy and Paste tube of choice.
I applied Radiance Effect with drop shadow
Add name I applied Gradient Glow with drop shadow
Add copyright info and we are done!

Here is her current ad for sales she is currently having :)

Check out the HUGE .99 Cent sale at most of my stores!!! Don't miss out


You will be able to find Lots of New CU packs, kits (Full and Tagger size)
Bundles, Page Borders, Clusters, Stacked Papers and Quick Pages!!!
Great for Printing or Digital Scrapbooking and making signature tags!

Want to save BIG....Only At Scrappin Dollars you can buy my whole store for $20
That is a savings of OVER $400!!!
Grab it HERE


Sunday, July 7, 2013

Tropical christmas - PTU

This tutorial was made and written by my own ideas any resemblance to other tutorials is purely coincidental.

Supplies Needed
For experienced PSP User
Scrapkit: Tropical Christmas by CreativeScrapsbyCrys
You can purchase her kit here
font of choice. I'm using font called JasmineUPC
Mask of choice. I'm using Mask252 by weescotslasscreations here
Plugin: Eye Candy 5-Impact-Gradient Glow

Elements used from kit
TC_Element_4
TC_Element_6
TC_Element_8
TC_Element_21
TC_Element_23
TC_Element_24
TC_Element_25
TC_Element_33
TC_Element_35
TC_Element_37
TC_Element_48
TC_Element_49
TC_Element_50
TC_Paper_5

Let's get Started
Open new raster 600x600
Copy and Paste sand place towards bottom of raster
Copy and Paste palm tree duplicate-image-mirror
Copy and Paste car place beside palm tree 
Copy and Paste towel place above sand layer
copy and Paste flamingo apply drop shadow
Copy and Paste gifts by sample
Copy and Paste flowers duplicate each 2x
Copy and Paste leaf place below flowers duplicate-image-mirror
Copy and Paste remaining elements by sample
Copy and Paste paper5 drag to bottom of raster
Go to layers-load/save mask-load mask from disk
select mask-right click-merge-merge group
Adjust size if needed
Add name I applied Gradient Glow with drop shadow
Add credit info and we are done!

Monday, June 24, 2013

Dance for Me - PTU

This tutorial was made and written by my own ideas any resemblance to other tutorials is purely coincidental.

supplies needed 
For experienced PSP User
scrapkit: Dance for Me by CreativeScrapsbyCrys
You can purchase her kit here
Font of choice. I'm using font called allura
Plugin : Eye Candy 5-Impact-Gradient 

Elements used from kit
DFM_Element_1
DFM_Element_4
DFM_Element_8
DFM_Element_19
DFM_Element_20
DFM_Element_39
DFM_Element_41
DFM_Element_42
DFM_Element_48

Let's get Started
Open new raster 600x600
copy and Paste mirror place in center of raster
Copy and Paste leaf duplicate 2x on one go to image-mirror
Copy and Paste flowers duplicate by sample
Copy and Paste remaining elements by sample
On the shoes duplicate-image-mirror
Add name I applied Gradient Glow with drop shadow
Add credit info and we are done!

Sunday, June 9, 2013

Blossoming Love - PTU

This tutorial was made and written by my own ideas any resemblance to other tutorials is purely coincidental.

Supplies Needed
For experienced PSP User
Scrapkit: Blossoming love by CreativeScrapsbyCrys
You can purchase her kit here
Font of choice. I'm using font called lainieDaySH
Tube of choice. I'm using Group Artist Permission by Go-Dark
Plugin: Eye Candy 5-Impact-Gradient Glow

Elements used from kit
BL_Element_1
BL_Element_9
BL_Element_10
BL_Element_14
BL_Element_24
BL_Element_27
BL_Element_38
BL_Element_40
BL_Element_45
BL_Frame_5
BL_Paper_10

Let's get Started
Open new raster 600x600
Copy and Paste frame
Copy and Paste paper10 drag below frame layer
Adjust size and use eraser tool to remove outside acess
Copy and Paste leaves duplicate 2x on one go to image-mirror
Copy and Paste doodle drag to bottom of raster
Duplicate and apply drop shadow
Copy and Paste remaining elements by sample
Add name i applied Gradient Glow with drop shadow
Add copyright info and we are done!

Sunday, June 2, 2013

Visions of Spring - PTU


This tutorial was made and written by my own ideas any resemblance to other tutorials is purely coincidental.

Supplies Needed
For experienced PSP User
Scrapkit: Visions of Spring by CreativeScrapsbyCrys
You can purchase her kit here
Tube of choice. I'm using a Group Artist Permission by Igolkina
Font of choice. I'm using font called inspiration
Mask of choice. I'm using Mask355 by Vix here
Plugin: Eye Candy 5-Impact-Gradient Glow
Plugin: Xero-Radiance

Elements used from kit
VOS_Element_4
VOS_Element_19
VOS_Element_20
VOS_Element_24
VOS_Element_31
VOS_Frame_1
VOS_Paper_4

Let's get Started
Open new raster 600x600
Copy and Paste frame
Copy and Paste paper4 drag below frame layer
Go to layers-load/save mask-load mask from disk
Select mask-right click-merge group 
Copy and Paste flower cluster below frame 
Copy and Paste rose duplicate-image-mirror
Copy and Paste remaining elements by sample
Add tube of choice. I applied Radiance Effect
Add name I applied Gradient Glow with drop shadow
Add copyright info and we are done!

Thursday, May 16, 2013

Hardback Cafe - PTU

This tutorial was made and written by my own ideas any resemblance to other tutorials is purely coincidental.

Supplies Needed
For experienced PSP User
Scrapkit: Hardback cafe by CreativeScrapsbyCrys
You can purchase her kit here
Font of choice. I'm using font called Lane_Narrow
Plugin: Eye Candy 5-Impact-Gradient Glow

Elements used from kit
HC_Element_1
HC_Element_2
HC_Element_3
HC_Element_4
HC_Element_7
HC_Element_8
HC_Element_24
HC_Element_31
HC_Element_34
HC_Element_43
HC_Element_53

Let's get Started
Open new raster 600x600
Copy and Paste rug place in lower part of page
Copy and Paste elements by sample
On shelf go to image-rotate right
On books in shelf duplicate-image-mirror
Copy and Paste girl 
Add name I applied Gradient Glow
Add credit info and we are done!


Thursday, May 2, 2013

Mothers Celebration - PTU

This tutorial was made and written by my own ideas any resemblance to other tutorials is purely coincidental.

Supplies Needed
For experienced PSP User
Scrapkit: Mothers Celebration by CreativeScrapsbyCrys
You can purchase her kit here
Font of choice. I'm using font called JasmineUPC
Plugin: Eye Candy 5-Impact-Gradient Glow

Elements used from kit
bag
bird
cup
diary
flower3
flowering vines
leaves
present
ribbon 3
small pillow
teddybears
yarn

Let's get Started
Open new raster 600x600
Copy and Paste diary place on left side in middle of raster
Copy and Paste bear beside diary
Copy and Paste leaves and duplicate arrange by sample
Copy and Paste flower and duplicate by sample
Copy and Paste ribbon drag below flower layers
Copy and Paste remaining elements by sample
On bag go to image-mirror
Add name I applied Gradient Glow with drop shadow
Add credit info and we are done!

Saturday, April 6, 2013

Sunset Summer - PTU


This tutorial was made and written by my own ideas any resemblance to other tutorials is purely coincidental.

Supplies Needed
For experienced PSP User
Scrapkit: Sunset Summer by CreativeScrapsbyCrys
You can purchase her kit here
Font of choice. I'm using font called Will&Grace
Plugin: Eye Candy 5-Impact-Gradient Glow

Elements used from kit
beach grass
boat
bottle
cattail
frame4
hibiscus4
ocean
palm tree silouette
sand
shell
shell2
twinkles2
vines2
word art
word art 2

Let's get Started
Open new raster 700x700
Copy and Paste frame duplicate
Copy and Paste ocean use eraser tool to remove outside access
Copy and Paste vines duplicate-image-mirror
Copy and Paste palmtree place above frame layer
Copy and Paste boat place above palmtree layer
Copy and Paste beach grass and cattail duplicate-image-mirror
Copy and Paste sand drag to bottom in layer and duplicate
Copy and Paste remaining elements by sample
On the hibiscus duplicate and arrange by sample
Add name I put in the colors then went to gradient in the foreground properties
Apply Gradient Glow with drop shadow
Right click in layer box go to merge-merge visible 
Copy then go to edit paste as new image
Add your credit info and we are done!
Bee My Honey - PTU

This tutorial was made and written by my own ideas any resemblance to other tutorials is purely coincidental.

Supplies Needed
For experienced PSP User
Scrapkit: BeeMyHoney by CreativeScrapsbyCrys
You can purchase her kit here
Font of choice. I'm using font called Save The Honeybee

Elements used from kit
BMH_Element_4
BMH_Element_6
BMH_Element_16
BMH_Element_20
BMH_Element_23
BMH_Element_26
BMH_Element_37
BMH_Element_40
BMH_Element_44
BMH_Frame_3
BMH_Frame_4
BMH_Paper_2

Let's get Started
Open new raster 600x600
Copy and Paste Frame3
Copy and Paste Paper2 drag below frame layer
Adjust size so fits inside
Copy and Paste Frame4 drag to bottom in layer box
Copy and Paste wordart place above frame layer
I applied drop shadow
Copy and Paste flower vines duplicate-image-mirror
Copy and Paste remaining elements by sample
On yellow flowers duplicate on frame layer
Add name I applied drop shadow
Add your credit info and we are done!