Pages

Saturday, October 19, 2013

Musical Romance - PTU


This tutorial was made and written by my own ideas any resemblance to other tutorials is purely coincidental.

Supplies Needed
For experienced PSP User

Tube by Verymany you can purchase here

Scrapkit by Ruinations by Hayleigh you can purchase here

Font of choice. I'm using font called Edward Script ITC

Mask of choice. I'm using Mask248 by weescotslasscreations here

Plugin: Eye Candy 5-Impact-Gradient Glow

Plugin: Xero-Radiance

Elements used from kit
MusicalRomance E2
MusicalRomance E16
MusicalRomance E19
MusicalRomance E43
MusicalRomance E44
MusicalRomance E48
MusicalRomance E51
MusicalRomance F7
MusicalRomance P1
MusicalRomance P4

Let's get Started
Open new raster 700x700
Copy and Paste Frame
Copy and Paste P1 drag below frame layer
Adjust size so fits inside frame
Copy and Paste leaves drag to bottom of raster
Duplicate and arrange around frame by sample
Copy and Paste remaining elements by sample
Duplicate flowers and arrange by sample
I applied drop shadow to the pearls
Copy and Paste tube of choice drag below elements
I applied Radiance Effect
Add name I applied Gradient Glow 
Add copyright info and we are done!

Evil Witch - PTU

This tutorial was made and written by my own ideas any resemblance to other tutorials is purely coincidental.

Supplies Needed
PSP10 any version will work

Tube: Margaux Evil Witch by Celinart  Pinup
You can purchase at SATC here

Scrapkit: Witchy by Bibi's Collection 
You can purchase at SATC here

Font of choice. I'm using font called Dream Cake

Plugin: Eye Candy 5-Impact-Gradient Glow

Plugin: Xero-Radiance

Elements used from kit
Bibiwitchy elems1
Bibwitchy elems6
Bibiwitchy elems16
Bibwitchy elems17
Bibiwitchy elems18
Bibiwitchy elems21
Bibiwitchy elems27
Bibwitchy elems33
Bibiwitchy elems35
Bibiwitchy elems47
Bibiwitchy elems55
Bibiwitchy elems56
Bibiwitchy elems59
Bibiwitchys elems61
Bibiwitchys elems81
Bibiwitchys elems84

Let's get Started
Open new raster 700x700
Copy and Paste bookshelf and duplicate
Copy and Paste brick stones drag below shelf layers
Copy and Paste tree 
Copy and Paste curtain and duplicate
Copy and Paste web place above shelf layer
Copy and Paste remaining elements by sample
Copy and Paste tube of choice
I applied Radiance effect with drop shadow
Add name I applied Gradient Glow with drop shadow
Add copyright info and we are done!


Wednesday, October 16, 2013

BCA A Girl's Heart - PTU


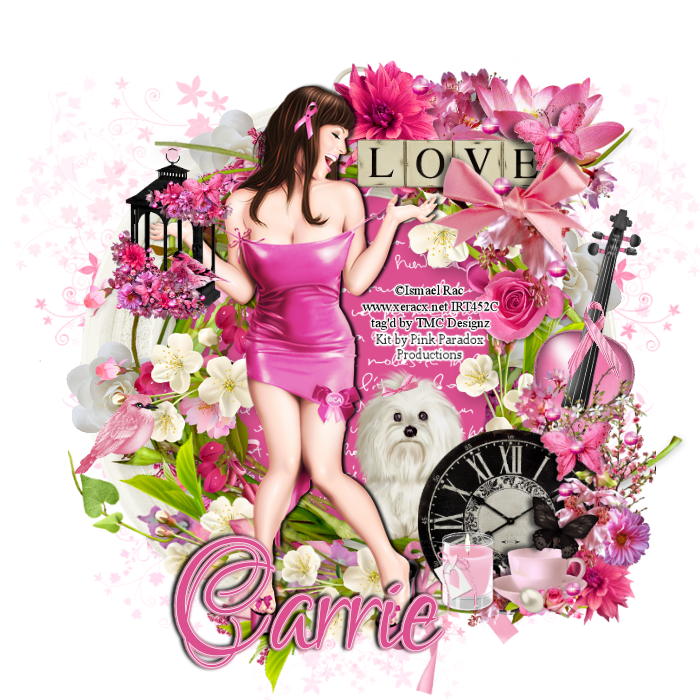
First tag showoff is using artwork by Ismael Rac
His work can be purchased here


Second tag showoff using artwork by Verymany
You can purchase work here

Scrapkit by PinkParadox Productions called BCA- A Girl's Heart
This kit can be purchased here
50% of all purchases made from this kit will be donated to
http://www.nationalbreastcancer.org/


Saturday, October 12, 2013

Falling for Autumn - PTU


This tutorial was made and written by my own ideas any resemblance to other tutorials is purely coincidental.

Supplies Needed

PSP 10 but any version should work

Tube of choice. I'm using artwork by Verymany
You can purchase here

Scrapkit : I'm using kit by Ruinations by Hayleigh
You can purchase her kit here

font of choice. I'm using font called Pristina

Plugin: Eye candy 5-Impact-Gradient Glow

Plugin: Xero-Radiance

Elements used from kit
Falling for  Autumn E 2
Falling for Autumn E 12
Falling for Autumn E 14
Falling for Autumn E 15
Falling for Autumn E 19
Falling for Autumn E 22
Falling for Autumn E 37
Falling for Autumn E 39
Falling for Autumn E 40
Falling for Autumn E 43
Falling for Autumn E 47
Falling for Autumn F 6
Falling for Autumn P 11

Let's get Started
Open new raster 700x700
Copy and Paste Frame adjust size if needed
Copy and Paste paper drag below frame layer
adjust size and use eraser tool to remove outside access
Copy and Paste leaves and arrange above frame layer
Copy and Paste sign and drag below leaves layers
Copy and Paste flower and duplicate
Copy and Paste remaining elements by sample
add tube of choice place under the elements 
I applied Radiance effect
Add name I applied Gradient Glow with drop shadow
Add copyright info and we are done!

Friday, October 11, 2013

Little Dark - PTU

This tutorial was made and written by my own ideas any resemblance to other tutorials is purely coincidental.

Supplies Needed

PSP 10 but any version should work

Tube: Artwork by Sebastien Serrano called "Little Dark"
You can purchase his work here

Scrapkit: Matching Kit by Hania's Designs with same name
You can purchase her kit here

Font of choice. I'm using font called Perpetua

Mask of choice. I'm using Mask363 by weescotslasscreations here

Plugin: Eye Candy 5-Impact-Gradient Glow

Plugin: Xero-Radiance

Elements used from kit
02
04
11
15
18
20
25
26
29
31
35
36
45
50
54
56
65
68
74
paper-01

Let's get Started
Copy and Paste gate then duplicate on center of raster
Copy and Paste grass and bushes behind gate
Duplicate and arrange across
Copy and Paste leaves place above gate layers
Duplicate and arrange across
Copy and Paste house drag to bottom of raster
Copy and Paste moon place below house layer
Double click and change opacity to 60
Copy and Paste Paper-01 drag to bottom of raster
Go to layers-load/save mask-load mask from disk
Select mask-right click-merge-merge group
Adjust size if needed
Copy and Paste remaining elements by sample
Add tube of choice. I applied Radiance Effect
Add name I applied Gradient Glow with drop shadow
Add copyright info and we are done!

Friday, September 13, 2013

Nina - PTU

 
This tutorial as made and written by my own ideas any resemblance to other tutorials is purely coincidental.

Supplies Needed
PSP 10 version used but any will work

Tube of choice. I'm using artwork called "Nina" by Alexander McMillan 
You can purchase his work here

Scrapkit: Matching kit with same name by Tiny Turtle Designs
You can purchase her work here

Font of choice. I'm using font called Same-Sex Marriage Script LDO

Plugin: Xero-Radiance

Elements used from kit
Nina (2)
Nina (5)
Nina (9)
Nina (12)
Nina (35)
Nina (42)
Nina (63)
Nina (67)
Nina (86)
Nina (89)

Let's get started
Open new raster 600x600
Copy and Paste Frame 
Copy and Paste paper drag below frame layer
Adjust size then use eraser tool to remove outside access
Copy and Paste star doodle duplicate-image-mirror
Copy and Paste branch go to image-rotate right
Duplicate-image-mirror
Copy and Paste flower arrange by sample
Copy and Paste diamond place above flower layers
Copy and Paste remaining elements by sample
On the leaves go to duplicate-image-mirror
Add tube of choice I applied Radiance Effect
Add name go to adjustments-add/remove noise-adjust setting to liking
Add copyright info and we are done!

Wednesday, September 11, 2013

Tea for Two - PTU


This tutorial was made and written by my own ideas any resemblance to other tutorials is purely coincidental.

Supplies Needed

Tube of choice. I'm using artwork by Keith Garvey
You can purchase here

Scrapkit: Tea for Two by Designs by Sarah
You can purchase kit here

Font of choice. I'm using font called Segoe Script

Elements used from kit
sb_pmt_tea-for-two_bear
sb_pmt_tea-for-two_cookie 2
sb_pmt_tea-for-two_cookie 4
sb_pmt_tea-for-two_cupcake
sb_pmt_tea-for-two_flower 1
sb_pmt_tea-for-two_greenery
sb_pmt_tea-for-two_pp8
sb_pmt_tea-for-two_tea cup 2
sb_pmt_tea-for-two_window

Let's get started
Open new raster 600x600
Copy and Paste window
Copy and Paste greenery place below window frame
Copy and Paste pp8 place below window
Adjust size so fits inside frame
Copy and Paste remaining elements by sample
On bear go to image-mirror
Copy and Paste tube of choice I applied drop shadow
Add name I applied drop shadow
Add copyright info then we are done!


post signature