Pages

Monday, August 20, 2012

SW Artist Series 06 - PTU


This tutorial was made and written by my own ideas any resemblance to other tutorials is purely coincidental.

Supplies Needed
For experienced PSP User
Scrapkit: SW Artist Series 06 by Pimp'd Designz
You can purchase her kit or bundle here
Tube of choice . I'm using Group Artist Permission only by Starweaver
Font of choice. I'm using font called Uniquely Sprayed

Elements used from kit
pd12-flower-01
pd12-flower-02
pd12-frame-02
pd12-pp-02
pd12-spider-01
pd12-spider-web

Let's get Started
Open new raster 600x600
Copy and Paste frame02
Copy and Paste pp02 drag below frame layer
Adjust size so fits inside frame
Copy and Paste remaining elements by sample
Add tube of choice I placed under frame layer
Add name and copyright info then we are done!

SW Artist Series 05 - PTU

This tutorial was made and written by my own ideas any resemblance to other tutorials is purely coincidental.

Supplies Needed
For experienced PSP User
Scrapkit: SW Artist Series 05 by Pimp'd Designz
You can purchase kit or bundle here
Font of choice. I'm using font called Symphony in ABC
Plugin: Eye Candy 5-Impact-Gradient Glow

Elements used from kit
pd12-headphones
pd12-keys
pd12-music-bars
pd12-pp-02

Let's get Started
Open new raster 600x600
Copy and Paste music bars
Copy and Paste pp02 drag below music bars
Adjust size so fits inside
Copy and Paste keys duplicate-image-mirror
Copy and Paste headphones place in center
Add name I applied Gradient Glow with drop shadow
Add your credit info and we are done!

Shabby Chic - PTU


This tutorial was made and written by my own ideas any resemblance to other tutorials is purely coincidental.

Supplies Needed
For experienced PSP User
Scrapkit: Shabby Chic by Butterfly Kisses Scraps
You can purchase her kit here
Tube of choice. I'm using artwork by Ismael Rac
You can purchase his work here
Font of choice. I'm using font called Gabriola
Mask of choice. I'm using Mask75 by MistessV here
Plugin: Eye Candy 5-Impact-Gradient Glow
Plugin: Xero-Radiance

Elements used from kit
Berry02
BirdHouse02
Ladder02
Leaves02
Love01
Paper01
PaperButterfly01
Ribbon02
ShabbyFlower02
Shutter02

Let's get Started
Open new raster 600x600
Copy and Paste Shutter duplicate-image-mirror
Copy and Paste paper01 drag to bottom in layer box
Go to layers-load/save mask-load mask from disk
Select mask of choice-right click-merge-merge group
Copy and Paste remaining elements by sample
On leaves , berry , butterfly duplicate-image-mirror
On the ladder I went to adjust adjust-hue and saturation-colorized
Add tube of choice drag below element layers
I applied Radiance Effect (optional)
Add name I applied Gradient Glow with drop shadow
Add copyright info and we are done!

Sunday, August 19, 2012

SW Artist Series 04 - PTU

This tutorial was made and written by my own ideas any resemblance to other tutorials is purely coincidental.

Supplies Needed
For experienced PSP Users
Scrapkit: SW Artist Series 04 by Pimp'd Designz
You can purchase this kit or bundle here
Font of choice. I'm using font called Mongolia Baiti
Plugin: Eye Candy 5-Impact-Gradient Glow-Glass

Elements used from kit
pd12-frame-02
pd12-pp-03
pd12-ribbon-01
pd12-ribbon-02
pd12-teddy

Let's get Started
Open new raster 600x600
Copy and Paste frame I applied drop shadow
Copy and Paste pp03 drag below frame adjust size so fits inside
Copy and Paste remaining elements by sample
Add name I applied Glass effect-Gradient Glow-drop shadow
Add your credit info and we are done!

Saturday, August 18, 2012

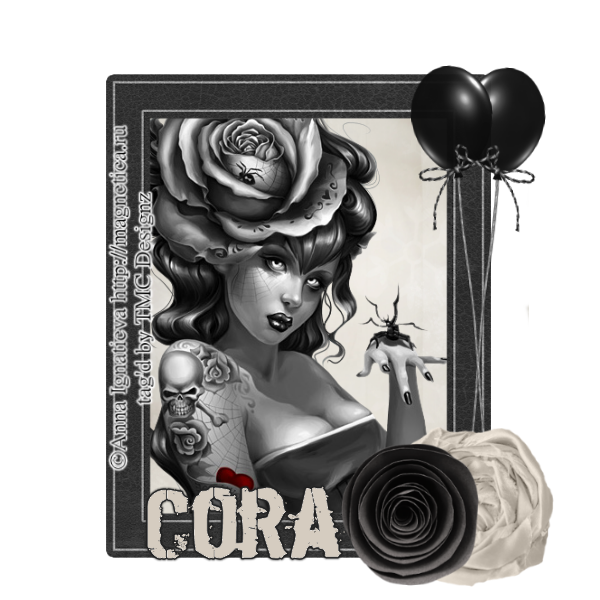
SW Artist Series 03 - PTU


This tutorial was made and wirtten by my own ideas any resemblance to other tutorials is purely coincidental.

Supplies Needed
For experienced PSP User
Scrapkit: SW Artist Series 03 by Pimp'd Designz
You can purchase her kit or bundle here
Tube of choice. I'm using Group Artist Permission only by Anna Ignatieva
Font of choice. I'm using font called Dirty Ego
Plugin: Eye candy 5-Impact-Gradient Glow

Elements used from kit
pd12-balloon
pd12-flower-01
pd12-flower-02
pd12-frame-02
pd12-pp-01
pd12-ribbon-01

Let's get Started
Open new raster 600x600
Copy and Paste frame
Copy and Paste pp01 drag below frame adjust size to fit inside
Copy and Paste flowers arrange by sample
Copy and Paste balloon duplicate-right click-merge-merge down
Duplicate-image-mirror
Copy and Paste bows adjust size to place on balloons by sample
Add tube of choice drag below frame layer
Add name I applied Gradient Glow
Add copyright info and we are done!

Wednesday, August 15, 2012

SW-Artist-Series-02 - PTU


This tutorial was made and written by my own ideas any resemblance to other tutorials is purely coincidental.

Supplies Needed
For experienced PSP User
Scrapkit: SW-Artist-Series-02 by Pimp'd Designz
you can purchase her kit here
Tube of choice. I'm using freebie by Zindy
You can download her free art here
Font of choice. I'm using font called Altitude DB
Plugin: Eye Candy 5-Impact-Gradient Glow

Elements used from kit
pd12-berry-branch
pd12-flower-01
pd12-flower-02
pd12-frame-02
pd12-leaf-01
pd12-pp-04
pd12-ribbon-02

Let's get Started
Open new raster 600x600
Copy and Paste frame
Copy and Paste pp04 drag below fram layer
Adjust size to fit use eraser tool to remove outside access
Copy and Paste berry branch duplicate 3x
On 1 go to image-mirror on another go to image-flip then mirror that one
Copy and Paste flowers duplicate by sample
Copy and Paste ribbon duplicate place on flower01
Copy and Paste tube of choice place inside frame layer
Add name I applied Gradient Glow
Add copyright info and we are done!

Tuesday, August 14, 2012

SW-Artist-Series-01 - PTU


This tutorial was made and written by my own ideas any resemblance to other tutorials is purely coincidental.

Supplies Needed
For experienced PSP User
Scrapkit: Sw-Artist-Series-01 by Pimp'd Designz
You can purchase kit or bundle here
Tube of choice. I'm using artwork by Ellie_Milk
You can purchase her work here
Font of choice. I'm using font called HoneyScript
Plugin: Eye Candy 5-Impact-Gradient Glow

Elements used from kit
pd12-flower-01
pd12-frame-01
pd12-jar
pd12-lights-01
pd12-pp-02
pd12-ribbon-01
pd12-ribbon-02

Let's get Started
Open new raster 600x600
Copy and Paste frame
Copy and Paste pp02 adjust size to fit inside
Copy and Paste jar duplicate-image-mirror
Copy and Paste remaining elements by sample
Copy and Paste tube of choice place inside frame layer
Double click on tube change blend mode to overlay
Add name I applied Gradient Glow
Add copyright info and we are done!

Fallen Leaves - PTU


This tutorial was made and written by my own ideas any resemblance to other tutorials is purely coincidental.

Supplies Needed
For experienced PSP User
Scrapkit: Fallen Leaves by SweetCravingsScraps
You can purchase her kit here
Tube of choice. I'm using cookie included in kit
Font of choice. I'm using font called FleurdeLeah
Mask of choice. I'm using Mask69 by MistressV here
Plugin: Eye Candy 5-Impact-Gradient Glow
Plugin: Xero-Radiance

Elements used from kit
ciz_falleverautumnfae1_4
SCS_FallenLeaves_Acorns
SCS_FallenLeaves_Bird
SCS_FallenLeaves_Bulb
SCS_FallenLeaves_Butterfly1
SCS_FallenLeaves_Flower5
SCS_FallenLeaves_Flower7
SCS_FallenLeaves_Flower9
SCS_FallenLeaves_Leaf1
SCS_FallenLeaves_Leaf2
SCS_FallenLeaves_Leafbranch
SCS_FallenLeaves_Leaves
SCS_FallenLeaves_Mushroom1
SCS_FallenLeaves_Paper14
SCS_FallenLeaves_Tree1
SCS_FallenLeaves_Twiggs
SCS_FallenLeaves_Walnut

Let's get Started
Open new raster 600x600
Copy and Paste tree put on left side center of raster
Copy and Paste twiggs place above tree layer
Copy and Paste leafbranch drag under twigg layer
Copy and Paste flowers duplicate and arrange by sample
Copy and Paste acorns duplicate
Copy and Paste leafs duplicate arrange leaves by clicking on square when selected
Copy and Paste remaining elements by sample
Copy and Paste Paper14 drag to bottom in layer box
Go to layers-load/save mask-load mask from disk
Select mask of choice-right click-merge-merge group
Copy and Paste tube of choice drag her to top in layer box
I applied Radiance Effect (optional)
Add name I applied Gradient Glow with drop shadow
Add copyright info and we are done!


Monday, August 13, 2012

Sweet Dream / Beautiful Nightmare - PTU

These Tutorials werre made and written by my own ideas any resemblance to other tutorials is purely coincidental.

Supplies Needed
For experienced PSP User
Scrapkit: Sweet Dream/Beautiful Nightmare by PolkadotScraps
You can purchase her kit here
Font of choice. I'm using font called FleurdeLeah

Elements used from kit
PDS_SDBN-element2
PDS_SDBN-element3
PDS_SDBN-element7
PDS_SDBN-element17
PDS_SDBN-element23
PDS_SDBN-element25
PDS_SDBN-element29
PDS_SDBN-element46

Let's get Started
Open new raster 600x600
Copy and Paste cloud duplicate in layer box
Right click-merge-merge down duplicate cloud arrange on other side
Copy and Paste angel place in center below cloud layers
Copy and Paste feather duplicate-image-mirror
Copy and Paste leaves go to image-rotate left drag to bottom in layer box
Copy and Paste ribbon go to image-rotate left drag above leaves layer
Copy and Paste rose duplicate-image-mirror
Repeat same steps on leaf drag below rose layers
Copy and Paste sparkle drag to top in layer box
Add name go to selections-select all-float-defloat-modify-expand-size3
Add new raster in layer box go to paint fill white
Drag layer below original font layer go to adjustment-add/remove noise-add noise
Adjust setting to liking then apply drop shadow
Add your credit info and we are done!


Beautiful Nightmare


Supplies Needed
For experienced PSP User
Tube of choice. I'm using artwork by Keith Garvey
I purchased this at Psptubesemporium
His new store will be opening soon new site can find here for further notice
Font of choice. I'm using font called Sverige Script Demo
Plugin: Eye Candy 5-Impact-Gradient Glow
Plugin: Xero-Radiance


Elements used from kit
PDS_SDBN-element31
PDS_SDBN-element32
PDS_SDBN-element33
PDS_SDBN-element43
PDS_SDBN-element44
PDS_SDBN-element54
PDS_SDBN-frame7
PDS_SDBN-paper19

Let's get Started
Open new raster 600x600
Copy and Paste frame7
Copy and Paste paper19 drag below frame adjust size to fit inside
Use eraser tool to remove outside access
Copy and Paste feather duplicate 4x arrange across frame
Copy and Paste ribbon drag below some feather layers
Copy and Paste remaining elements by sample
On the scatter and dots duplicate
Copy and Paste tube of choice I applied Radiance Effect
Add name I applied Gradient Glow with drop shadow
Add copyright info and we are done!


Saturday, August 11, 2012

Unlikely Ballad - PTU


This tutorial was made and written by my own ideas any resemblance to other tutorials is purely coincidental.

Supplies Needed
For experienced PSP User
Scrapkit: Unlikely Ballad by Polkadotscraps
You can purchase her kit here
Mask of choice. I'm using Mask75 by Mistressv here
Font of choice. I'm using font called Sverige Script Decorated Demo
Plugin: Eye Candy 5-Impact-Gradient Glow

Elements used from kit
PDS_UB-element4
PDS_UB-element22
PDS_UB-element24
PDS_UB-element25
PDS_UB-element29
PDS_UB-element33
PDS_UB-element37
PDS_UB-element40
PDS_UB-paper9

Let's get Started
Open new raster 600x600
Copy and Paste leaves go to image-rotate right
Copy and Paste leaves duplicate 2x drag below leaves
On one layer go to image-mirrror
Copy and Paste remaining elements by sample
On butterfly duplicate-image-mirror
Copy and Paste paper9 drag to bottom in layer box
Go to layers-load/save mask-load mask from disk
Select mask of choice-right click-merge-merge group
Duplicate-right click-merge-merge down
Add name I applied Gradient Glow
Add your credit info and we are done!


Friday, August 10, 2012

Emo Cuteness - PTU


This tutorial was made and written by my own ideas any resemblance to other tutorials is purely coincidental.

Supplies Needed
For experienced PSP User
Scrapkit: Emo Cuteness by Ditzy Dezigns
You can purchase her kit here
Font of choice. I'm using font called Accent Dot Lots
Plugin: Eye Candy 5-Impact-Gradient Glow

Elements used from kit
Bow3
Bow4
Curly Ribbon1
Emo Girl1
Emo Girl4
Heart Scalloped Frame
kitty Pop2
Paper6
Sparkles1
Sparkles2

Let's get Started
Open new raster 600x600
Copy and Paste frame
Copy and Paste Paper6 drag below frame
Adjust so fits inside use eraser tool to remove outside access
Copy and Paste Curly Ribbon duplicate and arrange around frame
Copy and Paste Bows duplicate and arrange around frame
Copy and Paste Kitty Pop duplicate and arrange under bow layers
Copy and Paste remaining elements by sample
Add name I applied Gradient Glow twice then applied drop shadow
Add your credit info and we are done!


Thursday, August 9, 2012

Naughty Hottie - PTU


This tutorial was made and written by my own ideas any resemblance to other tutorials is purely coincidental.

Supplies Needed
For experienced PSP User
Scrapkit: Naughty Hottie by Sarah's Tags -N- Things
You can purchase her kit here
Tube of choice. I'm using artwork by Ismael Rac
You can purchase his tubes here
I'm using Template 177 by Toxic Desirez here
Font of choice. I'm using font called Movie Filmstrip
Plugin: Eye Candy 5-Impact-Gradient Glow
Plugin: Xero-Radiance

Elements used from kit
ST-Boot
ST-Bow1
ST-City
ST-Condom
ST-Fan
ST-Frame2
ST-FuzzyHeart
ST-Halftone
ST-HeartChain
ST-Paper3
ST-Paper6
ST-Paper7
ST-Paper9
ST-Sparkles
ST-Whip
ST-WordArt

Let's Get Started
Open Template close out Credit info
Select bottom red rectangle in layer box
Go to selections-select all-float-defloat
Copy and Paste Paper7 use the pick tool-move to arrange
Go to selections-invert-hit delete on keyboard apply Gradient Glow
Repeat same steps for the top red rectangle
Select the top red circle in layer box
Go to selections-select all-float-defloat
Copy and Paste Paper7 use the pick tool-move to arrange
Go to selections-invert-hit delete on keyboard apply Gradient Glow
Repeat same steps for the bottom red circle layer
Select the bottom black square in layer box
Go to selections-select all-float-defloat
Copy and Paste Paper3 use to pick tool-move to arrange
Go to selections-invert-hit delete on keyboard apply Gradient Glow
Repeat same steps for the top black square layer
On the round rectangle layer apply Gradient Glow
Select circle in layer box
Go to selections-select all-float-defloat
Copy and Paste Paper9 use pick tool-move to arrange
Go to selections-invert-hit delete on keyboard apply Gradient Glow
Copy and Paste Halftone drag to bottom in layer box
Duplicate-image-mirror
Copy and Paste Frame2 arrange inside top and bottom circle layers
Copy and Paste remaining elements by sample
On Whip, Boots, FuzzyHeart duplicate-image-mirror
Add tube of choice preferable close up for inside circle
Click on circle layer go to selections-select all-float-defloat-invert
Select on close up tube layer hit delete on keyboard
Double click on tube change blend mode to overlay
Copy and Paste half or full tube of choice I applied Radiance Effect
If you would like to resize right click on layer-merge-merge visible
Add name I applied Gradient Glow
Add copyright info and we are done!
Wednesday, August 8, 2012

A Visit to Grandma's Cluster Freebie


Using scrapkit by CreativeScrapsbyCrys
You can purchase her kit here
This is for Personal Use only if you share please link back to my blog

Download Cluster Here

Sassy Pants - PTU


This tutorial was made and written by my own ideas any resemblance to other tutorials is purely coincidental.

Supplies Needed
For experienced PSP User
Scapkit: Sassy Pants by Designs by Sarah
You can purchase her kit here
Tube of choice. I'm using artwork by Verymany
You can purchase tubes here
Font of choice. I'm using font called Jenna Sue
Plugin: Eye Candy 5-Impact-Gradient Glow
Plugin: Xero-Radiance

Elements used from kit
sb_sassypants_clipped flower1
sb_sassypants_cluster frame2
sb_sassypants_frame2
sb_sassypants_pp1
sb_sassypants_splat1

Let's get started
Copy and Paste cluster frame
Copy and Paste frame2 adjust size to fit over cluster frame
Copy and Paste paper drag below frame layers
Use eraser tool to remove outside access
Copy and Paste splat duplicate 4x arrange around frame
Copy and Paste clip add drop shadow duplicate-image-flip
Copy and Paste tube of choice. I'm using the background from this tube 
Adjust size to liking how you want to look in frames
Double click on tube and change blend mode to overlay
Copy and Paste full tube of choice
I applied Radiance Effect (optional)
Add name I applied Gradient Glow with drop shadow
Add copyright info and we are done!

Scrapkit Freebie

I have decided to try my hand at making scrapkits soooo I have a scrapkit freebie you can download here on my new scrap blog :)


Tuesday, August 7, 2012

A Visit with Grandma - PTU


This tutorial was made and written by my own ideas any resemblance to other tutorials is purely coincidental.

Supplies Needed
For experienced PSP User
Scrapkit: A Visit with Grandma by CreativeScrapsbyCrys
You can purchase her kit here
Font of choice. I'm using font called Gabriola
Mask of choice. I'm using Mask75 by SignatureCollections here
Plugin: Eye Candy 5-Impact-Gradient Glow

Elements used from kit
bird cage
bird
books
bow4
branch
broken glasses
key2
kitten
lamp
leaves
paper14
ribbon
rocking chair
yarn

Let's get Started
Open new raster 600x600
Copy and Paste leaves when selected move mouse over little square
arrange so its straight across place towards bottom of raster
Copy and Paste branch drag above leaves layer
Duplicate-image-mirror
Copy and Paste remaining elements by sample
On rocking chair and bird cage go to image-mirror apply drop shadow to cage
Duplicate the cat-right click-merge-merge down
Copy and Paste paper drag to bottom in layer box
Go to layers-load/save mask-load mask from disk
Select mask of choice-right click-merge-merge group
Duplicate 3x on each layer go to merge-merge down until you have one mask layer
Add name I applied Gradient Glow with drop shadow
Add your credit info and we are done!


Saturday, August 4, 2012

Speedy - PTU

This tutorial was made and written by my own ideas any resemblance to other tutorials is purely coincidental.

Supplies Needed
For experienced PSP User
Scrapkit: Speedy by Polkadotscraps
You can purchase her kit here
Tube of choice. I'm using artwork by Ismael Rac
You can purchase his tubes here
Font of choice. I'm using font called BreezedCaps
Plugin: Eye Candy 5-Impact-Gradient Glow
Plugin: Xero-Radiance

Elements used from kit
PDS_S-frame6
PDS_S-paper2
PDS_S-ribbon5
PDS_S-scatter3
PDS_S-speedometer
PDS_S-stearingwheel
PDS_S-trafficlight
PDS_S-wire

Let's get Started
Open new raster 600x600
Copy and Paste frame
Copy and Paste paper5 drag below frame adjust size so fits inside
Copy and Paste remaining elements by sample
On scatter duplicate drag below frame 
Copy and Paste tube of choice place above frame layer
Use eraser tool to erase on frame layer so shes inside frame
I applied Radiance Effect (optional)
Add name I applied Gradient Glow with drop shadow
Add copyright info and we are done!

Thursday, August 2, 2012

JC Artist Series 06 - PTU


This tutorial was made and written by my own ideas any resemblance to other tutorials is purely coincidental.

Supplies Needed
For experienced PSP User
Scrapkit: JC Artist Series 06 by Pimp'd Designz
You can purchase her kit here
Tube of choice. I'm using artwork by Zindy Nielsen
You can download this freebie here
Font of choice. I'm using font called Larissa
Plugin: Eye Candy 5-Impact-Gradient Glow

Elements used from kit
pd12-flower-01
pd12-frame-02
pd12-pp-04
pd12-ribbon-01

Let's get Started
Open new raster 600x600
Copy and Paste frame
Copy and Paste pp04 drag below frame adjust size so fits inside
Copy and Paste flower duplicate 3x arrange by sample
Copy and Paste ribbon above frame layer
Add tube of choice I applied drop shadow
Add name I applied Gradient Glow 
Add copyright info and we are done!


JC Artist Series 05 - PTU


This tutorial was made and written by my own ideas any resemblance to other tutorials is purely coincidental.

Supplies Needed
For experienced PSP User
Scrapkit: JC Artist Series 05 by Pimp'd Designz
You can purchase her kit here
Font of choice. I'm using font called Alice in Wonderland
Plugin: Eye Candy 5-Impact-Gradient Glow

Elements used from kit
pd12-flower-02
pd12-greens-01
pd12-pp-03
pd12-ribbon-01
pd12-ribbon-02

Let's get Started
Open new raster 600x600
Copy and Paste greens go to image-rotate left
Copy and Paste ribbon2 place on top of greens
Copy and Paste flower duplicate 3x arrange by sample
Copy and Paste remaining elements by sample
Copy and Paste pp03 drag to bottom in layer box
Go to layers-load/save mask-load mask from disk
Select mask-right click-merge-merge group 
Add name I applied Gradient Glow with drop shadow
Add your credit info and we are done!


JC Artist Series 04 - PTU


This tutorial was made and written by my own ideas any resemblance to other tutorials is purely coincidental.

Supplies Needed
For experienced PSP User
Scrapkit: JC Artist Series 04 by Pimp'd Designz
You can purchase her kit here
Tube of choice. I'm using an exclusive tube by JamieKidd
You can get this tube at CreativeMisfitsForum here
Font of choice. I'm using font called Sverige Script Decorated Demo
Plugin: Eye Candy 5-Impact-Gradient Glow
Plugin: Xero-Radiance

Elements used from kit
pd12-frame-01
pd12-glitter-01
pd12-glitter-02
pd12-pp-04
pd12-ribbon-01
pd12-ribbon-02

Let's get started
Open new raster 600x600
Copy and Paste frame 
Copy and Paste pp04 drag below frame adjust size so fits inside
Copy and Paste glitters on the silver glitter apply drop shadow
Copy and Paste remaining elements by sample
Add tube of choice preferably close up for inside frame
Double click on tube change opacity to 60
Copy and Paste full tube of choice. I applied Radiance Effect (optional)
Add name I applied Gradient Glow with drop shadow
Add copyright info and we are done!

Wednesday, August 1, 2012

JC Artist Series 03 - PTU

This tutorial was made and written by my own ideas any resemblance to other tutorials is purely coincidental.

Supplies Needed
For experienced PSP User
Scrapkit: JC Artist Series 03 by Pimp'd Designz
You can purchase her kit here
Tube of choice. I'm using artwork by NoFlutter
You can view art here
Font of choice. I'm using font called Dirty Ego
Plugin: Eye Candy 5-Impact-Gradient Glow
Plugin: Xero-Radiance

Elements used from kit
pd12-cross-bones
pd12-frame-03
pd12-lock
pd12-pearls
pd12-pirate-chest
pd12-pp-02
pd12-print-01
pd12-print-02
pd12-ribbon-02
pd12-ribbon-03

Let's get Started
Open new raster 600x600
Copy and Paste frame apply drop shadow
Copy and Paste pp02 drag below frame adjust size to fit inside
Copy and Paste prints on the black duplicate-image-mirror
Copy and Paste remaining elements by sample
On pearls and cross bones apply drop shadow
Copy and Paste tube of choice I applied Radiance Effect
Add name I applied Gradient Glow with drop shadow
Add copyright info and we are done!

JC Artist Series 02 - PTU


This tutorial was made and written by my own ideas any resemblance to other tutorials is purely coincidental.

Supplies Needed
For experienced PSP User
Scrapkit: JC Artist Series 02 by Pimp'd Designz
You can purchase her kit here
Tube of choice. I'm using an exclusive tube by The Hunter
You can get this tube at CreativeMisfitsForum here
Font of choice. I'm using font called Uniquely Sprayed
Plugin: Eye Candy 5-Impact-Gradient Glow
Plugin: Xero-Radiance

Elements used from kit
pd12-frame-01
pd12-frame-02
pd12-guitar
pd12-ipod
pd12-pp-04
pd12-ribbons-01
pd12-star-01

Let's get started
Open new raster 600x600
Copy and Paste frame02 
Copy and Paste pp04 drag below frame02 
Use eraser tool to remove outside access
Copy and Paste frame01 adjust size to fit over each frame by sample
Copy and Paste ribbons adjust size and duplicate
Copy and Paste star adjust size to fit inside each frame
Copy and Paste remaining elements by sample
Copy and Paste tube of choice. I applied Radiance Effect
Add name I applied Gradient Glow
Add copyright info and we are done!


JC Artist Series 01 - PTU


This tutorial was made and written by my own ideas any resemblance to other tutorials is purely coincidental.

Supplies Needed
For experienced PSP User
Scrapkit: JC Artist Series 01 by Pimp'd Designz
You can purchase her kit here
Tube of choice . I'm using artwork by Keith Garvey
You can purchase his work here
Font of choice. I'm using font called Jellyka Delicious Cake
Plugin: Eye Candy 5-Impact-Gradient Glow
Plugin: Xero-Radiance-Fritillary

Elements used from kit
pd12-flower-01
pd12-frame-01
pd12-frame-02
pd12-pp-05
pd12-print-01

Let's get Started
Open new raster 600x600
Copy and Paste frame01&02 adjust size and place center of raster
Copy and Paste pp05 drag below frame layers
Use eraser tool to remove outside access
Copy and Paste flower duplicate-image-mirror
Copy and Paste pring duplicate-image-mirror
For inside heart frame preferably closeup tube
Adjust size so fits inside use eraser tool to remove outside access
I applied Radiance Effect double click tube change blendmode to luminance (legacy)
Duplicate-image-mirror place on other side of heart
Place full tube in center I applied Radiance Effect
On paper layer I applied Fritillary Effect adjust setting to liking
Add name I applied Gradient Glow with drop shadow
Add copyright info and we are done!