Pages

Tuesday, December 31, 2013

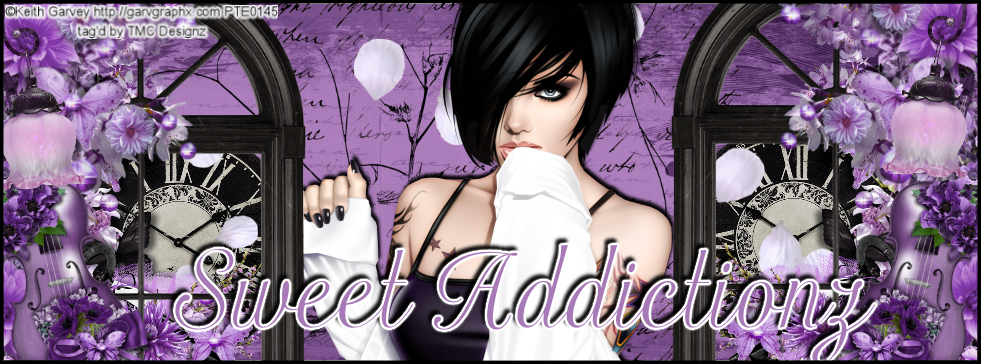
Midnight Resolutions - PTU

This tutorial was made and written by my own ideas any resemblance to other tutorials is purely coincidental.
 
Supplies Needed
For experienced PSP User
 
Tube: Artwork by Keith Garvey
You can now purchase here
 
Scrapkit: Midnight Resolutions by CreativeScrapsbyCrys
You can purchase here
 
Font of choice. I'm using font called Vladimir Script
 
Plugin: Eye Candy 5-Impact-Gradient Glow
 
Plugin: Xero-Radiance
 
Elements used from kit
MR_Element_2
MR_Element_10
MR_Element_18
MR_Element_22
MR_Element_29
MR_Element_31
MR_Element_32
MR_Element_33
MR_Element_34
MR_Element_44
MR_Frame_1
MR_Paper_5
 
Let's get Started
Open new raster 700x700
Copy and Paste frame
Copy and Paste Paper_5 drag below frame layer
Use eraser tool to remove outside access
Copy and Paste city drag to bottom of raster
Copy and Paste star fireworks and duplicate
Arrange below the city layer
Copy and Paste remaining elements by sample
On the hat layer go to image-mirror
Copy and Paste tube of choice
Add name I applied Gradient Glow
Add copyright info
Merge layers down to invisible background
I applied Radiance Effect (optional)
 

Monday, December 30, 2013

Sunday, December 29, 2013

Sparkling Snow Angel - PTU

This tutorial was made and written by my own ideas any resemblance to other tutorials is purely coincidental.
 
Supplies Needed
For experienced PSP Users
 
Tube: Artwork by Ismael Rac
you can purchase here
 
Scrapkit: Sparkling Snow Angel by PinkParadox Productions
You can purchase here
 
Font of choice. I'm using font called chalk-hand-lettering-shaded-dem
 
Plugin: Xero-Radiance
 
Elements used from kit
Snow Angel 83
Snow Angel 106
Snow Angel 112
Snow Angel 120
Snow Angel 121
Snow Angel F1
Snow Angel P8
 
Let's get Started
Open new raster 700x700
Copy and Paste frame
Copy and Paste P8 drag below frame layer
Use eraser tool to remove outside access
Copy and Paste flower clutter drag to bottom of raster
Duplicate and arrange around frame layer
Copy and Paste remaining elements by sample
Copy and Paste tube of choice . I applied Radiance Effect
Add name and copyright info

Saturday, December 28, 2013

New Years Wish - PTU

 
This tutorial was made and written by my own ideas any resemblance to other tutorials is purely coincidental.
 
Supplies Needed
For experienced PSP User
 
Tube: Artwork by The Hunter called New Years Wish
 
Scrapkit: Matching kit by Bibi Collections with same name
 
Alpha: Designz by Sue
All can be purchased here
 
Plugin: Eye candy 5-Impact-Gradient Glow
 
Plugin: Xero-Radiance
 
Elements used from kit
BibiNewYearsDream Elems35
BibiNewYearsDream Elems99
BibiNewYearsDream Elems100
BibiNewYearsDream Elems101
BibiNewYearsDream Elems121
BibiNewYearsDream Elems122
BibiNewYearsDream Elems125
BibiNewYearsDream Elems132
BibiNewYearsDream Elems135
BibiNewYearsDream Elems155
BibiNewYearsDream Elems171
BibiNewYearsDream Elems172
 
Let's get Started
Open new raster 700x700
Copy and Paste buildings arrange them by sample
Copy and Paste fireworks and moon by sample
Copy and Paste remaining elements above buildings layer
Select the mirror layer use the magic wand to select inside
Copy and Paste close up tube preferably move to the mirror layer
Go to selections-invert-delete on keyboard
Double click on tube layer and change opacity to 40
Copy and Paste full size tube I applied Radiance Effect
Add the alpha then merge each down so there on one raster layer
I applied Gradient Glow with drop shadow
Add copyright info and we are done!

Monday, December 23, 2013

Pink Cocoa Christmas - PTU

 
This tutorial was made and written by my own ideas any resemblance to other tutorials is purely coincidental.
 
Supplies Needed
For experienced PSP User
 
Tube: Artwork by Alex Prihodko
You can purchase here
 
Scrapkit: Pink Cocoa Christmas by PinkParadox Productions
You can purchase here
 
Font of choice. I'm using font called Parisienne
 
Plugin: Eye Candy 5-Impact-Gradient Glow
 
Elements used from kit
Pink Cocoa Christmas 49
Pink Cocoa Christmas 64
Pink Cocoa Christmas 83
Pink Cocoa Christmas 110
Pink Cocoa Christmas 123
Pink cocoa Christmas F1
Pink cocoa Christmas P18
 
Let's get Started
Open new raster 700x700
Copy and Paste frame
Copy and Paste P18 drag below frame layer
Copy and Paste wreath drag to bottom of raster
Duplicate-image-mirror arrange by sample
Copy and Paste flower cluster place at the top below frame layer
Duplicate and place on other side
Copy and Paste remaining elements by sample
Copy and Paste tube of choice
Add name I applied Gradient Glow with drop shadow
Add copyright info and we are done!

Sunday, December 22, 2013

Sawyer - PTU

This tutorial was made and written by my own ideas any resemblance to other tutorials is purely coincidental.
 
Supplies Needed
For experienced PSP User
 
Tube: Artwork by Aguila Dorado called Sawyer
 
Scrapkit: Matching kit by dnscraps with same name
Both products can be purchased here
 
Font of choice. I'm using font called Script MT Bold
 
Plugin: Eye Candy 5-Impact-Gradient Glow
 
Elements used from kit
Sawykitpudnlipstick
Sawykitpupaper6
Sawykitpudnapple
Sawykitpudnboot
Sawykitpudndarkframe
Sawykitpudndoodle4
Sawykitpudndragon
Sawykitpudndrume
Sawykitpudnlatterns
 
Let's get started
Open new raster 700x700
Copy and Paste Frame
Copy and Paste Paper6 drag below frame layer
Use eraser tool to remove outside access
Copy and Paste dragon place above frame layer
Copy and Paste doodle place inside frame layer
Duplicate-image-mirror-flip both
Copy and Paste remaining elements by sample
Copy and Paste tube of choice
Add name I applied Gradient Glow
Add copyright info and we are done!


Friday, December 20, 2013

Sexy Craziness - PTU

 
This tutorial was made and written by my own ideas any resemblance to other tutorials is purely coincidental.
 
Supplies Needed
For experienced PSP User
 
Tube: Artwork by Dran Design
 
Scrapkit: Matching kit by Bibi Collection called Sexy Craziness
You can purchase both products here
 
Font of choice. I'm using font called Van Helsing
 
Plugin: Eye Candy 5-Impact-Gradient Glow
 
Plugin: Xero-Radiance
 
Elements used from kit
BibiSexyCraziness Elem1
BibiSexyCraziness Elem2
BibiSexyCraziness Elem5
BibiSexyCraziness Elem 12
BibiSexyCraziness Elem 17
BibiSexyCraziness Elem 25
BibiSexyCraziness Elem 32
BibiSexyCraziness Elem 33
BibiSexyCraziness Elem 40
BibiSexyCraziness Elem 41
BibiSexyCraziness Elem 45
BibiSexyCraziness Elem 57
BibiSexyCraziness Papers 5
 
Lets get Started
Open new raster 600x600
Copy and Paste frame
copy and Paste paper 5 drag below frame layer
Use eraser tool to remove outside access
Copy and Paste fence drag to bottom of raster and duplicate
Copy and Paste remaining elements by sample
Copy and Paste tube of choice. I applied Radiance Effect
Add name I applied Gradient Glow
Add copyright info and we are done!

Tuesday, December 17, 2013

Candy Cane Queen - PTU

 
This tutorial was made and written by my own ideas any resemblance to other tutorials is purely coincidental.
 
Supplies Needed
For experienced PSP Users
 
Tube: I'm using artwork by Celinart
You can now purchase her artwork here
 
Scrapkit: Candy Cane Queen by PinkParadox Productions
You can purchase here
 
Font of choice. I'm using font called Vladimir Script
 
Plugin: Eye Candy 5-Impact-Gradient Glow
 
Elements used from kit
Candy Cane Queen 10
Candy Cane Queen 19
Candy Cane Queen 32
Candy Cane Queen 76
Candy Cane Queen 78
Candy Cane Queen 107
 
Let's get Started
Open new raster 700x700
Copy and Paste tree
Copy and Paste chair go to image-mirror-place behind tree
Copy and Paste presents drag to top of the raster
Copy and Paste remaining elements by sample
Copy and Paste tube of choice
Add name I applied Gradient Glow with drop shadow
Add copyright info and we are done!


Monday, December 16, 2013

Sweet Christmas - PTU

 
This tutorial was made and written by my own ideas any resemblance to other tutorials is purely coincidental.
 
Supplies Needed
For experienced PSP Users
 
Tube: I'm using artwork called Niky Christmas by Pandora-Creations
 
Scrapkit: Sweet Christmas by Lizquis Scraps
Both products can be purchased here
 
Font of choice. I'm using font called Monotype Corsiva
 
Plugin: Eye Candy 5-Impact-Gradient Glow
 
Elements used from kit
LizquisScraps_SweetChristmas_bow1
LizquisScraps_SweetChristmas_bear1
LizquisScraps_SweetChristmas_bow3
LizquisScraps_SweetChristmas_frame
LizquisScraps_SweetChristmas_mistletoe
LizquisScraps_SweetChristmas_paper11
LizquisScraps_SweetChristmas_tree
 
Let's get Started 
Open new raster 600x600
Copy and Paste frame layer
Copy and Paste paper11 drag below frame
Use eraser tool to remove outside access
Copy and Paste tree place above frame layer
Copy and Paste remaining elements by sample
Copy and Paste tube of choice
Duplicate tube layer double click-change blend mode to soft light
I applied drop shadow
Add name I applied  Gradient Glow with drop shadow
add copyright info and we are done!

Friday, December 13, 2013

Snow Queen - PTU

This tutorial was made and written by my own ideas any resemblance to other tutorials is purely coincidental.
 
Supplies Needed
For experienced PSP Users
 
Tube: I'm using artwork by The Hunter
 
Scrapkit: Matching kit of the same name by Bibi's Collections
Both products can be purchased here
 
Font of choice. I'm using font called Will&Grace
 
Plugin: Xero-Radiance
 
Elements used from kit
BibiSnowQueen Elems2
BibiSnowQueen Elems14
BibiSnowQueen Elems41
BibiSnowQueen Elems59
BibiSnowQueen Elems62
BibiSnowQueen Elems72
BibiSnowQueen Papers11
 
Lets get Started
Open new raster 700x700
Copy and Paste frame
Copy and Paste paper drag below frame layer
Use eraser tool to remove outside access
Copy and Paste cluster elements place above frame layer
Copy and Paste remaining elements by sample
Copy and Paste close up tube preferably place inside frame layer
I applied Radiance Effect
Double click on tube layer and change opacity to 50
Copy and Paste full size tube and drag to top of raster
I applied drop shadow
Add copyright info and we are done!


Elegant Holiday - PTU

 
This tutorial was made and written by my own ideas any resemblance to other tutorials is purely coincidental.
 
Supplies Needed
For experienced PSP Users
 
Tube of choice. I'm using artwork by Alex Prihodko
You can purchase here
 
Scrapkit: Elegant Holiday by PinkParadox Productions
You can purchase kit here
 
Font of choice. I'm using font called Kunstler Script
 
Plugin: Eye Candy 5-Impact-Gradient Glow
 
Elements used from kit
Elegant Holiday 32
Elegant Holiday 42
Elegant Holiday 50
Elegant Holiday 74
Elegant holiday 102
Elegant Holiday 115
Elegant holiday 116
Elegant Holiday 123
Elegant holiday P 7
 
Let's get Started
Open new raster 700x700
Copy and Paste window
Copy and Paste P7 drag below window layer
Copy and Paste wine cluster place on right side
Copy and Paste leaves drag to bottom of raster
Duplicate and place on other side
Copy and Paste flower vines
Duplicate and place on sides of window
Copy and Paste remaining elements by sample
Copy and Paste tube of choice. I applied drop shadow
Add name I applied drop shadow
Add copyright info and we are done!

Monday, December 2, 2013

Hot Christmas - PTU


This tutorial was made and written by my own ideas any resemblance to other tutorials is purely coincidental.

Supplies Needed
For experienced PSP User

Tube: Artwork by Danny Lee

Scrapkit: Matching called called Hot Christmas by Designs by Joan
Both products can be purchased here

Font of choice. I'm using font called Miss Le Gatees

Plugin: Eye Candy 5-Impact-Gradient Glow

Plugin: Xero-Radiance

Elements used from kit
HotChristmas 7
HotChristmas19
HotChristmas 31
HotChristmas 40
HotChristmas 46
HotChristmas 48
HotChristmas 57
PP5

Let's get Started
Open new raster 700x700
Copy and Paste wreath frame
Copy and Paste PP5 drag below wreath layer
Use eraser tool to remove outside access
Copy and Paste glitter drag to bottom of raster
Copy and Paste greenery duplicate-image-mirror
Copy and Paste remaining elements by sample
Copy and Paste tube close-up preferrably 
I applied Radiance effect 
Double click on close-up layer change opacity to 60
Copy and Paste full size tube I applied Radiance Effect with drop shadow
Add name I applied Gradient Glow with drop shadow
Add copyright info and we are done!

Sunday, December 1, 2013

Waiting for Santa - PTU

This tutorial was made and written by my own ideas any resemblance to other tutorials is purely coincidental.

Supplies Needed
For experienced PSP User

Scrapkit: Waiting for Santa by PinkParadox Productions
You can purchase here

Tube: Artwork by Keith Garvey
Free tube you can download here
You must have a Lic# if you do not have one

Font of choice. I'm using font called Baskerville Old Face

Plugin: Eye candy 5-Impact-Gradient Glow

Elements used from kit
Waiting for Santa 4
Waiting for Santa 31
Waiting for Santa 48
Waiting for Santa 53
Waiting for Santa 80
Waiting for Santa 82
Waiting for Santa 117
Waiting for Santa 144
Waiting for Santa 149

Let's get Started
Open new raster 700x700
Copy and Paste Post box place in center of raster
Copy and Paste tree place behind box
copy and Paste snow drag above post box layer
Copy and Paste remaining elements by sample
Copy and Paste tube of choice
Add name I applied Gradient Glow with drop shadow
Add copyright info and we are done!

Friday, November 29, 2013

Winter Girl - PTU


This tutorial was made and written by my own ideas any resemblance to other tutorials is purely coincidental.

Supplies Needed
For experienced PSP User

Tube: Winter Girl by Di_Halim

Matching kit with the same name by Bibi's Collections
You can purchase both items here

Font of choice. I'm using font called Onyx

Plugin: Eye Candy 5- Impact-Gradient Glow

Elements used from kit
BibiWinter Girl Elem16
BibiWinter Girl Elem17
BibiWinter Girl Elem21
BibiWinter Girl Elem25
BibiWinter Girl Elem34
BibiWinter Girl Elem40
BibiWinter Girl Elem49
BibiWinter Girl Elem51
BibiWinter Girl Elem53
BibiWinter Girl Elem58
BibiWinter Girl Elem59
BibiWinter Girl Elem64
BibiWinter Girl Elem66

Let's get Started
Open new raster 700x700
Copy and Paste the snow layers
Duplicate the snowballs-image-mirror
Copy and Paste orange fence and duplicate
Copy and Paste the tree place at bottom of raster
Copy and Paste remaining elements by sample
Copy and Paste tube of choice place below sled
Add name I applied Gradient Glow-drop shadow-inner bevel
Add copyright info and we are done!


Thursday, November 28, 2013

Sugar Plum - PTU


This tutorial was made and written by my own ideas any resemblance to other tutorials is purely coincidental.

Supplies Needed
For experienced PSP Users

Artwork by Verymany
You can purchase here

Scrapkit: Sugar Plum by Creative Scraps by Crys
You can purchase here

Font of choice. I'm using font called JasmineUPC

Plugin: Eye Candy 5-Impact-Gradient Glow

Elements used from kit
Sp_Element_7
Sp_Element_9
Sp_Element_22
Sp_Element_45
Sp_Element_48
Sp_Frame_2
Sp_Paper_14

Let's get started
Open new raster 700x700
Copy and Paste frame
Copy and Paste Paper14 drag below frame layer
Adjust size and use eraser tool to remove outside access
Copy and Paste greenery duplicate at above frame layer
Copy and Paste remaining elements by sample
Duplicate ornaments by sample
Add tube of choice. I applied drop shadow
Add copyright info and we are done!

Upon a Winter Dream - PTU


This tutorial was made and written by my own ideas any resemblance to other tutorials is purely coincidental.

Supplies Needed
For experienced PSP User
Scrapkit: Upon a Winter Dream by Creative Scraps by Crys
You can purchase here

Artwork by Ismael Rac
You can purchase here

Font of choice. I'm using font called Vladimir Script

Elements used from kit
UAWD_Element_4
UAWD_Element_16
UAWD_Element_17
UAWD_Element_19
UAWD_Element_20
UAWD_Element_42
UAWD_Paper_2

Let's get Started
Open new raster 700x700
Copy and Paste frame
Copy and Paste Paper2 drag below frame layer
Adjust size and use eraser tool to remove outside access
Copy and Paste remaining elements by sample
On snowballs duplicate-image-mirrror
Copy and Paste tube of choice I applied drop shadow
Add name I applied drop shadow
Add copyright and we are done!


Friday, November 22, 2013

CT Tag Show Offs using kit Cozy Christmas - PTU


First tag I'm using artwork by Ismael Rac
You can purchase here

Second tag I'm using artwork by Verymany
You can purchase here

Scrapkit: Cozy Christmas by PinkParadox Productions
You can purchase here


Monday, November 18, 2013

Dangerously Alluring - PTU


This tutorial was made and written by my own ideas any resemblance to other tutorials is purely coincidental.

Supplies Needed
For experienced PSP User

Tube: Artist by Zlata_M
You can purchase here

Scrapkit: Dangerously Alluring by PinkParadox Productions
You can purchase here

Font of choice. I'm using font called iNked God

Plugin: Xero-Radiance

Elements used from kit
Dangerously Alluring E 12
Dangerously Alluring E 17
Dangerously Alluring E 25
Dangerously Alluring E 29
Dangerously Alluring E 33
Dangerously Alluring E 40
Dangerously Alluring E 48
Dangerously Alluring E 66
Dangerously Alluring E 73
Dangerously Alluring E 85
Dangerously Alluring E 88
Dangerously Alluring E 104

Let's get Started
Open new raster 700x700
Copy and Paste wall place in center of raster
Copy and Paste city duplicate and place behind wall layer
Copy and Paste moon drag to bottom of raster
Copy and Paste car go to image-mirror
Copy and Paste remaining elements by sample
Add tube of choice. I applied Radiance Effect
Add name go to effects-3d effects-inner bevel
Adjust settings to liking and apply drop shadow with color of choice
Add copyright info and we are done!


Friday, November 15, 2013

Dress up Denim - PTU


This tutorial was made and written by my own ideas any resemblance to other tutorials is purely coincidental.

Supplies Needed
For experienced PSP User

Tube: Artist by Verymany
You can purchase here

Scrapkit: Dress Up Denim by PinkParadox Productions
You can purchase here

Font of choice. I'm using font called Parisienne

Plugin: Eye Candy 5-Impact-Gradient Glow

Plugin: Xero-Radiance

Elements used from kit
PDUD E 1
PDUD E 45
PDUD E 69
PDUD E 77
PDUD E 85
PDUD E 106
PDUD E 111
PDUD F 3
PDUD F
PDUD P 1

Let's get Started
Open new raster 700x700
Copy and Paste Frame 3
Copy and Paste Frame F drag below Frame3 layer
Copy and Paste P1 drag to bottom of raster
Adjust size so fits inside use eraser tool to remove outside access
Copy and Paste leaves duplicate and arrange by sample
Copy and Paste flower duplicate and arrange on top of leaves
Copy and Paste remaining elements by sample
Copy and Paste tube of choice. I applied Radiance Effect
Add name I applied Gradient Glow with drop shadow
Add copyright info and we are done!

Wednesday, November 13, 2013

Early Frost - PTU


This tutorial was made and written by my own ideas any resemblance to other tutorials is purely coincidental.

Supplies Needed
For experienced PSP User

Tube: Artist by Alex Prihodko
you can purchase here

Scrapkit: Early Frost by PinkParadox Productions
You can purchase here

Font of choice. I'm using font called Pristina

Mask of choice. I'm using Mask275 by weescotslasscreations
You can download here

Eye Candy 5-Impact-Gradient Glow

Xero-Radiance

Elements used from kit
Early Frost E 1
Early Frost E 4
Early Frost E 24
Early Frost E 52
Early Frost E 67
Early Frost E 85
Early Frost E 96
Early Frost F 1
Early Frost F 8
Early Frost F 9
Early Frost P 20

Let's get Started
Open new raster 700x700
Copy and Paste Frame9
Copy and Paste Frame8 place above frame 9 layer
Copy and Paste Frame1
Drag below frame 8 layer
Copy and Paste Paper 20
Drag to bottom of raster
Go to layers-load/save mask-load mask from disk
Select mask-right click-merge-merge group
Adjust size if needed
Copy and Paste cluster and place on left side of frame
Copy and Paste mailbox place below cluster layer
Copy and Paste remaining elements by sample
On leaf duplicate-image-mirror
Add tube of choice. I applied Radiance effect
Add name I applied Gradient Glow with drop shadow
Add copyright info and we are done!


Saturday, November 9, 2013

CT Tag Show Offs using kit A Moment in Time


First tag I'm using artwork by Verymany
You can purchase here

Second tag I'm using artwork by Alex Prihodko
You can purchase here 

Scrapkit by PinkParadox Productions called A Moment in Time 
You can purchase here

Thursday, November 7, 2013

Round the Way Girl - PTU


This tutorial was made and written by my own ideas any resemblance to other tutorials is purely coincidental.

Supplies Needed
For experienced PSP User

Tube: Artwork by Verymany called Bella
You can purchase her work here

Scrapkit: Round the way Girl by PinkParadox Productions
You can purchase kit here

Font of choice. I'm using font called Vladimir Script

Eye candy 5-Impact-Gradient Glow

Xero-Radiance

Elements used from kit
RTWG-E 15
RTWG-E 16
RTWG-E 27
RTWG-E 33
RTWG-E 46
RTWG-E 61
RTWG-E 69
RTWG-E 121
RTWG-E 129
RTWG-F 5
RTWG-P 11

Let's get Started
Open new raster 700x700
Copy and Paste frame
Copy and Paste P11 drag below frame layer
Adjust size so fits inside use eraser tool to remove outside access
Copy and Paste wordart place above paper layer
I applied drop shadow
Copy and Paste dot doodle drag to bottom of raster and duplicate
Repeat same steps for music notes
Copy and Paste remaining elements by sample
Add tube of choice. I applied Radiance Effect
Add name I applied Gradient Glow with drop shadow
Add copyright info and we are done!

Friday, November 1, 2013

Love kills Slowly - PTU


This tutorial was made and written by my own ideas any resemblance to other tutorials is purely coincidental.

Supplies Needed
For experienced PSP User
Tube by Alex Prihodko 
You can purchase here
Scrapkit: Love Kills Slowly by PinkParadox Productions
You can purchase here
Font of choice. I'm using font called Old English Text MT
Plugin: Eye Candy 5-Impact-Gradient Glow
Plugin: Xero-Radiance

Elements used from kit 
Love Kills Slowly 2
Love kills Slowly 20
Love Kills Slowly 24
Love kills Slowly 26
Love Kills Slowly 27
Love Kills Slowly 32
Love kills Slowly 69
Love Kills Slowly 73
Love Kills Slowly 100
Love kills Slowly 103
Love kills Slowly 106
Love Kills Slowly 125
Love Kills Slowly F 14
Love Kills Slowly P1

Let's get started
Open new raster 700x700
copy and Paste frame
Copy and Paste P1 drag below frame layer and adjust size so fits inside
Copy and Paste cluster and place on right side of frame
Copy and Paste white flowers 
Go to image-rotate right
Copy and Paste leaves drag below flower layers
Copy and Paste remaining elements by sample
On skull duplicate-image-mirror
Copy and Paste tube of choice drag below elements
I applied Radiance Effect (optional)
add name I applied Gradient Glow with drop shadow
Add copyright info and we are done!