Pages

Wednesday, February 27, 2013

Falling For You - PTU

This tutorial was made and written by my own ideas any resemblance to other tutorials is purely conicidental.

Supplies Needed
For experienced PSP User
Scrapkit: Falling For You by Pimp'd Designz
You can purchase her kit here
Tube of choice. I'm using artwork by Keith Garvey
You can purchase his work  here
Font of choice. I'm using font called Will&Grace
Plugin: Eye Candy 5-Impact-Gradient Glow
Plugin: Xero-Radiance

Elements used from kit
pd12-leaf-01
pd12-leaf-02
pd12-leaf-03
pd12-branch-01
pd12-branch-02
pd12-flower-01
pd12-frame-02
pd12-pinecones-01
pd12-pp-05

Lets' get Started
Open new raster 600x600
Copy and Paste frame 
Copy and Paste pp05 drag below frame layer
Adjust size so fits inside 
Copy and Paste branches on right side of frame
Copy and Paste remaining elements by sample
On leaf 03 drag under flower duplicate-image-mirrror
On leaf 01 and leaf 02 duplicate-image-mirror
Add tube of choice drag under elements
I applied radiance effect (optional)
Add name I applied Gradient Glow with drop shadow
Add copyright info and we are done! 

Play-it-Loud - PTU

This tutorial was made and written by my own ideas any resemblance to other tutorials is purely coincidental.

Supplies Needed
For experienced PSP User
Scrapkit: Play-it-Loud by Pimp'd Designz
You can purchase her kit here
Font of choice. Im using font called Feathergraphy decoration
Plugin: Eye Candy 5-Impact-Gradient Glow

Elements used from kit
cc-banner-heart
cc-light-02
cc-mic
cc-music-note-01
cc-music-note-02
cc-ribbon-01
cc-speakers
cc-star-03
cc-wire

Let's get Started
Open new raster 600x600
Copy and Paste speakers duplicate-image-mirror
Copy and Paste wire drag to bottom in layer box
Copy and Paste ribbon drag above speakers
Copy and Paste mic duplicate-image-mirror
Copy and Paste remaining elements by sample
On notes duplicate-image-mirror
On stars duplicate-image-mirror
Add name I applied Gradient Glow with drop shadow
Add your credit info and we are done!

Tuesday, February 26, 2013

Sincerely - PTU


This tutorial was made and written by my own ideas any resemblance to other tutorials is purely coincidental.

Supplies Needed
For experienced PSP User
Scrapkit: Sincerely by SweetCravingsScraps
You can purchase her kit here
Font of choice. I'm using font called Home & Hearth
Plugin: Eye Candy 5-Impact-Gradient Glow

Elements used from kit
SSLisa-Cookie-Boop-Pink4
SCS_Sincerely_Candy Pop2
SCS_Sincerely_Chainofhearts
SCS_Sincerely_CuteKitten
SCS_Sincerely_Dessert
SCS_Sincerely_Flowers
SCS_Sincerely_Frame4
SCS_Sincerely_Frame7
SCS_Sincerely_Lipstick
SCS_Sincerely_Paper3
SCS_Sincerely_Perfume
SCS_Sincerely_Splatter

Elements used from kit
Open new raster 600x600
Copy and Paste Frames
On Frame7 drag below Frame4 adjust size so fits by sample
Copy and Paste paper3 drag to bottom in layer box
Adjust size and use eraser tool to remove outside access
Copy and Paste remaining elements by sample
Add cookie supplied in kit
Add name I applied Gradient Glow with drop shadow
Add copyright info and we are done!

Eternity in Darkness - PTU


This tutorial was made and written by my own ideas any resemblance to other tutorials is purely coincidental.

Supplies Needed
For experienced PSP User
Scrapkit: Eternity in Darkness by CreativeScrapsbyCrys
You can purchase her kits here
Tube of choice. I'm using free artist Cris Ortega
You can view artwork here
Font of choice. I'm using font called Van Helsing
Plugin: Eye Candy 5-Impact-Gradient Glow
Plugin: Xero-Radiance-Soft Mood

Elements used from kit
EID_Element_8
EID_Element_10
EID_Element_11
EID_Element_13
EID_Element_21
EID_Element_26
EID_Element_28
EID_Element_30
EID_Element_38
EID_Element_39
EID_Element_41
EID_Element_45
EID_Element_49
EID_Frame_3
EID_Frame_5
EID_Paper_5

Let's get Started
Open new raster 600x600
Copy and Paste Frame 3
Copy and Paste Frame 5  drag above Frame 3 layer
Copy and Paste paper5 drag to bottom in layer box
Adjust size so fits inside use eraser tool to remove outside access
Copy and Paste leaves duplicate 4x on 3 go to image-mirror
Copy and Paste blood splatts duplicate around frame by sample
Copy and paste the vines duplicate 4x on 3 go to image-mirror
Copy and Paste roses duplicate around frame
Copy and Paste remaining elements by sample
Copy and Paste tube drag below frame layer
Double click on tube change opacity to 40
Go to effects-Plugins-Xero-Soft Mood adjust settings to likings
Copy and Paste tube again drag under elements
I applied Radiance Effect (optional)
Add name I applied Gradient Glow with drop shadow
Add copyright info and we are done!
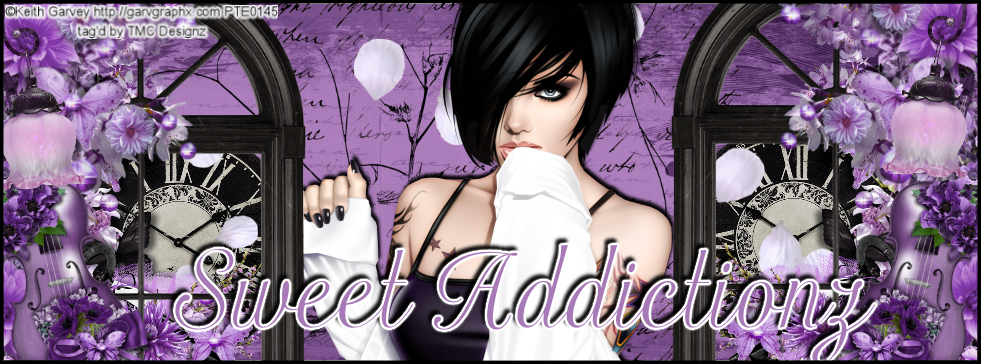


Sunday, February 24, 2013

Eggcellent Adventure - PTU

This tutorial was made and written by my own ideas any resemblance to other tutorials is purely coincidental.

Supplies Needed
For experienced PSP User
Scrapkit: Eggcellent Adventure by CreativeScrapsbyCrys
You can purchase her kit here
Font of choice. I'm using font called DaunPenh
Plugin: Eye Candy 5-Impact-Gradient Glow

Elements used from kit
buckets
bunny
clouds
colored eggs 2
colored eggs 4
colored eggs 5
colored egg
flower scatter
flowers
grass
home
sun
tree

Let's get Started
Open new raster 600x600
Copy and Paste tree
Copy and Paste grass duplicate and arrange by sample
Copy and Paste flowers duplicate and arrange by sample
Copy and Paste eggs drag under grass layers
Copy and Paste remaining elements by sample
On bunny go to image-mirror
Add name I applied Gradient Glow with drop shadow
Add your credit info then we are done!

Queen of The Night - PTU


This tutorial was made and written by my own ideas any resemblance to other tutorials is purely coincidental.

Supplies Needed
For experienced PSP User
Scrapkit: Queen of the Night by Grunge & Glitter
You can purchase her kit here
Tube of choice. I'm using artwork by Ismael Rac
You can purchase his work here
Font of choice. I'm using font called Van Helsing
Plugin: Eye Candy 5-Impact-Gradient Glow
Plugin: Xero-Radiance

Elements used from kit
barbedwireheart
bats
moon
bottle
charm1
cross
crown
flowers
flowers2
frame1
gemstonespider
paper5

Let's get Started
Open new raster 600x600
Copy and Paste paper5 drag below frame
Adjust size use eraser tool to remove outside access
Copy and Paste moon drag to bottom in layer box
Copy and Paste bats I applied Gradient Glow
Copy and Paste remaining elements by sample
On spider duplicate-image-mirror
Copy and Paste close up tube drag below frame layer
Double click on tube change opacity to 70
Copy and Paste full size tube go to image-mirror
I applied Radiance (optional) with drop shadow
Add name I applied Gradient Glow with drop shadow
Add copyright info and we are done!


Wednesday, February 20, 2013

April Showers - PTU

This tutorial was made and written by my own ideas any resemblance to other tutorials is purely coincidental.

Supplies Needed 
For experienced PSP User
Scrapkit: April Showers by CreativeScrapsbyCrys
You can purchase her kit here
Font of choice. I'm using font called Comic Sans Ms
Plugin: Eye Candy 5-Impact-Gradient Glow

Elements used from kit
cloud
duck2
flower2
flower3
girl2
grass patch
grass2
puddle
rain
ripple2
tree
umbrella2
vine

Let's get Started
Open new raster 600x600
Copy and Paste grass patch
Copy and Paste puddle above grass patch
Copy and Paste grass duplicate and arrange by sample
Copy and Paste flowers duplicate and arrange by sample
Copy and Paste remaining elements by sample
On rain duplicate 2x on one go to image mirror
Add name I applied Gradient Glow
Add credit then we are done!

Lets Celebrate - PTU

This tutorial was made and written by my own ideas any resemblance to other tutorials is purely coincidental.

Supplies Needed
For experienced PSP Users
Scrapkit: Lets Celebrate by Pimp'd Designz
You can purchase kit here
Tube of choice. I'm using artwork by Eugene Rzhevskii
You can purchase artwork here
Plugin: Eye Candy 5-Impact-Gradient Glow
Plugin: Xero-Radiance

Elements used from kit
pd12-balloons
pd12-cake
pd12-flower-01
pd12-frame-04
pd12-glitter-01
pd12-glitter-02
pd12-mesh-01
pd12-mesh-02
pd12-pp-05
pd12-streamer-02
pd12-streamer-03

Let's get started
Open new raster 600x600
Copy and Paste frame04
Copy and Paste pp05 drag below frame layer
Adjust size so fits inside
Copy and Paste the glitters on glitter03 go to image-mirror
Copy and Paste remaining elements by sample
Add tube of choice I applied Radiance (optional)
Add name I applied Gradient Glow with drop shadow
Add copyright info and we are done!

Saturday, February 16, 2013

Lucky - PTU

This tutorial was made and written by my own ideas any resemblance to other tutorials is purely coincidental.

Supplies Needed
For experienced PSP Users
Scrapkit: Lucky by Designs by Sarah
You can purchase her kit here
Tube of choice. I'm using free artwork by Ana Rasha
You can view her work here
Font of choice.I'm using font called Feathergraphy Decoration
Plugin: Eye Candy 5-Impact-Gradient Glow
Plugin: Xero-Radiance

Elements used from kit
sb_pmt_lucky_banner1
sb_pmt_lucky_clover1
sb_pmt_lucky_frame1
sb_pmt_lucky_green beer
sb_pmt_lucky_greenery
sb_pmt_lucky_horseshoe
sb_pmt_lucky_pot of gold
sb_pmt_lucky_pp6
sb_pmt_lucky_rainbow
sb_pmt_lucky_scatter circle

Let's get Started
Open new raster 600x600
Copy and Paste frame
Copy and Paste pp6 drag below frame layer
Adjust size so fits inside use eraser tool to remove outside access
Copy and Paste scatter circle drag to bottom in layer box
Copy and Paste remaining elements by sample
On clover duplicate and arrange by sample
Copy and Paste tube of choice drag below the elements
I applied Radiance Effect (optional)
Add name I applied Gradient Glow with drop shadow
Add copyright info and we are done!

Thursday, February 14, 2013

Bunny Hop - PTU

This tutorial was made and written by my own ideas any resemblance to other tutorials is purely coincidental.

Supplies Needed
For experienced PSP User
Scrapkit: Bunny Hop by Alika's Scraps
You can purchase her kit here
Font of choice. I'm using font called KG True Colors
Plugin: Eye Candy 5-Impact-Gradient Glow

Elements used from kit
as11
as16
as18
as21
as74

Lets get Started
Open new raster 500x500
Copy and Paste grass element
Copy and Paste basket drag below grass layer
Copy and Paste bunny go to image-mirror
Drag below grass layer
Copy and Paste remaining elements by sample
Add name I applied Gradient Glow with drop shadow
Add your credit then we are done!

Saturday, February 9, 2013

Rockin Valentine - PTU

This tutorial was made and written by my own ideas any resemblance to other tutorials is purely coincidental.

Supplies Needed
For experienced PSP User
Scrapkit: Rockin Valentine by Designs by Sarah
You can purchase her kit here
Tube of choice. I'm using artwork by Verymany
You can purchase artwork here
Font of choice. I'm using font called CF Punk Forever
Plugin: Eye Candy 5-Impact-Gradient Glow
Plugin: Xero-Radiance

Elements used from kit
sb_pmt_Rockin_Valentine_cupcake
sb_pmt_Rockin_Valentine_flower1
sb_pmt_Rockin_Valentine_flower2
sb_pmt_Rockin_Valentine_flower3
sb_pmt_Rockin_Valentine_frame2
sb_pmt_Rockin_Valentine_guitar
sb_pmt_Rockin_Valentine_heart1
sb_pmt_Rockin_Valentine_heart2
sb_pmt_Rockin_Valentine_note1
sb_pmt_Rockin_Valentine_pp9
sb_pmt_Rockin_Valentine_print1
sb_pmt_Rockin_Valentine_print3
sb_pmt_Rockin_Valentine_shoe1
sb_pmt_Rockin_Valentine_spiked collar
sb_pmt_Rockin_Valentine_swirl1

Let's get Started
Open new raster 600x600
Copy and Paste frame2
Copy and Paste pp9  drag below frame layer
Adjust size to fit inside use eraser tool to remove outside access
Copy and Paste the prints drag to bottom in raster
Copy and Paste music notes duplicate 3x on 2 go to image-mirror
Copy and Paste remaining elements by sample
On shoe go to image-mirror
On flowers duplicate and arrange by sample
On collar layer use eraser tool so cupcake is inside
Add tube of choice place below elements
I applied Radiance Effect (optional) with drop shadow
Add name I applied Gradient Glow with drop shadow
Add copyright info and we are done!

Wednesday, February 6, 2013

Boy Meets Girl - PTU

This tutorial was made and written by my own ideas any resemblance to other tutorials is purely coincidental.

Supplies Needed
For experienced PSP User
Scrapkit: Boy Meets Girl by Designs by Sarah
You can purchase her kit here
font of choice. I'm using font called DJB Jacked Up Kinda Luv

Elements used from kit 
sb_pmt_boy-meets-girl_couple1
sb_pmt_boy-meets-girl_couple3
sb_pmt_boy-meets-girl_flower1
sb_pmt_boy-meets-girl_frame3
sb_pmt_boy-meets-girl_heart label
sb_pmt_boy-meets-girl_heart line
sb_pmt_boy-meets-girl_pp1
sb_pmt_boy-meets-girl_ring
sb_pmt_boy-meets-girl_rose
sb_pmt_boy-meets-girl_word art2
sb_pmt_boy-meets-girl_word art

Let's get Started
Open new raster 600x600
Copy and Paste frame
Copy and Paste pp1 adjust size to fit inside frame
Use eraser tool to remove outside access
Copy and Paste the couples adjust size to fit inside frame
Copy and Paste remaining elements by sample 
On wordart apply drop shadow
Add name and credit info then we are done!


Tuesday, February 5, 2013

Feeling Flirty - PTU

This tutorial was made and written by my own ideas any resemblance to other tutorials is purely coincidental.

Supplies Needed
For experienced PSP User
Scrapkit: Feeling Flirty by Designs by Sarah
You can purchase her kit here
Font of choice. I'm using font called Lane-Narrow
Tube of choice. I'm using artwork by Verymany
You can purchase artwork here
Plugin: Xero-Radiance

Elements used from kit
sb_pmt_feeling_flirty_frame1
sb_pmt_feeling_flirty_paisley2
sb_pmt_feeling_flirty_pp1
sb_pmt_feeling_flirty_ribbon1
sb_pmt_feeling_flirty_tag2
sb_pmt_feeling_flirty_vine
sb_pmt_feeling_flirty_word art

Let's get Started
Open new raster 600x600
Copy and Paste frame1
Copy and Paste pp1 drag below frame
Adjust size so fits inside
Copy and Paste remaining elements by sample
On paisley2 and vine duplicate-image-mirror
Add tube of choice drag under frame layer
Select frame layer use eraser tool to go over tube 
So the tube layer is now above frame
I applied Radiance Effect (optional)
Add name I applied drop shadow
Add copyright info and we are done!

Sexy Valentine - PTU

This tutorial was made and written by my own ideas any resemblance to other tutorials is purely coincidental.

Supplies Needed
For experienced PSP User
Scrapkit: Sexy Valentine by Pimp'd Designz
You can purchase her kit here
Tube of choice. I'm using artwork by Zlata_M
You can purchase artwork here
Font of choice. I'm using font called LainieDaySH
Plugin: Xero-Radiance

Elements used from kit
pd13-flower-02
pd13-frame-01
pd13-frame-03
pd13-heart-02
pd13-mesh
pd13-pp-06
pd13-pp-10
pd13-ribbon-04
pd13-sparkle

Let's get Started
Open new raster 600x600
Copy and Paste frame01 duplicate-image-mirror
Copy and Paste frame03 adjust size duplicate-image-mirror
Copy and Paste pp06 drag below heart frames 
Use eraser tool to remove outside access
Copy and Paste pp10 drag to bottom in layer box
Use eraser tool to remove outside access
Copy and Paste flower duplicate by sample
Copy and Paste ribbon duplicate-image-mirror
Copy and Paste remaining elements by sample
Copy and Paste tube of choice in center
I applied radiance Effect (optional)
Copy and Paste tube adjust size to fit inside heart frame
Double click on tube change opacity to 50
Duplicate-image-mirror place in other frame
Add name and copyright info then we are done!