Pages

Saturday, March 31, 2012

PrettyLittleGarden - PTU

This tutorial was made and written by my own ideas any resemblance to other tutorials is purely coincidental.

Supplies Needed
For experienced PSP user
Scrapkit: PrettyLittleGarden by CreativeScrapsbyCrys
You can view her blog here and purchase her kit here
Tube of choice. I'm using artwork by Keith Garvey
You can purchase his work here
Font of choice. I'm using font called Larissa
Plugin: Eye Candy 5-Impact-Gradient Glow-Glass
Plugin: Xero-Radiance

Elements used from kit
PLG_element_4
PLG_element_5
PLG_element_6
PLG_element_8
PLG_element_9
PLG_element_14
PLG_element_18
PLG_element_22
PLG_element_27
PLG_element_33
PLG_element_46
PLG_element_66
PLG_element_70

Let's get Started
Open new raster 600x600
Copy and Paste element6 place in center
Copy and Paste element4 duplicate-apply drop shadow
Copy and Paste element5 drag to top in layer box
Duplicate-image-mirror apply drop shadow
Copy and Paste element68 
Drag below the purple pots
Duplicate 3x so you now have 4 layers
On 2 of the layers go to image-mirror arrange by sample
Copy and Paste element18
Duplicate drag above the leaves
Copy and Paste element46
Duplicate 2x so you now have 3 layers
Adjust size and arrange above purple pots
On pink flower duplicate-image-mirror
Apply drop shadow
Copy and Paste remaining elements by sample
Copy and Paste tube of choice
I applied Radiance Effect (optional)
Add name I applied Glass-Gradient Glow-drop shadow
Add copyright info and we are done!
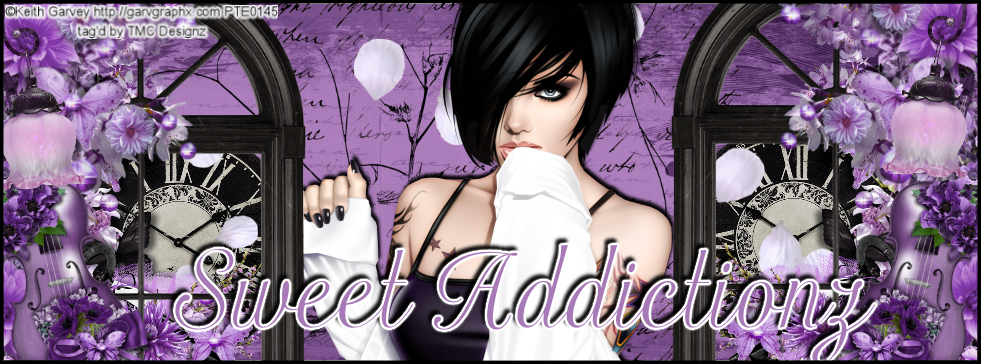


Friday, March 30, 2012

Garden Magick - PTU


This tutorial was made and written by my own ideas any resemblance to other tutorials is purely coincidental.

Supplies Needed
For experienced PSP user
Scrapkit: Garden Magick by 2 Irish Bitches Designs
You can view blog here and purchase kit here
Font of choice. I'm using font called Gabriola
Plugin: Eye Candy 5-Impact-Gradient Glow

Elements used from kit
book
candle
flower1
flowers&leaves
flowerscatter
heartelement
lamb
leaf pile
leaves1
Lightpost
Lights

Let's get Started
Open new raster 600x600
Copy and Paste heartelement adjust size if needed
Copy and Paste leaves1
Drag below heartelement apply drop shadow
Copy and Paste flowers&leaves drag above the leaves 1
Duplicate-image-mirror apply drop shadow
Copy and Paste flowerscatter drag to top in layer box
Duplicate and arrange by sample
Copy and Paste Flower1 duplicate-image-mirror
Copy and Paste remaining elements by sample
Add name I applied Gradient Glow with drop shadow
Add credit info and we are done!

Wednesday, March 28, 2012

Daydream Believer - PTU


This tutorial was made and written by my own ideas any resemblance to other tutorials is purely coincidental.

Supplies Needed
For experienced PSP user
Scrapkit: Daydream Believer by SweetCravingsScraps
You can view her blog here and purchase her kit here
Font of choice. I'm using font called Atlastgreeting
Tube I'm using is included in kit
Plugin: Eye Candy 5-Impact-Gradient Glow
Plugin: Xero-Radiance

Elements used from kit
Medi_aphydia1
SCS_Daydream Believer_ButterflyScatter1
SCS_Daydream Believer_Cloud1
SCS_Daydream Believer_FantasyHouse
SCS_Daydream Believer_FeltFlower4
SCS_Daydream Believer_Field1
SCS_Daydream Believer_Flower5
SCS_Daydream Believer_Lantern
SCS_Daydream Believer_LeafPile
SCS_Daydream Believer_Owl1
SCS_Daydream Believer_Owl2
SCS_Daydream Believer_Paper19
SCS_Daydream Believer_Tree2
SCS_Daydream Believer_Turtle

Let's get Started
Open new raster 500x300
Open Paper19 go to image-resize to raster size
Copy and Paste into new raster
Selections-select all-float-modify-select selections border
I do border size 3 add new raster in layer box
Select paint tool and I filled a dark brown
Copy and Paste field1 drag below border layer
Copy and Paste flower5 apply drop shadow
Duplicate 3x so you now have 4 layers
Arrange behind field layer by sample
Copy and Paste leafpile and drag below the flower layers
Duplicate 3x so you now have 4 layers 
Arrange by sample
Copy and Paste remaining elements by sample
On owl1 go to image-mirror
On the feltflower I duplicated 4x so you now have 5 layers
Arrange to your liking
On the tube I used plugin Radiance (optional)
Add name I applied Gradient Glow with drop shadow
Add copyright info and we are done!

Monday, March 26, 2012

Mid Summer Night - PTU

This tutorial was made and written by my own ideas any resemblance to other tutorials is purely coincidental.

Supplies Needed
For experienced PSP user
Scrapkit: Mid Summer Night by Pimp'd Designz
You can purchase her kit here
Tube of choice. I'm using artwork by Keith Garvey
You can purchase his work here
Font of choice. I'm using font called Will&Grace
Plugin: Eye Candy 5-Impact-Glass-Gradient Glow

Elements used from kit
Butterfly-03
flower-01
flower-02
green-08
greens-ribbon
pp13

Let's get Started
Open new raster 600x600
Copy and Paste green08 apply drop shadow
Duplicate-image-flip drag below first frame layer
Copy and Paste pp13 drag to bottom in layer box
Adjust size so fits inside frame 
Use eraser tool to remove outside access
Copy and Paste flower02 drag under first frame
Duplicate-image-mirror
Copy and Paste flower01 drag to bottom in layer box
Duplicate 6x so you now have 7 layers
On 2 of the layers go to image-mirror
For the bottom positions go to image-flip
Copy and Paste remaining elements 
On butterfly-duplicate-image-flip
Add tube of choice drag under first frame layer
Select eraser tool and on the first frame erase where head is
So looks like shes out of frame
Add name I applied Glass-Gradient Glow-drop shadow
Add copyright info and we are done!

Sunday, March 25, 2012

Lovely ladybugs - PTU

This tutorial was made and written by my own ideas any resemblance to other tutorials is purely coincidental.

Supplies Needed
For experienced PSP user
Scrapkit : Lovely Ladybugs by CreativeScrapsbyCrys
You can purchase her kit here
Font of choice. I'm using font called Accent Dot Lots
Mask of choice. I'm using Mask1 in set1 by BrutalDesigns here

Elements used from kit
LL_Element_2
LL_Element_16
LL_Element_22
LL_Element_26
LL_Element_27
LL_Element_28
LL_Element_49
LL_Element_51
LL_Element_60
LL_Element_62
LL_Element_63
LL_Paper_5
LL_Paper_14

Let's get Started
Open new raster 600x600
Copy and Paste Element 51
Use magic wand and select inside the tag frame
Copy and Paste paper 5 go to select-invert-delete
Copy and Paste Element 28 go to image-flip
Duplicate 3x so you now have 4 layers
On 2 layers go to image-mirror
Copy and Paste paper 14 drag to bottom in layer box
Go to layers-load/save mask-load mask from disk
Select mask-right click-merge-merge group 
Copy and Paste Element 22 duplicate-image-mirror
Copy and Paste Elements 62 and 63 adjust size and arrange by sample
Copy and Paste Element 49 duplicate-image-mirror
When selected go to square box to adjust angle to liking
Copy and Paste remaining elements by sample
Add name and credit info 


Saturday, March 24, 2012

My Imortal ll - PTU

This tutorial was made and written by my own ideas any resemblance to other tutorials is purely coincidental.

Supplies Needed
For experienced PSP user
Scrapkit: My Imortal ll by Pimp'd Designz
You can purchase her kit here
Tube of choice. I'm using artwork by Alex Prihodko
You can purchase artworks here
Font of choice. I'm using font called Altitude DB
Plugin: Eye Candy 5-Impact-Gradient Glow
Plugin: Xero-Radiance

Elements used from kit
pd-book-01
pd-candle-01
pd-clock-01
pd-flower-01
pd-flower-03
pd-fog
pd-frame-01
pd-greens-01
pd-pp-03
pd-print-04
pd-ribbon-02

Let's get Started
Open new raster 600x600
Copy and Paste frame adjust size if needed
Copy and Paste pp03 adjust size so fits inside frame
Use eraser tool to remove outside access
Copy and Paste print04 drag to bottom in layer box
Duplicate 2x so you now have 3 layers
On one layers go to image-flip arrange by sample
Copy and Paste remaining elements by sample
On flower01 duplicate-image-mirror
Copy and Paste tube of choice drag below frame layer
I applied Radiance effect (optional)
Add name I applied Gradient Glow twice
First color using white then next red with drop shadow
Add copyright info and we are done!


All The Small Things - PTU

This tutorial was made and written by my own ideas any resemblance to other tutorials is purely coincidental.

Supplies Needed
For experienced PSP user
Scrapkit: All The Small Things by SweetCravingsScraps
You can view her blog here and purchase her kit here
Font of choice. I'm using font called Plantagenet Cherokee
Mask of choice. I'm using Mask14 in set3 by BrutalDesigns here
Plugin: Eye Candy 5-Impact-Gradient Glow

Elements used from kit
SCS_AllTheSmallThings_Basket
SCS_AllTheSmallThings_Bird2
SCS_AllTheSmallThings_CuteBoyBunny
SCS_AllTheSmallThings_CuteGirlBunny
SCS_AllTheSmallThings_Flower5
SCS_AllTheSmallThings_Gate
SCS_AllTheSmallThings_Grass
SCS_AllTheSmallThings_Paper6
SCS_AllTheSmallThings_Sun&Cloud Doodle
SCS_AllTheSmallThings_Tree

Let's get Started
Open new raster 600x600
Copy and Paste Grass towards bottom of your raster
Copy and Paste paper6 adjust size if needed
Go to layers-load/save mask-load mask from disk
Select mask-right click-merge-merge group
Duplicate mask layer-right click-merge-merge down
Copy and Paste sun&cloud apply drop shadow
Copy and Paste remaining elements by sample
On flower duplicate
On bird-image-mirror
Add name I applied Gradient Glow with drop shadow
Add credit info and we are done!


Friday, March 23, 2012

Mirror Mirror - PTU

This tutorial was made and written by my own ideas any resemblance to other tutorials is purely coincidental.

Supplies Needed
For experienced PSP user
Scrapkit: Mirror Mirror by Pimp'd Designz
You can purchase her kit here
I'm using Mask provided in kit
Font of choice. I'm using font called Wizards Magic
Plugin: Eye Candy 5-Impact-Gradient Glow
Plugin: Alien Skin Xenofex2-Constellation

Elements used from kit
pd-cracked mirror
pd-floor-01
pd-flower-02
pd-glitter-01
pd-mask-BONUS-b
pd-moon
pd-print-02
pd-ribbon-02
pd-sparkle-01
pd-tree

Let's get Started
Open new raster 600x600
Copy and Paste mask adjust size if needed
Select all-float-defloat
Copy and Paste floor go to pick tool and select move
Drag the floor layer towards bottom of mask that is selected
Go to select-invert-hit delete on keyboard
Copy and Paste glitter drag below the mask layer
I applied Constellation effect (optional)
Duplicate 3x so you now have 4 layers
Arrange around mask frame 
Copy and Paste print drag below glitter layers
Duplicate 3x so you now have 4 layers
On 2 of the layers go to image-mirror arrange by sample
Copy and Paste remaining elements
On ribbon erase bottom access so looks like its behind mask frame
Add name I applied Gradient Glow
Add credit info and we are done!

Thursday, March 22, 2012

Hoppy Spring - PTU

This tutorial was made and written by my own ideas any resemblance to other tutorials is purely coincidental.

Supplies needed
For experienced PSP user
Scrapkit: Hoppy Spring by Designs by Sarah
You can purchase kit here
Cluster frame also by Designs by Sarah 
Font of choice. I'm using font called JI Bunny Caps
Mask of choice. I'm using Mask362 by Vix here
Plugin: Eye Candy 5-Impact-Gradient Glow

Elements used from kit
sb_pmt_hoppy-spring_broken egg
sb_pmt_hoppy-spring_bunny
sb_pmt_hoppy-spring_carrots
sb_pmt_hoppy-spring_egg1
sb_pmt_hoppy-spring_egg4
sb_pmt_hoppy-spring_grass
sb_pmt_hoppy-spring_pp2
sb_pmt_hoppy-spring_pp9
sb_pmt_hoppy-spring_tree
sb_pmt_hoppy-spring_CLUSTERS_cluster 2

Let's get Started
Open cluster frame
Go to image-resize-600x600
Copy and Paste pp9 adjust size so fits inside frame
Copy and Paste pp2 drag to bottom in layer box
Go to layers-load/save mask-load mask from disk
Select mask-right click-merge-merge group
Duplicate-right click-merge-merge down
Copy and Paste remaining elements by sample
On broken egg duplicate-image-mirror
Duplicate the grass
On eggs and bunny apply drop shadow (optional)
On name I applied Gradient Glow with drop shadow
Add credit info and we are done!


Sunday, March 18, 2012

Forever Love - PTU


This tutorial was made and written by my own ideas any resemblance to other tutorials is purely coincidental.

Supplies Needed
For experienced PSP user
Scrapkit: Forever Love by Designs by Sarah
You can purchase her kit here
Tube of choice. I'm using artwork by Keith Garvey 
You can purchase his work here
Font of choice. I'm using font called Fleurie
Mask of choice. I'm using Mask1 in set1 by BrutalDesigns here
Plugin: Eye Candy 5-Impact-Gradient Glow
Plugin: Xero-Radiance

Elements used from kit
sb_pmt_forever-love_bow1
sb_pmt_forever-love_flower2
sb_pmt_forever-love_frame1
sb_pmt_forever-love_greenery1
sb_pmt_forever-love_greenery2
sb_pmt_forever-love_greenery3
sb_pmt_forever-love_hearts notes
sb_pmt_forever-love_lamp post
sb_pmt_forever-love_leaves
sb_pmt_forever-love_petals
sb_pmt_forever-love_pp4
sb_pmt_forever-love_ribbon1

Let's get Started
Open new raster 600x600
Copy and Paste frame
Copy and Paste pp4 drag below frame layer
Go to layers-load/save mask-load mask from disk
Select mask-right click-merge-merge down
Adjust size if needed
Copy and Paste greenery2 drag below frame layer
Duplicate-image-mirror
Copy and Paste leaves drag below frame layer
Duplicate 7x so you now have 8 layers
Arrange around frame by sample
Copy and Paste hearts notes duplicate-image-mirror
I applied drop shadow (optional)
Copy and Paste remaining elements by sample
On the greenery 1 duplicate-image-mirror 
Drag under flower
On petals duplicate drag under elements
Add tube of choice I applied Radiance Effect (optional)
Add name I applied Gradient Glow with drop shadow
Add copyright info and we are done!


California Girls - PTU


This tutorial was made and written by my own ideas any resemblance to other tutorials is purely coincidental.

Supplies Needed
For experienced PSP user
Scrapkit: California Girls by Pimp'd Designz
You can purchase her kit here
Tube of choice. I'm using artwork by Ismael Rac
You can purchase his work here
Font of choice. I'm using font called LilyUPC
Plugin: Eye Candy 5-Impact-Gradient Glow-Glass
Plugin: Xero-Radiance

Elements used from kit
cc-flower-01
cc-frame-02
cc-palm-01
cc-pp-06
cc-sand-02
cc-starfish
cc-surfboard

Let's get Started
Open new raster 600x600
Copy and Paste frame I add drop shadow
Copy and Paste pp6 drag below frame layer
Adjust size so fits inside frame
Copy and Paste close up tube of choice below frame layer
Double click on tube and change opacity to 60
Copy and Paste remaining elements by sample
On flower and starfish duplicate
Copy and Paste full tube of choice drag below elements
I applied Radiance Effect with drop shadow (optional)
Add name I applied Glass-Gradient Glow-Drop shadow
Add copyright info and we are done!

Saturday, March 17, 2012

Love Story - PTU

This tutorial was made and written by my own ideas any resemblance to other tutorials is purely coincidental.

Supplies Needed
For experienced PSP user
Scrapkit: Love Story by CreativeScrapsbyCrys
You can view her blog here and purchase her kit here
Tube of choice. I'm using artwork by Ismael Rac
You can purchase his work here
Font of choice. I'm using Font called Love
Mask of choice. I'm using Mask33 in set5 by BrutalDesigns here
Plugin: Eye Candy 5-Impact-Gradient Glow
Plugin: Xero-Radiance

Elements used from kit
LS_Bear
LS_DressForm
LS_FlowerScatter2
LS_Frame1
LS_Leaves3
LS_Paper2
LS_Ribbon3
LS_WordArt3

Let's get Started
Open new raster 600x600
Copy and Paste frame1
Copy and Paste Paper2 drag to bottom in layer box
Go to layers-load/save mask-load mask from disk
Select mask-right click-merge-merge group
Duplicate-right click-merge-merge down
I applied drop shadow
Copy and Paste leaves3 drag below frame layer
Go back to open leaves element-image-flip
Duplicate-image-mirror
Copy and Paste FlowerScatter drag below frame layer
Duplicate-image-mirror
Copy and Paste remaining elements by sample
On Wordart apply Gradient Glow with drop shadow
On ribbon drag below wordart and bear
Use eraser tool over flower so looks like its intertwining
Add tube of choice inside frame layer
I applied Radiance Effect with drop shadow (optional)
Add name I applied Gradient Glow with drop shadow
Add copyright info and we are done!

Friday, March 16, 2012

Gothabilly - PTU

This tutorial was made and written by my own ideas any resemblance to other tutorials is purely coincidental.

Supplies Needed
For experienced PSP User
Scrapkit: Gothabilly by Pimp'd Designz
You can purchase her kit here
Tube of choice. I'm using artwork by Verymany
You can purchase tube here
Font of choice. I'm using font called Birth of a Hero
Plugin: Eye Candy 5-Impact-Gradient Glow
Plugin: Xero-Radiance

Elements used from kit
pd-ballchain
pd-flower-02
pd-flower-03
pd-frame-05
pd-paperstrip
pd-pin
pd-pp-07
pd-ribbon-01
pd-wire

Let's get started
Open new raster 600x600
Copy and Paste frame
Copy and Paste pp07 drag below frame
Adjust size so fits inside frame
Copy and Paste wire drag to bottom in layer box
Copy and Paste remaining elements by sample
On flower duplicate
On the ballchain use eraser tool by sample
So looks like its intertwining frame
Copy and Paste tube of choice
Place inside frame I applied Radiance effect (optional)
Add name I applied Gradient Glow with drop shadow
Add copyright info and we are done!

Thursday, March 15, 2012

Afternoon Delight - PTU

This tutorial was made and written by my own ideas any resemblance to other tutorials is purely coincidental.

Supplies Needed
For experienced PSP user
Scrapkit: AfternoonDelight by SweetCravingsScraps
You can view her blog here and purchase her kit here
Cookie used is provided in kit
Font of choice. I'm using font called Jenna Sue
Mask of choice. I'm using Mask5 in set1 by BrutalDesigns here
Plugin: Eye Candy 5-Impact-Gradient Glow

Elements used from kit
SCS_AfternoonDelight_Cloud1
SCS_AfternoonDelight_Flower3
SCS_AfternoonDelight_Mushroom1
SCS_AfternoonDelight_Paper8
SCS_AfternoonDelight_Sun
SSLisa-Cookie-Season Faes-Spring1

Let's get Started
Open new raster 600x600
Copy and Paste paper8 adjust size to fit inside raster
Go to layers-load/save mask-load mask from disk
Select mask-right click-merge-merge group
Adjust size if needed
Copy and Paste cloud1 double click in layer box
Change opacity to 60
On flower duplicate 4x so you now have 5 layers
Adjust size and arrange by sample I applied drop shadow
Copy and Paste remaining elements by sample
I applied drop shadow on cookie
Add name I applied Gradient Glow with drop shadow
Add copyright info and we are done!

Wednesday, March 14, 2012

Emo Princess - PTU


This tutorial was made and written by my own ideas any resemblance to other tutorials is purely coincidental.

Supplies Needed
For experienced PSP User
Scrapkit: Emo Princess by Designs by Sarah
You can purchase her kit here
Tube of choice. I'm using artwork by Zlata_M
You can purchase this tube here
Template called All Punked Up by BrutalDesigns here
Font of choice. I'm using font called Cinnamon Cake
Plugin : Eye Candy 5-Impact-Gradient Glow
Plugin: Xero-Radiance

Elements used from kit
sb_pmt_emo-princess_hearts2
sb_pmt-emo-princess_links
sb_pmt_emo-princess_pp4
sb_pmt_emo-princess_pp8
sb_pmt_emo-princess_pp9
sb_pmt_emo-princess_ribbon6
sb_pmt_emo-princess_splat2
sb_pmt_emo-princess_tiara2

Let's get Started
Open template close out credits in layer box
Select grey circle top in layer box
Selections-select all-float-defloat-invert
Copy and Paste pp8 hit delete on keyboard
Repeat same steps on purple neon square frames
Apply drop shadow (optional)
Select purple circle bottom in layer box
Selections-select all-float-defloat-invert
Copy and Paste pp4 hit delete on keyboard
Repeat same step on purple circle top layer
Select pink square top in layer box
Selections-select all-float-defloat-invert
Copy and Paste pp9 hit delete on keyboard
Repeat same step on pink square bottom
Select grey square top in layer box
Selections-select all-float-defloat
Select paint tool and fill black apply gradient glow
Repeat same step on grey square bottom
Select dk circle top in layer box
Selections-select all-float-defloat
Select paint tool and fill black apply gradient glow
Repeat same step on dk circle grey bottom
Close out lt grey square bottom and top and sm blk square bottom
Copy and Paste splat drag to bottom in layer box
Duplicate 3x so you now have 4 layers
Arrange around by sample
For inside the frames I used close up sample given when purchase tube
Select top blk frame in layer box
Copy and Paste tube move mouse on square to adjust angle
Select the blk frame in layer box again
Selections-select all-float-defloat-invert
Select close up tube hit delete on keyboard 
Double click on tube and change opacity to 60
Apply Gradient Glow (optional)
Repeat same step with blk frame below
Copy and Paste remaining elements by sample
On links I duplicated-image-mirror
Add full tube of choice I applied Radiance Effect (optional)
Add name I applied Gradient Glow with drop shadow
Add copyright info and we are done!


Angellic - PTU

This tutorial was made and written by my own ideas any resemblance to other tutorials is purely coincidental.

Supplies Needed
For experienced PSP User
Scrapkit: Angellic by Pimp'd Designz
You can purchase her kit here
Tube of choice. I'm using free artwork by Zindy
You can download freebies here
Font of choice. I'm using font called Altitude DB
Plugin: Eye Candy 5-Impact-Gradient Glow

Elements used from kit
cc-angellic-pp-03
cc-angellic-splash
cc-bead-wrap
cc-butterflies
cc-frame-01
cc-rose-beads

Let's get Started
Open new raster 600x600
Copy and Paste frame
Copy and Paste pp03 drag below frame layer
Adjust size so fits inside frame use eraser tool to remove outside access
Copy and Paste splash apply drop shadow
Copy and Paste remaining elements by sample
Copy and Paste tube of choice place inside frame
Add name I applied Gradient Glow with drop shadow
Add copyright info and we are done!

Tuesday, March 13, 2012

MayFresh - PTU


This tutorial was made and written by my own ideas any resemblance to other tutorials is purely coincidental.

Supplies Needed
For experienced PSP User
Scrapkit : MayFresh by CreativeScrapsbyCrys
You can view her blog here and purchase her kit here
Mask of choice. I'm using Mask14 set3 by Brutal Designs here
Font of choice. I'm using font called Jenna Sue
Plugin: Eye Candy 5-Impact-Gradient Glow

Elements used from kit
bench
breeze
butterfly
butterfly4
chipmunk
dandylion fluff2
doggie
little girl
paper6
petals
teddybear
tree
tulip2

Let's get Started
Open new raster 600x600
Copy and Paste paper6 
Go to  layers-load/save mask-load mask from disk
Select mask-right click-merge-merge group
Adjust size if needed
Copy and Paste tree duplicate adjust size by sample
Copy and Paste bench in lower center
Copy and Paste tulip2 and dandylion
Duplicate to arrange behind bench as in sample
Copy and Paste remaining elements by sample
On butterfly4 go to image-mirror 
Apply drop shadow to elements (optional)
Add name I applied Gradient Glow with drop shadow
Add credit and we are done!


Sunday, March 11, 2012

Cupcake Surprise Collab - PTU


These tutorials were made and written by my own ideas any resemblance to other tutorials is purely coincidental.

I'm using the latest Collab called Cupcake Surprise you can purchase here

Supplies Needed for this tutorial
For experienced PSP User
Font of choice. I'm using font called Comic Sans MS

Elements used from collabs
pd12-dots
sb_pmt_cupcake_surprise_flower2
sb_pmt_cupcake_surprise_ribbon4
tk-cupcakesurprise-element6
PDS_CS_cupcake2

Let's get Started
Open new raster 600x600
Copy and Paste dots and element6 add drop shadow (optional)
Copy and Paste remaining elements
On flower2 duplicate
Copy and Paste ribbon drag above one flower layers
Add name I  applied inner bevel with drop shadow
Right click on one layers in layer box go to merge-merge invisible
Select arrow beside magic wand tool to go to selection
Make rectangle around siggy so theres no extra access
Go to edit-cut-edit-paste as new image
Add credit and we are done!


Supplies Needed
For experienced PSP User
Font of choice. I'm using font called Accent Dot Lots
Mask of choice. I'm using Mask21 in Pack4 by BrutalDesigns here
Plugin: Eye Candy 5-Impact-Gradient Glow
 
**Note**Parts by Tammykat will no longer be available in store so you can sub with other elements and make it your own

Elements used from collabs
backinsheet_CupcakeSurprise_Schnegge
pd12-pp-04
milkshake_CupcakeSurprise_Schnegge
rollingpin_CupcakeSurprise_Schnegge
sb_pmt_cupcake_surprise_chocolate 2
sb_pmt_cupcake_surprise_chocolate bottle
sb_pmt_cupcake_surprise_chocolate
sb_pmt_cupcake_surprise_cupcake
sb_pmt_cupcake_surprise_ribbon1
tk-cupcakesurprise-element2
tk-cupcakesurprise-element20
tk-cupcakesurprise-element23
woodenspoon_Cupcake_Surprise_Schnegge

Let' get Started
Open new raster 600x600
Copy and Paste element20 apply drop shadow (optional)
Copy and Paste pp04 drag below frame layer
Go to layers-load/save mask-load mask from disk
Select mask-right click-merge-merge group adjust size if needed
Copy and Paste chocolate on top of frame layer
I applied drop shadow (optional)
Add wordart at top I applied drop shadow (optional)
Copy and Paste backinsheet inside frame 
Double click layer in layer box and change opacity to 60
Copy and Paste remaining elements by sample 
Apply drop shadow (optional)
On ribbon go to image-rotate right
On the heartchocolate go to image-mirror
Add name I applied Gradient Glow with drop shadow
Add credit and we are done!


Supplies Needed
For experienced PSP User
Tube of choice. I'm using artwork by Anna Liwanag
You can purchase her work here
Font of choice. I'm using font called AppleScript
Mask of choice. I'm using Mask14 in set3 by BrutalDesigns here
Plugin: Eye Candy 5-Impact-Gradient Glow
Plugin: Xero-Porcelain

Elements from Collabs
butterfly02_CupcakeSurprise_Schnegge
sb_pmt_cupcake_surprise_frame5
sb_pmt_cupcake_surprise_pp10
sb_pmt_cupcake_surprise_ribbon5
tk-cupcakesurprise-element1
PDS_CS-flower5
PDS_CS-frame1
PDS_CS-leaves1
PDS_CS-paper1

Let's get Started
Open new raster 600x600
Copy and Paste frame1
Copy and Paste pp10 drag below frame
Adjust size so fits inside frame use eraser tool to remove outside access
Copy and Paste pp1 drag to bottom in layer box
Go to layers-load/save mask-load mask from disk
Select mask-right click-merge-merge group
Adjust size if needed
Copy and Paste frame5 drag above mask layer
Copy and Paste leaves drag below frame layer
Duplicate-image-mirror
Copy and Paste flower5 use eraser on end of branch
Duplicate-image-mirror drag under first flower
Use eraser tool so branch looks like one as in sample
Copy and Paste remaining elements by sample
Add tube of choice place inside frame
I applied Porcelain Effect (optional)
Add name I applied Gradient Glow with drop shadow
Add copyright info and we are done!


Supplies Needed
For experienced PSP User
Tube of choice. I'm using artwork by Elias Chatzoudis
I purchased this at MPT you can now find his work here
Font of choice. I'm using font called cinnamon cake
Plugin: Eye Candy 5-Impact-Gradient Glow-Glass
Plugin: Xero-Radiance

Elements used from collabs
pd12-cupcake-01
pd12-glitter-01
frame02_CupcakeSurprise_Schnegge
paper04_CupcakeSurprise_Schnegge
tk-cupcakesurprise-element9
tk-cupcakesurprise-element15
tk-cupcakesurprise-element16
wordart_CupcakeSurprise_Schnegge

Let's get Started
Open new raster 600x600
Copy and Paste frame02 apply drop shadow (optional)
Copy and Paste paper04 drag below frame
Adjust size so fits inside use eraser tool to remove outside access
Copy and Paste glitter drag to bottom in layer box
Duplicate 3x so you now have 4 layers
Arrange around frame use eraser tool to go around edges
Copy and Paste remaining elements by sample 
Apply drop shadow to elements (optional)
On element16 to image-mirror
Add name I applied Glass Effect-Gradient Glow-drop shadow
Add copyright info and we are done!