Pages

Sunday, July 31, 2011

Christmas In July

This tutorial was made and written by my own ideas any resemblance to other tutorials is purely coincidental.

Supplies Needed
Experienced PSP user
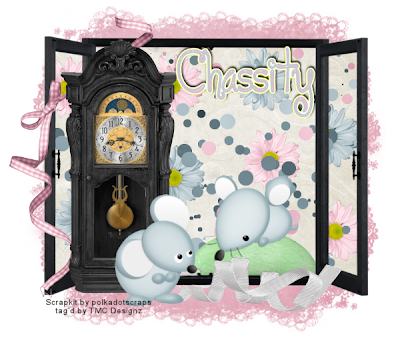
Scrapkit: Christmas in July by Crystal's Creations
You can purchase her kit here
Template by Melissaz Creationz here
Font of choice. I'm using A&S Christmas Script
Plugin: Eye Candy 5-Impact-Gradient Glow


Elements used from kit
christmas ee1
christmas ee2 (2)
christmas ee2
christmas ee3
christmas ee4
christmas ee6 (2)
christmas ee8
christmas ee14
christmas ee15
christmas ee16
christmas ee22
christmas ee28
christmas ee35
christmas ee40
christmas pp3
christmas pp10
christmas pp12

Lets get started
Open template close out credits
Select circle in layer box
Selections-select all-float-defloat-invert
Select frames in layer box
Selections-select all-float-defloat
Use paint tool fill white go to effects-innerbevel-add gradient glow
Copy and Paste pp12 hit delete on keyboard
Repeat same steps on rectangles layer
Select rectangle frames in layer box
Selections-select all-float-defloat
Use paint tool fill white go to effects-inner bevel-add gradient glow
Select squares in layer box
Selections-select all-float-defloat-invert
Copy and Paste pp10 hit delete on keyboard
Select square frames in layer box
Selections-select all-float-defloat
Use paint tool to fill white go to effects-inner bevel-add gradient glow
Select swirls in layer box
Selections-select all-float-defloat-invert
Copy and Paste pp3 hit delete on keyboard add drop shadow
Repeat same steps on Glitter trail layer
Copy and Paste lights inside circle layer
Use eraser tool to remove access so its inside only
Copy and Paste remaining elements add drop shadow *optional*
On candy cane and ornament I duplicated-image-mirror
Add name I added drop shadow
Add copyright info and we are done!


Domestic Goddess

This tutorial was made and written by my own ideas any resemblance to other tutorials is purely coincidental.

Supplies Needed
Experienced PSP user
Scrapkit: Domestic Goddess by Sarah
You can purchase her kit here
Template by Cakes Here
Tube of choice. I'm using artwork by Artzy Basheff
You can purchase his work here
Font of Choice. I'm using Loyal Fame
Plugin: Eye Candy 5-Impact-Gradient Glow
Plugin: Xero-Radiance

Elements used from kit
sb_pmt_domesticgoddess-apron
sb_pmt_domesticgoddes-bottle
sb_pmt_domesticgoddess-button 3
sb_pmt_domesticgoddess-feather
sb_pmt_domesticgoddess-fridge
sb_pmt_domesticgoddess-gloves 2
sb_pmt_domesticgoddess-ironing board
sb_pmt_domesticgoddess-mop
sb_pmt_domesticgoddess-pail
sb_pmt_domesticgoddess-pp1
sb_pmt_domesticgoddess-pp2
sb_pmt_domesticgoddess-pp 11
sb_pmt_domesticgoddess-ribbon 2
sb_pmt_domesticgoddess-soap
sb_pmt_domesticgoddess-sponge
sb_pmt_domesticgoddess-stove
sb_pmt_domesticgoddess-tag 1
sb_pmt_domesticgoddess-vacuum
sb_pmt_domesticgoddess-washer
sb_pmt_domesticgoddess-wordart

Lets get started
Open Template close out credit layer, wordart1&2, sq1&2
Select square in layer box
Selections-select all-float-defloat-invert
Copy and Paste pp2 hit delete on keyboard add gradient glow
Select raster 1 in layer box
Selections-select all-float-defloat-invert
Copy and Paste pp11 hit delete on keyboard add gradient glow
Select circllittle2 in layer box
Selections-select all-float-defloat-invert
Copy and Paste pp1 hit delete on keyboard add gradient glow
Select circlelittle in layer box
Selections-select all-float-defloat-invert 
Copy and Paste pp1 hit delete on keyboard add gradient glow
Select oval in layer box
Selections-select all-float-defloat-invert
Copy and Paste pp2 hit delete on keyboard add gradient glow
Select rectangle88 in layer box
Selections-select all-float-defloat-invert
Copy and Paste pp11 hit delete on keyboard add gradient glow
Select lilbackcircles in layer box
Selections-select all-float-defloat-invert
Copy and Paste pp1 hit delete on keyboard add gradient glow
Select backlilrect in layer box
Selections-select all-float-defloat-invert
Copy and Paste pp2 hit delete on keyboard add gradient glow
Copy and Paste wordart drag above layers in layer box
I applied gradient glow
Copy and Paste buttons I duplicated added drop shadow
Add remaining elements by sample with drop shadow *optional*
On the gloves I dragged above apron
Used eraser tool to remove bottom access so its inside apron
Copy and Paste tube of choice drag to top in layer box
Copy and Paste feather above tube of choice
I used eraser tool on feather so that its behind hand
Add name and copyright info

Friday, July 29, 2011

Pretty Mermaid

This tutorials was made and written by my own ideas any resemblance to other tutorials is purely coincidental.

Supplies Needed
Experienced PSP user
Scrapkit: Pretty Mermaid by Polkadotscraps
You can purchase her kit here
Tube of choice. I'm using artwork by NoFlutter
You can see her work here
Font of choice. I'm using font Sunshine Poppy
Plugin: Eye Candy 5-Impact-Gradient Glow-Glass
Plugin: Xero-Radiance

Elements used from kit
PDS_PM-bubbles
PDS_PM-circles
PDS_PM-deco1
PDS_PM-flower3
PDS_PM-flower5
PDS_PM-frame4
PDS_PM-leaves1
PDS_PM-leaves3
PDS_PM-paper8
PDS_PM-ribbon3
PDS_PM-shell
PDS_PM-starfish

Lets get started
Open new raster 600x600
Copy and Paste frame add drop shadow
Copy and Paste paper drag below frame in layer box
Adjust size so fits inside frame
Copy and Paste circles drag to bottom in layer box
Duplicate 2x so you now have 3 layers 
On one circles layer go to image-mirror arrange by sample add drop shadow
On the leaves, yellow flowers, blue deco-duplicate-image-mirror
Copy and Paste remaining elements by sample with drop shadow
Add tube of choice I applied radiance *optional* with drop shadow
Add name I applied glass-gradient glow-with drop shadow
Add copyright info and we are done!

Thursday, July 28, 2011

Wisteria

This tutorial was made and written by my own ideas any resemblance to other tutorials is purely coincidental.

Supplies Needed
Experienced PSP user
Scrapkit: Wisteria by Polkadotscraps
You can purchase her kit here
Cluster frame by Raspberry Road Designs here
Font of choice. I'm using font Denise Sans
Plugin: Eye Candy 5-Impact-Gradient Glow

Elements used from kit
PDS-W-element1
PDS-W-element4
PDS-W-element5
PDS-W-element8
PDS-W-element9
PDS-W-element11
PDS-W-element12
PDS-W-element14
PDS-W-element22
PDS-W-element25
PDS-W-element29
PDS-W-frame4
PDS-W-paper7

Lets get started
Open Cluster frame-image-resize 600x600
Copy and Paste paper resize so fits inside frame
Copy and Paste bricks place above paper in layer box
Copy and Paste frame above brick layer
I added leave behind frame layer and duplicated arrange by sample
Copy and Paste remaining elements by sample
On the glitter i dragged to bottom in layer box 
Duplicate and arrange by sample
Add fairy or tube of choice
I duplicated double clicked change blend mode to soft light
Add name I applied inner bevel with gradient glow
Add copyright info and we are done!

Wednesday, July 27, 2011

After The Rain


This tutorial was made and written by my own ideas any resemblance to other tutorials is purely coincidental.

Supplies Needed
Experienced PSP user
Scrapkit: After The Rain by Kikeka
You can purchase her kit here
Mask282 by weescotslasscreations here
Font of choice. I'm using font AboutFace333 ttext

Elements used from kit
cbg_aftertherain_bugs
cbg_aftertherain_clouds
cbg_aftertherain_flower05
cbg_aftertherain_flower07
cbg_aftertherain_frog01
cbg_aftertherain_frog02
cbg_aftertherain_frog04
cbg_aftertherain_grass02
cbg_aftertherain_jar02
cbg_aftertherain_ladybug
cbg_aftertherain_leaf03
cbg_aftertherain_lilipad
cbg_aftertherain_mushroom01
cbg_aftertherain_paper02
cbg_aftertherain_paper08
cbg_aftertherain_rain
cbg_aftertherain_rainbow
cbg_aftertherain_sun
cbg_aftertherain_wordart
cbg_aftertherain_mongram alpha

Lets get Started
Open Paper 2 go to layers-load/save mask-load mask from disk
Right click merge-merge group
Copy and Paste paper 8 drag above mask paper in layer box
Double click change opacity to 60 
Use eraser tool to go around edges to kinda give blend look
Copy and Paste remaining elements by sample with drop shadow
On the pink flower and leaf I duplicated
On ladybug I duplicated-image-mirror
Use alpha wordart for name I added drop shadow
Add copyright info and we are done!


Tuesday, July 26, 2011

Midnight Escape


This tutorial was made and written by my own ideas any resemblance to other tutorials is purely coincidental.

Supplies Needed
Experienced PSP user
Scrapkit: Midnight Escape by Jens Sweet Temptations
You can purchase her kit here
Font of choice. I'm using font Helmsley
Plugin: Eye Candy 5-Impact-Gradient Glow-Glass
Plugin: Xero-Radiance

Elements used from kit
BFly2
Bling1
Bling3
Box
Clock
Decor3
Dragon
Medi_thistleberry2
Medi_thistleberry4
Paper7
Swing

Lets get started
Open new raster 500x250
Open paper7-image-resize raster size
Copy and Paste 
Go to Selections-select all-modify settings-inside-anti-alias-border 3
Add new raster in layer box use paint tool fill purple
Go to effects-plugin-add gradient glow
Copy and Paste elements by sample
For clock double click in layer box change opacity to 60
For girls I applied plugin radiance *optional*
Add name I applied glass effect with gradient glow
Add copyright info and we are done!

Sunday, July 24, 2011

Diamonds Are

This tutorial was made and written by my own ideas any resemblance to other tutorials is purely coincidental.


Supplies Needed 
Experienced PSP user
Scrapkit : Diamonds are by Pimp'd Designz
You can purchase her kit here
Template by Vaybs you can find here
Tube of Choice. I'm using artwork by Keith Garvey
You can now purchase his work here
Font of choice. I'm using font Bickham Script Two
Plugin: Eye Candy 5-Impact-Gradient Glow
Plugin: Xero-Radiance

Elements used from kit
pd-clip-01
pd-diamond-02
pd-diamond-03
pd-frame-01
pd-mat-01
pd-pp-06
pd-pp-12
pd-print-01
pd-ribbon-04
pd-sparkle-01
pd-stars-02

Lets get started
Open template close out credit and lips in layer box
Select Rectangle base in layer box
Selections-select all-float-defloat-invert
Copy and Paste pp12 hit delete on keyboard w/gradient glow
Select rectangle 3 in layer box
Selections-select all-float-defloat-invert
Copy and Paste pp12 hit delete on keyboard w/gradient glow
Select circle 3 in layer box
Selections-select all-float-defloat-invert
Copy and Paste pp12 hit delete on keyboard w/gradient glow
Select circle 1 in layer box
Selections-select all-float-defloat-invert
Copy and Paste pp06 hit delete on keyboard w/gradient glow
Repeat same steps for circles 2,4,5 in layer box
Select rectangle 4 in layer box
Selections-select all-use paint tool fill in color from pp12 w/gradient glow
Copy and Paste mat element go to image-rotate right
Place above rectangle 4 in layer box
Copy and Paste remaining elements by sample
On ribbon, print, and diamond I duplicated
On star I duplicated-image-mirror
Copy and Paste tube of choice I applied radiance with drop shadow
Add name I applied gradient glow with drop shadow
Add copyright info and we are done!


Thursday, July 21, 2011

Ruby

This tutorial was made and written by my own ideas any resemblance to other tutorials is purely coincidental.

Supplies Needed
Experienced PSP user
Scrapkit: Ruby by Kikeka
You can purchase her kit here
Font of choice. I'm using FG Ronja

Elements used from kit
cbg_ruby_candy03
cbg_ruby_cup01
cbg_ruby_fairy
cbg_ruby_flower07
cbg_ruby_flower08
cbg_ruby_leaves02
cbg_ruby_scatter03
cbg_ruby_tag02
cbg_ruby_wordart05

Lets get started
Open new raster 600x600
Copy and Paste elements with drop shadow *optional*
On the scatter drag to bottom in layer box I duplicated
On leaves I duplicated-image-mirror
Add name I applied drop shadow
Add copyright info and we are done!

Wednesday, July 20, 2011

Rock Chick

This tutorial was made and written by my own ideas any resemblance to other tutorials is purely coincidental.

Supplies Needed
Experienced PSP user
Scrapkit: Rock Chick by Pink Candy Designs
You can purchase her kit here
Tube of choice. I'm using artwork by Keith Garvey
You can purchase his work here
Template by Punky Butts here
Font of choice. I'm using Honey Script
Plugin: Eye Candy 5-Impact-Gradient Glow
Plugin: Xero-Radiance

Elements used from kit
bear
boot
diamonds
discoball
glitter
guitar
musicnotes
pp1
pp2
sparkles
speakers
streamer

Lets get started
Open template close out credits in layer box
Select large circle in layer box
Selections-select all-float-defloat-invert
Copy and Paste pp2 hit delete on keyboard
Select left star in layer box
Selections-select all-float-defloat-invert
Copy and Paste pp1 hit delete on keyboard add gradient glow
Repeat same steps for right star 
Add gradient glow to frame layers
Copy and Paste close up tube place above left circle
Add plugin effect radiance (optional)
Repeat same step above right circle
Copy and Paste full tube in center add radiance (optional)
Copy and Paste remaining elements
On speakers I duplicated-image-mirror
Duplicate the glitter 3x so you now have 4 layers arrange by sample
Add name I applied gradient glow 
Add copyright info and we are done!

Tuesday, July 19, 2011

Sleepy Time

This tutorial was made and written by my own ideas any resemblance to other tutorials is purely coincidental.

Supplies Needed
Experienced PSP user
Scrapkit: Sleepy Time by Polkadotscraps
You can purchase her kit here
Tube of choice.I'm using free art by Lix
You can find it here 
You will need to request for Lic# if you do not have one
Mask351 by weescotslasscreations here
Font of choice. I'm using font Ck Stars
Plugin: Eye Candy 5-Impact-Gradient Glow

Elements used from kit
PDS_ST_clock
PDS_ST_frame3
PDS_ST_lamp
PDS_ST_moon1
PDS_ST_paper3
PDS_ST_pillow
PDS_ST_sheep1
PDS_ST_stars1
PDS_ST_teddybear

Lets get Started
Open new raster 600x600
Copy and Paste frame
Copy and Paste paper3
Go to layers-load/save mask-load mask from disk
Once you have selected mask right click-merge-merge group
Adjust size to siggy if needed
Copy and Paste remaining elements by sample
On the stars and sheep I duplicated with drop shadow
Add name I applied gradient glow with drop shadow
Add copyright info and we are done!

Atlantis

This tutorial was made and written by my own ideas any resemblance to other tutorials is purely coincidental.

Supplies Needed
Experienced PSP user
Scrapkit: Atlantis by Pimp'd Designz
You can purchase her kit here
Font of choice. I'm using font Spongy
Plugin: Eye Candy 5-Impact-Glass

Elements used from kit
pd-bottle2
pd-bubbles-01
pd-dolphins
pd-fish-02
pd-fish-03
pd-frame-02
pd-frame-03
pd-hook
pd-jelly-fish
pd-mermaid
pd-mesh-01
pd-pearl
pd-pp-03
pd-print-01
pd-rock-01
pd-rock-02
pd-sand
pd-seafoam
pd-sea-grass-01
pd-shell-02
pd-splash-03
pd-spray3
pd-waved-01

Lets get started
Open new raster 600x600
Copy and Paste frame 1
Copy and Paste frame 2 drag to bottom in layer box
Copy and Paste paper drag to bottom
Adjust size so fit inside frame use eraser tool to remove access
Copy and Paste spray drag to bottom in layer box
Duplicate 2x so you now have 3 layers arrange by sample
Copy and Paste remaining elements by sample
Duplicate rocks 2x arrange by sample
Add name I applied glass effect with drop shadow
Add copyright info and we are done!


Monday, July 18, 2011

Hickory Dickory Dock

This tutorial was made and written by my own ideas any resemblance to other tutorials is purely coincidental.

Supplies Needed
Experienced PSP user
Scrapkit : Hickory Dickory Dock by Polkadotscraps
You can purchase her kit here
Font of choice. I'm using font Loyal Fame
Mask282 by weescotslasscreations here
Plugin : Eye Candy 5-Impact-gradient glow-glass

Elements used from kit
PDS_HDD_element1
PDS_HDD_element3
PDS_HDD_element4
PDS_HDD_element9
PDS_HDD_element19
PDS_HDD_element26
PDS_HDD_element27
PDS_HDD_element30
PDS_HDD_frame3
PDS_HDD_paper4
PDS_HDD_paper8

Lets get Started
Open new raster 600x600
Copy and Paste frame
Copy and Paste paper8 drage below frame in layer box
Use eraser tool to remove access
Copy and Paste dots duplicate 2x so you now have 3 layers
Arrange by sample
Copy and Paste flowers duplicate and arrange by sample
Copy and Paste remaining elements
Copy and Paste paper4
Go to layers load/save mask-load mask from disk
Select mask right click-merge-merge group
Arrange size to tag if needed
Add name I applied glass-gradient glow-with drop shadow
Add copyright info and we are done!

Sunday, July 17, 2011

My Super Hero

This tutorial was made and written by my own ideas any resemblance to other tutorials is purely coincidental.


Supplies Needed
Experienced PSP user
Scrapkit: My Super Hero by Kikeka
You can purchase her kit here
Mask116 by weescotslasscreations here
Font of choice. I'm using font Kingthings Flashbang
Plugin: Eye Candy5-Impact-Gradient Glow


Elements from kit
cbg_mysuperhero_building03
cbg_mysuperhero_building04
cbg_mysuperhero_buidling05
cbg_mysuperhero_cloud01
cbg_mysuperhero_flare01
cbg_mysuperhero_hero
cbg_mysuperhero_lamp
cbg_mysuperhero_lightening
cbg_mysuperhero_paper16
cbg_mysuperhero_skyline
cbg_mysuperhero_stars01
cbg_mysuperhero_wordart03
cbg_mysuperhero_wordart05

Lets get Started
Open new raster 600x600
Copy and Paste skyline
Copy and Paste buildings behind the skyline
Copy and Paste lamp I duplicated
Copy and Paste remaining elements
Copy and Paste paper drag to bottom in layer box
Go to layers load/save mask-load mask from disk
Select mask right click-merge-merge group
Adjust size to tag if needed
Add name I applied gradient glow
Add copyright info and we are done!

Saturday, July 16, 2011

Remember Me

This tutorial was made and written by my own ideas any resemblance to other tutorials is purely coincidental.

Supplies Needed
Experienced PSP user
Scrapkit: Remember Me by HorseDreamns
You can purchase her kit here
Tube of choice. I'm using artwork by Keith Garvey
You can purchase his work here
Template 41 by Beckys Creations here
Font of choice. I'm using font Aspire
Plugin: Eye Candy 5-Impact-Gradient Glow-Glass
Plugin: Xero-Radiance

Elements used from kit
HD_Remember Me_element3
HD_Remember Me_element4
HD_Remember Me_element15
HD_Remember Me_element28
HD_Remember Me_element29
HD_Remember Me_element30
HD_Remember Me_element31
HD_Remember Me_element_1
HD_Remember Me_paper_2
HD_Remember Me_paper_4
HD_Remember Me_paper_19

Lets get Started 
Open Template close out credits/flowers in layer box
Select top rectangle in layer box
Selections-select all-float-defloat-invert
Copy and Paste paper2 hit delete on keyboard
Select middle rectangle in layer box
Selections-select all-float-defloat-invert
Copy and Paste paper4 hit delete on keyboard
Select frame layer in layer box
Selections-select all-float-defloat-invert
Copy and Paste paper19 hit delete on keyboard
Add gradient glow to frame layers *optional*
Select swirly doodle in layer box
Selections-select all-float-defloat-invert
Copy and Paste paper19 hit delete on keyboard
Copy and Paste remaining elements by sample
On the leaves I duplicated-image-mirror
Flower I duplicated 3x so you now have 4 layers
Add tube of choice adjust size so face fits inside frame
Drag tube above the top rectangle in layer box
I applied radiance double clicked and change opacity to 60
Copy and Paste that tube go to image-mirror move to other side
Copy and Paste original tube drag to top but under left side leaves
Add name I applied glass effect with drop shadow
Add copyright info and we are done!


Pretty Girl

This tutorial was made and written by my own ideas any resemblance to other tutorials is purely coincidental.

Supplies Needed
Experienced PSP user
Scrapkit: Pretty Girl by Polkadotscraps
You can purchase her kit here
Tube of Choice. I'm using artwork by Jose Cano
You can now purchase his work here
Font of choice.I'm using font MA Sexy
Mask84-20 by weescotslasscreations here
Plugin: Eye Candy 5-Impact-Gradient Glow-Glass
Plugin: Xero-Radiance

Elements used from kit
PDS_PG_flower8
PDS_PG_frame1
PDS_PG_frame2
PDS_PG_gem1
PDS_PG_paper10
PDS_PG_paper11
PDS_PG_sparkle1
PDS_PG_swirl1

Lets get started
Open new raster 600x600
Copy and Paste frame1
Copy and Paste frame2 drag below 1 in layer box
Copy and Paste paper10 adjust size inside frame1
Use eraser tool to remove access outside frame
Copy and Paste flower duplicate-image-mirror
Duplicate again image-flip then image-mirror
Copy and Paste gem duplicate-image-mirror
Copy and Paste swirl drag to bottom in layer box
Duplicate-image-flip with drop shadow
Copy and Paste paper11 drag to bottom in layer box
Go to layers-load/save mask-load mask from disk
Select mask then right click merge-merge group
Adjust size to tag if needed
Add tube of choice preferrably close up
Drag to top in layer box 
You will need to select the bottom flowers in layer box 
Drag above tube layer so its behind the flowers 
On tube layer use eraser tool if there is bottom access
Add name I applied glass effect-gradient glow-with drop shadow
Add copyright info and we are done!


Friday, July 15, 2011

Monkeying Around

This tutorial was made and written by my own ideas any resemblance to other tutorials is purely coincidental.

Supplies Needed
Experienced PSP user
Scrapkit: Monkeying Around by Kikeka
You can purchase her kit here
Template by Tracy.F You can find here
Font of choice.I'm using JI Chubby Caps
Plugin: Eye Candy 5-Impact-Gradient Glow-Glass

Elements used from kit
cbg_monkeyingaround_banana02
cbg_monkeyingaround_bow01
cbg_monkeyingaround_leaves01
cbg_monkeyingaround_monkey09
cbg_monkeyingaround_monkey10
cbg_monkeyingaround_monkey11
cbg_monkeyingaround_monkey12
cbg_monkeyingaround_paper04
cbg_monkeyingaround_paper05
cbg_monkeyingaround_paper10
cbg_monkeyingaround_tree01
cbg_monkeyingaround_vine02
cbg_monkeyingaround_wordart02

Lets get Started
Open template close out credit/text/leaf in layer box
Select circle in layer box
Selections-select all-float-defloat-invert
Copy and Paste paper10 hit delete on keyboard
Select rectangle in layer box
Selections-select all-float-defloat-invert
Copy and Paste paper05 hit delete on keyboard
Select squares in layer box
Selections-select all-float-defloat-invert
Copy and Paste paper04 hit delete on keyboard
Add gradient glow to frame layers (optional)
Copy and Paste remaining elements by sample
On the leaves I duplicated-image-mirror with drop shadow
Add name I applied Glass effect with Gradient Glow
Add copyright info and we are done!


Wednesday, July 13, 2011

Wana be a Rockstar

This tutorial was made and written by my own ideas any resemblance to other tutorials is purely coincidental.

Supplies Needed
Experienced PSP user
Scrapkit: Wana be a Rockstar by Wicked Creation Scrapz
You can purchase her kit here
Tube of choice.I'm using artwork by Keith Garvey
You can now find his work here
Template by Missy here
Font of choice. I'm using Sick Capital Vice
Plugin: Eye Candy 5-Impact-Gradient Glow
Plugin: Xero-Radiance

Elements used from kit
DiscoBall
Guitar2
HeadPhones
Martini
MusicNote
MusicNote2
Paper1
Paper4
Paper5

Lets get Started
Open template close out credit in layer box
Select circle in layer box
Selections-select all-float-defloat-invert
Copy and Paste paper4 hit delete on keyboard
Select rectangle in layer box
Selections-select all-float-defloat-invert
Copy and Paste paper5 hit delete on keyboard
Select frame background in layer box
Selections-select all-float-defloat-invert
Copy and Paste paper1 hit delete on keyboard
Add gradient glow to the frame layers *optional*
Copy and Paste remaining elements by sample
On notes layer duplicate-image-mirror
I placed guitar under tube layer and used eraser tool on tube layer
So looks like shes holding it
Add name I added gradient glow
Add copyright info and we are done!

Tuesday, July 12, 2011

IRock

This tutorial was made and written by my own ideas any resemblance to other tutorials is purely coincidental.

Supplies Needed
For experienced PSP users
Scrapkit: IRock by Pimp'd Designz
You can purchase her kit here
Font of choice. I'm using Vtks Revolt
Template by Tamie you can find here
Mask297 by weescotslasscreations here
Plugin: Eye Candy 5-Impact-Glass-Gradient Glow

Elements used from kit
pd-guitar
pd-horns-up
pd-lightening
pd-pp-01
pd-pp-02
pd-pp-03
pd-pp-04
pd-print-01
pd-rock-boy
pd-rock-girl
pd-star

Lets get started
Open template close out credits in layer box
Select Rectangle in layer box
Selections-select all-float-defloat-invert
Copy and Paste pp4 use pick tool-move if needed hit delete on keyboard
Repeat same steps for Strip 2 in layer box
Select Circle in layer box
Selections-select all-float-defloat-invert
Copy and Paste pp2 use pick tool-move if needed hit delete on keyboard
Repeat same steps for Circle 2
Add gradient glow to frame layers *optional*
Select heartbackground in layer box
Selections-select all-float-defloat-invert
Copy and Paste pp1 hit delete on keyboard
Double click change opacity to 50
Copy and Paste pp3 drag to bottom in layer box
Go to layers-load/save mask-load mask from disk
Select mask right click-merge-merge group
Adjust size to siggy if needed
Copy and Paste remaining elements
I duplicated-image-mirror the guitars
On start I went to image-mirror
Add name I applied Glass with drop shadow
Add copyright info and we are done!