Pages

Thursday, March 28, 2013

Vintage Romance - PTU

This tutorial was made and written by my own ideas any resemblance to other tutorials is purely coincidental.

Supplies Needed 
For experienced PSP User
Scrapkit: Vintage Romance by Memory Lane Creations
You can purchase her kit here
Tube of choice. I'm using artwork by Keith Garvey
You can purchase his work here
Font of choice. I'm using font called Shonar Bangla
Plugin: Eye Candy 5-Impact-Gradient Glow
 Plugin: Xero-Radiance

Elements used from kit
memlaCr_vr_frame1
memlaCr_vr_pp19
memlaCr_vr_rose1
memlaCr_vr_rose2
memlaCr_vr_string wrap

Let's get Started
Open new raster 600x600
Copy and Paste frame1
Copy and Paste pp19 drag below frame layer
Copy and Paste remaining elements by sample
Copy and Paste tube of choice place under frame layer
I applied Radiance Effect Double click on tube change opacity to 50
Copy and Paste tube and put on other side
Add tube again apply Radiance Effect
Add name I applied Gradient Glow
Add copyright info and we are done!

Tuesday, March 26, 2013

Spring in the Garden - PTU

This tutorial was made and written by my own ideas any resemblance to other tutorials is purely coincidental.

Supplies Needed
For experienced PSP Users
Scrapkit: Spring in the Garden by Jackie's Jewels
You can purchase her kit here
Font of choice. I'm using font called New Garden
Plugin: Eye Candy 5-Impact-Gradient Glow

Elements used from kit
Bunny2
Butterflies
Dirt
Fence
Flower1
Flower8
Flower9
Grass2
HandPitchFork
HandRake
HandShovel
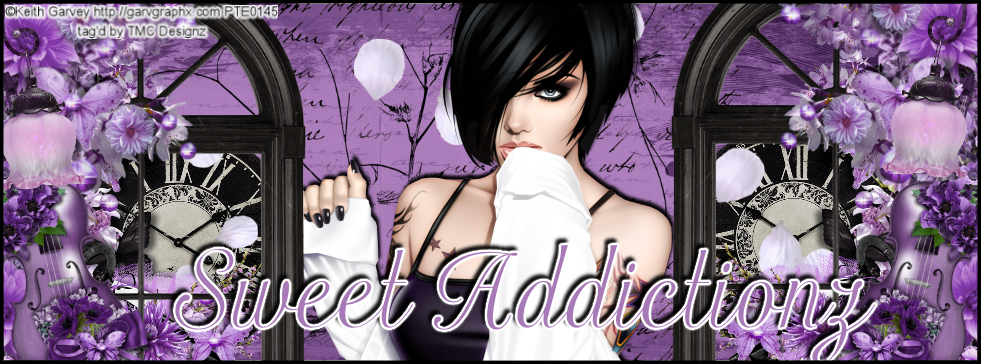
Rain
Rock & Grass
WagonWheel

Let's get Started
Open new raster 600x600
Copy and Paste fence
Copy and Paste grass duplicate 
Copy and Paste flowers duplicate by sample
Copy and Paste Grass&Rock duplicate-image-mirror
Copy and Paste remaining elements by sample
Add name I applied Gradient Glow with drop shadow
Add your credit info and we are done!

Berry Blush - PTU

This tutorial was made and written by my own ideas any resemblance to other tutorials is purely coincidental.

Supplies Needed
For experienced PSP User
Scrapkit: Berry Blush by Designs by Sarah
You can purchase her kit here
Tube of choice. I'm using artwork by Verymany
You can purchase here
Font of choice. I'm using font called  Pycuafodi
Plugin: Xero-Radiance

Elements used from kit
sb_pmt_berry-blush_bow5
sb_pmt_berry-blush_feather1
sb_pmt_berry-blush_feather2
sb_pmt_berry-blush_flower1
sb_pmt_berry-blush_flower6
sb_pmt_berry-blush_flower7
sb_pmt_berry-blush_frame3
sb_pmt_berry-blush_leaf2
sb_pmt_berry-blush_leaf
sb_pmt_berry-blush_pp4

Let's get Started
Open new raster 600x600
Copy and Paste frame
Copy and Paste pp4 drag below frame layer
adjust size then use eraser tool to remove outside access
Copy and Paste leaf2 duplicate 3x on 2 go to image-flip
Arrange around frame by sample
Copy and Paste remaining elements by sample
On feathers and leaf duplicate-image-mirror
Add tube of choice for inside frame layer
I applied Radiance Effect (optional)
Double click on tube change opacity to 60
Copy and Paste fuller tube drag under elements
Add name I applied drop shadow
Add copyright info and we are done!


Friday, March 22, 2013

Spring Fling - PTU


This tutorial was made and written by my own ideas any resemblance to other tutorials is purely coincidental.

Supplies Needed
For experienced PSP User
Scrapkit: Spring Fling by Designs by Sarah
You can purchase her kit here
Font of choice. I'm using font called Allura
Tube of choice. I'm using arwork by keith Garvey
You can purchase his work here
Mask of choice. I'm using Floral Mask by ScrappinKrazydesigns here
Plugin: Eye candy 5-Impact-Gradient Glow
Plugin: Xero-Radiance

Elements used from kit
sb_pmt_springfling-flower3
sb_pmt_springfling-frame5
sb_pmt_springfling_greenery4
sb_pmt_springfling-pp1
sb_pmt_springfling-ribbon1
sb_pmt_springfling-scatter2

Let's get Started
Open new raster 600x600
Copy and Paste frame
Copy and Paste leaves duplicate 4x on 3 go to image-flip
Use eraser tool to remove access from each inside frame layer
Copy and Paste flower duplicate 5x arrange by sample
Copy and Paste pp1 drag to bottom in layer box
Copy and Paste ribbon duplicate-image-mirror
I applied drop shadow on both
Copy and Paste tube of choice for inside frame layer
I applied Radiance Effect-double click on tube-change opacity to 70
Copy and Paste full size tube of choice
I applied Radiance Effect (optional)
Add name I applied Gradient Glow with drop shadow
Add copyright info and we are done!


Thursday, March 21, 2013

Snuggle Bunny - PTU

This tutorial was made and written by my own ideas any resemblance to other tutorials is purely coincidental.

Supplies Needed 
For experienced PSP_User
Scrapkit: Snuggle Bunny by Designs by Sarah
You can purchase her kit here
Tube of choice. I'm using artwork by Keith Garvey
You can purchase his work here
Font of choice. I'm using font called Sverige Script Demo
Plugin: Eye candy 5-Impact-Gradient Glow
Plugin: Xero-Radiance

Elements used from kit
sb_pmt_snuggle-bunny_basket2
sb_pmt_snuggle-bunny_carrot1
sb_pmt_snuggle-bunny_eggs
sb_pmt_snuggle-bunny_frame1
sb_pmt_snuggle-bunny_greenery1
sb_pmt_snuggle-bunny_greenery3
sb_pmt_snuggle-bunny_leaf
sb_pmt_snuggle-bunny_pp10

Let's get Started
Open new raster 600x600
Copy and Paste frame
Copy and Paste pp10 drag below frame layer 
adjust size so fits inside use eraser tool to remove outside access
Copy and Paste greenery1 drag above frame layer
Copy and Paste remaining elements by sample
On leaf duplicate and arrange below greenery2 layer
Add tube of choice. I applied Radiance Effect (optional)
Add name I applied Gradient Glow with drop shadow
Add copyright info and we are done!


Wednesday, March 20, 2013

Color-Series3-Maroon - PTU

This tutorial was made and written by my own ideas any resemblance to other tutorials is purely coincidental.

Supplies Needed
For experienced PSP User
Scrapkit: Color-Series3-Maroon by Pimp'd Designz
You can purchase her kit here
Tube of choice. I'm using artwork by Keith Garvey
you can purchase his work here
Font of choice. I'm using font called Lovers Quarrel
Plugin: Eye candy 5-Impact-Gradient Glow
Plugin: Xero-Radiance

Elements used from kit
pd13-flower-01
pd13-frame-02
pd13-pp-04
pd13-print-01
pd13-ribbon-01

Let's get Started
Open new raster 600x600
Copy and Paste frame
Copy and Paste pp04 drag below frame
Adjust size and use eraser tool to remove outside access
Copy and Paste remaining elements by sample
On print duplicate 3x arrange around frame
Add tube of choice I applied Radiance Effect (optional)
Add name I applied Gradient glow with drop shadow
Add copyright info and we are done!

Color-Series3-Emerald - PTU

This tutorial was made and written by my own ideas any resemblance to other tutorials is purely coincidental.

Supplies Needed
For experienced PSP User
Scrapkit: Color-Series3-Emerald by Pimp'd Designz
you can purchase her kit here
Tube of choice. I'm using group artist permission artwork by AnaRasha
Mask of choice. I'm using FloralMask5 by Scrappin Krazy Designs here
Font of choice. I'm using font called LainieDaySH
Plugin: Eye  Candy 5-Impact-Gradient Glow

Elements used from kit
pd13-flower-01
pd13-flower-02
pd13-frame-02
pd13-pp-02
pd13-print-01
pd13-ribbon-02

Let's get Started
Open new raster 600x600
Copy and Paste frame
Copy and Paste pp02 drag below frame
Go to layers-load/save mask-load mask from disk
Select mask-right click-merge-merge group
Copy and Paste pp02 again and place above mask layer
Adjust size and use eraser tool to remove outside access
Copy and Paste remaining elements by sample
On flower02 duplicate
Add tube of choice place below elements
Add name I applied Gradient Glow
Add copyright info and we are done!

Color-Series3-Cobalt - PTU

This tutorial was made and written by my own ideas any resemblance to other tutorials is purely coincidental.

Supplies Needed 
For experienced PSP User
Scrapkit: Color-series3-Cobalt by Pimp'd Designz
You can purchase her kit here
Tube of choice. I'm using artwork by Zlata_M
You can purchase artwork here
Font of choice. I'm using font called Kokila
Plugin: Eye Candy 5-Impact-Gradient Glow

Elements used from kit
pd13-flower-03
pd13-frame-01
pd13-pp-03
pd13-print-02

Let's get started
Open new raster 600x600
Copy and Paste frame
Copy and Paste pp03 drag below frame layer
Adjust size so fits inside
Copy and Paste flower duplicate and arrange by sample
Add tube of choice place below elements
Duplicate the tube double click change blend mode to overlay
Add name I applied Gradient Glow with drop shadow
Add copyright info and we are done!


Monday, March 18, 2013

Spring Solace - PTU

This tutorial was made and written by my own ideas any resemblance to other tutorials is purely coincidental.

Supplies Needed
For experienced PSP User
Scrapkit: Spring Solace by annaica's place
You can purchase her kit here
Font of choice. I'm using font called vijaya

Elements used from kit
AP_SpringSolace_Element1
AP_SpringSolace_Element4
AP_SpringSolace_Element5
AP_SpringSolace_Element7
AP_SpringSolace_Element11
AP_SpringSolace_Element17
AP_SpringSolace_Element23
AP_SpringSolace_Element24
AP_SpringSolace_Element25
AP_SpringSolace_Element27
AP_SpringSolace_Element28
AP_SpringSolace_Element30
AP_SpringSolace_Element31
AP_SpringSolace_Element32

Let's get Started
Open new raster 600x600
Copy and Paste grass
Copy and Paste fence I applied drop shadow
Copy and Paste flowers against fence
Duplicate and arrange by sample
Copy and Paste remaining elements by sample
On bird duplicate 2x on one go to image-mirror
Add name I applied drop shadow
Add your credit info and we are done!

Sunday, March 17, 2013

Gothic Desire - PTU

This tutorial was made and written by my own ideas any resemblance to other tutorials is purely coincidental.

Supplies Needed
For experienced PSP Users
Scrapkit: Gothic Desire by Digital Indulgence
You can purchase her kit here
Tube of choice. I'm using artwork by Anne Stokes
You can view her work here
Font of choice. I'm using font called Lane-Narrow
Plugin: Eye Candy 5-Impact-Gradient Glow
Plugin: Xero-Radiance 

Elements used from kit
DI_Arch2
DI_BloodSplatter2
DI_Frame1
DI_Ribbon1
DI_Rose1
DI_Rose2
DI_Wordart2
DI_Paper19

Let's get Started
Open new raster 600x600
Copy and Paste frame
Copy and Paste paper19 drag below frame layer
Copy and Paste ribbon duplicate-image-mirror
Copy and Paste roses duplicate by sample
Copy and Paste arch duplicate
Copy and Paste tube of choice I applied Radiance Effect (optional)
Add name I applied Gradient Glow
Add copyright info and we are done!

Thursday, March 14, 2013

One Last Splash - PTU

This tutorial was made and written by my own ideas any resemblance to other tutorials is purely coincidental.

Supplies Needed
For experienced PSP User
Scrapkit: One Last Splash by Pimp'd Designz
You can purchase her kit here
Font of choice. I'm using font called New Garden
Mask of choice. I'm using mask by Designs by Sarah here
Plugin: Eye Candy 5-Impact-Gradient Glow

Elements used from kit
pd12-flower-01
pd12-flower-02
pd12-net-01
pd12-net-02
pd12-pp-01
pd12-ribbon-04
pd12-sand
pd12-shell-01
pd12-shell-02
pd12-shell-04
pd12-star-fish

Let's get Started
Open new raster 600x600
Copy and Paste sand place in center of raster
Copy and Paste nets duplicate both on net01 duplicate-image-flip
Copy and Paste flowers duplicate and arrange by sample
Copy and Paste shells duplicate and arrange by sample
Copy and Paste pp01 drag to bottom in layer box
Go to layers-load/save mask-load mask from disk
Select mask-right click-merge-merge group
Adjust size if needed
Add name I applied Gradient Glow with drop shadow
Add credit info and we are done!


Tuesday, March 12, 2013

MissUnderstood - PTU

This tutorial was made and written by my own ideas any resemblance to other tutorials is purely coincidental.

Supplies Needed
For experienced PSP User
Scrapkit: MissUnderstood by Grunge & Glitter
You can purchase her kit here 
Tube of choice. I'm using artwork by ArthurCrowe
You can purchase his work here
Font of choice. I'm using font called CF Punk Forever
Plugin: Eye candy 5-Impact-Gradient Glow
Plugin: Xero-Radiance

Elements used from kit
barbed wire
chain link
doodle1
frame5
key
know1
startrail3
paper19

Let's get Started
Open new raster 600x600
Copy and Paste frame5
Copy and Paste barbedwire duplicate 2x arrange on frame
Copy and Paste paper19 drag below frame layer
Adjust size so fits inside
Copy and Paste remaining elements by sample
On chainlink, doodle1,stars duplicate arrange by sample
Add tube of choice I applied Radiance Effect Optional
Add name I applied Gradient Glow
Add copyright info and we are done!

Saturday, March 9, 2013

Ceramic Poetique - PTU


This tutorial was made and written by my own ideas any resemblance to other tutorials is purely coincidental.

Supplies Needed
For experienced PSP User
Scrapkit: Ceramic Poetique by Love-Crea
You can purchase her kit here
Font of choice. I'm using font called LainieDaySH
Plugin: Eye candy 5-Impact-Gradient Glow

Elements used from kit
LC_ceramic_poetique_elements1
LC_ceramic_poetique_elements7
LC_ceramic_poetique_elements18
LC_ceramic_poetique_elements19
LC_ceramic_poetique_elements21
LC_ceramic_poetique_elements35
LC_ceramic_poetique_elements38
LC_ceramic_poetique_elements44
LC_ceramic_poetique_elements53
LC_ceramic_poetique_elements57
LC_ceramic_poetique_elements64
LC_ceramic_poetique_elements65
LC_ceramic_poetique_elements67
papier10

Let's get Started
Open new raster 600x600
Copy and Paste frame
Copy and Paste papier10 drag below frame layer
adjust size so fits inside use eraser tool to remove outside access
Copy and Paste the print and pearls below frame layer
Copy and Paste flowers on sides of frame duplicate-image-mirror
Copy and Paste remaining elements by sample
On the ribbon go to image-rotate right
I applied drop shadow on the teal flowers and bunny
Add name I applied Gradient Glow with drop shadow
Add your credit info and we are done!


Wednesday, March 6, 2013

SpringTime Collab Part by Designs by Sarah

This tutorial was made and written by my own ideas any resemblance to other tutorials is purely concidental.

Supplies Needed
For experienced PSP User
Scrapkit: SpringTime Collab part by Designs by Sarah
You can purchase kit here
Font of choice. I'm using font called Allura
Plugin: Eye Candy 5-Impact-Gradient Glow

Elements used from kit
sb_pmt_springtime_flower2
sb_pmt_springtime_flower4
sb_pmt_springtime_flower5
sb_pmt_springtime_flower7
sb_pmt_springtime_frog
sb_pmt_springtime_grass1
sb_pmt_springtime_nest
sb_pmt_springtime_print3
sb_pmt_springtime_swirls
sb_pmt_springtime_word art

Let's get Started
Open new raster 600x600
Copy and Paste print place in center of raster
Copy and Paste wordart apply drop shadow
Copy and Paste flower7 duplicate 2x on one go to image-mirror
Copy and Paste remaining flowers duplicate-image-mirror
Copy and Paste remaining elements by sample
On swirls duplicate-image-mirror
Add name I applied innerbevel-gradient glow-drop shadow
Add your credit info and we are done!


Sunday, March 3, 2013

SpringTime Collab - PTU


This tutorial was made and written by my own ideas any resemblance to other tutorials is purely concidental.

Supplies Needed
For experienced PSP User
Scrapkit: Pimp'd Designz part of SpringTime Collab
You can purchase her part here
Tube of choice.I'm using artwork by Elias Chatzoudis 
You can purchase his work here
Font of choice. I'm using font called Allura
Plugin: Eye Candy 5-Impact-Gradient Glow

Elements used from kit
pd13-cluster
pd13-flower-01
pd13-flower-06
pd13-frame-01
pd13-grass
pd13-leaf-02
pd13-pp-01
pd13-swing

Let's get Started
Open new raster 600x600
Copy and Paste frame
Copy and Paste pp01 drag below frame
Adjust size use eraser tool to remove outside access
Copy and Paste swing place above frame layer
Copy and Paste leaf duplicate-image-mirror
Copy and Paste remaining elements by sample
On flowers duplicate by sample
On grass duplicate
On white flower duplicate-image-mirror
Add tube of choice preferrable close up for inside frame
Double click on that tube change opacity to 50
Copy and Paste full size tube I applied drop shadow
Add name I applied Gradient Glow with drop shadow
Add copyright info and we are done!

Saturday, March 2, 2013

Fresh Water - PTU

This tutorial was made and written by my own ideas any resemblance to other tutorials is purely coincidental.

Supplies Needed
For experienced PSP User
Scrapkit: Fresh Water by Grunge & Glitter
You can purchase her kit here
Tube of choice. I'm using artwork by Steve Baier
You can purchase his work here
Font of choice. I'm using font called LainieDaySH
Plugin: Xero-Radiance

Elements used from kit
bluecandle
bottle1
decocircles
image2
waterfilledframe1
watereffect1
watertwig

Let's get Started
Open new raster 600x600
Copy and Paste frame
Copy and Paste image drag under frame layer
Copy and Paste decocircles drag above image layer
Copy and Paste remaining elements by sample
On bottle go to image-rotate left
Add tube of choice. I applied Radiance Effect (optional)
Add name I applied drop shadow
Add copyright info and we are done!

Friday, March 1, 2013

Masquerade - PTU


This tutorial was made and written by my own ideas any resemblance to other tutorials is purely coincidental.

Supplies Needed 
For experienced PSP User
Scrapkit : Masquerade by Grunge & Glitter
You can purchase her kit here
Tube of choice. I'm using free art by Zindy
You can download freebies here
Mask of choice. I'm using Mask241 by weescotslasscreations here
Font of choice.I'm using font called iNked God

Elements used from kit
butterfly1
champagneglass
champagne
clock
flower1
flower2
frame3
frame5
mask3
metalflourish
paper6
paper11
ribbon4
violin

Let's get Started
Open new raster 600x600
Copy and Paste frame
Copy and Paste paper11 drag to bottom in layer box
Go to layers-load/save mask-load mask from disk
Select mask-right click-merge-merge group
Adjust size if needed
Copy and Paste Paper6 drag below frame layer
adjust size use eraser tool to remove outside access
Copy and Paste frame5 drag above frame3
Copy and Paste remaining elements by sample
On champagneglass,champagne,flowers,mask,metalflourish
Duplicate-image-mirror
Apply drop shadow to flower2
Add tube of choice place inside frame
Add name go to effects-inner bevel
Go to adjustments-add/remove noise-add noise then apply drop shadow
Add copyright info and we are done!


Captivation - PTU


This tutorial was made and written by my own ideas any resemblance to other tutorials is purely coincidental.

Supplies Needed
For experienced PSP User
Scrapkit: Captivation by Designs by Sarah
You can purchase her kit here
Tube of choice. I'm using artwork by Keith Garvey
You can purchase his work here
Font of choice. I'm using font called Respective
Mask of choice. I'm using MaskSKDSfloralMask5 here
Plugin: Eye Candy 5-Impact-Gradient Glow
Plugin: Xero-Radiance

Elements used from kit
sb_pmt_captivation_backdrop2
sb_pmt_captivation_backdrop4
sb_pmt_captivation_flower4
sb_pmt_captivation_frame3
sb_pmt_captivation_greenery
sb_pmt_captivation_pp4
sb_pmt_captivation_swirl1

Let's get started
Open new raster 600x600
Copy and Paste frame
Copy and Paste backdrop4 drag under frame layer
Copy and Paste pp4 drag to bottom in layer box
Go to layers-load/save mask-load mask from disk
Select mask-right click-merge-merge group
Copy and Paste backdrop2 drag above frame layer
Copy and Paste remaining elements by sample
On the swirl I applied drop shadow
Add tube of choice. I used close up and place under frame layer
Double click on tube change opacity to 70
I applied Radiance Effect (optional)
Add name I applied Gradient Glow with drop shadow
Add copyright info and we are done!