Pages

Friday, November 30, 2012

Silverbells - PTU

This tutorial was made and written by my own ideas any resemblance to other tutorials is purely coincidental.

Supplies Needed
For experienced PSP User
Scrapkit: Silverbells by Skulliez Skrapz
You can purchase her kit here
Tube of choice. I'm using artwork by Ismael Rac
You can purchase his work here
Font of choice. I'm using font called Lovers Quarrel
Plugin: Eye Candy 5-Impact-Gradient Glow
Plugin: Xero-Radiance

Elements used from kit
dcorbitt_silverbells_bell2
dcorbitt_silverbells_berries
dcorbitt_silverbells_bow4
dcorbitt_silverbells_branch
dcorbitt_silverbells_flower1
dcorbitt_silverbells_frame2
dcorbitt_silverbells_glittersnowflake
dcorbitt_silverbells_ornament4
dcorbitt_silverbells_ornament5
dcorbitt_silverbells_pp9
dcorbitt_silverbells_tree1
dcorbitt_silverbells_tree2

Let's get Started
Open new raster 600x600
Copy and Paste frame
Copy and Paste pp9 drag below frame layer
Adjust size so fits inside frame
Copy and Paste snowflake duplicate and arrange around frame
Copy and Paste trees drag above frame layer
Copy and Paste branch duplicate 4x on 2 go to image-mirror
Copy and Paste berries duplicate 3x on 2 go to image-mirror
Copy and Paste ornaments duplicate both on 2 go to image-mirror
Copy and Paste star drag above the branch layers
Apply drop shadow
Copy and Paste flower duplicate
Copy and Paste bell duplicate-image-mirror
Add tube of choice place below the elements 
I applied Radiance Effect (optional)
Add name I applied Gradient Glow with drop shadow
Add copyright info and we are done!
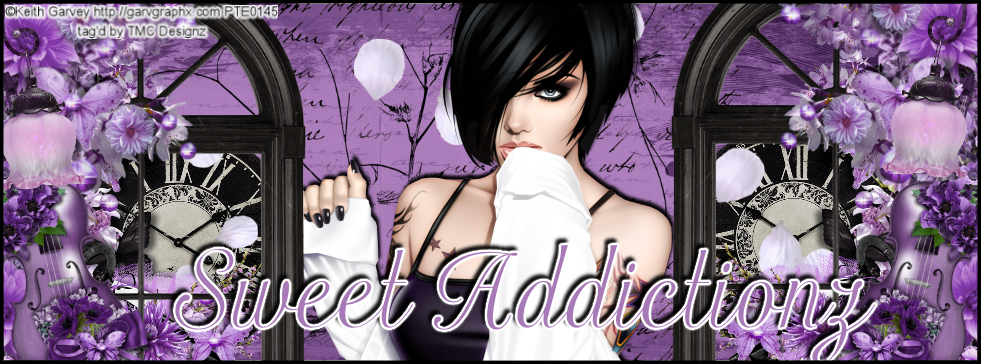

Wednesday, November 28, 2012

Macabre - PTU

This tutorial was made and written by my own ideas any resemblance to other tutorials is purely coincidental.

Supplies Needed
For experienced PSP User
Scrapkit: Macabre by Skulliez Skrapz
You can purchase her kit here
Font of choice. I'm using font called LainieDaySH
Tube of choice. I'm using Group Artist Permission only by Anastaysia
Plugin: Eye Candy 5-Impact-Gradient Glow

Elements used from kit
dcorbitt_macabre_bow
dcorbitt_macabre_butterflies2
dcorbitt_macabre_crow
dcorbitt_macabre_flower6
dcorbitt_macabre_frame2
dcorbitt_macabre_gem
dcorbitt_macabre_lace
dcorbitt_macabre_leaf
dcorbitt_macabre_paintsplatter
dcorbitt_macabre_pp4
dcorbitt_macabre_ribbon1

Let's get Started
Open new raster 600x600
Copy and Paste frame2 duplicate-image-mirror
Copy and Paste pp4 drag below frames 
Use eraser tool to remove outside access
Copy and Paste lace at bottom of frames
Copy and Paste ribbon on top of lace layer
Copy and Paste leaves and flowers below the ribbon layers
Duplicate each 2x one 1 leaf go to image-mirror
Copy and Paste remaining elements by sample
On butterfly duplicate-image-mirror
On crow apply Gradient Glow
Add your tube of choice
Add name and copyright info then we are done!

Tuesday, November 27, 2012

Of Christmas Past - PTU

This tutorial was made and written by my own ideas any resemblance to other tutorials is purely coincidental.
 
Supplies Needed
For experienced PSP User
Scrapkit: Of Christmas Past by CreativeScrapsbyCrys
You can purchase her kit here
Font of choice. I'm using font called Santa's Sleigh Full
Mask of choice. I'm using Mask363 by weescotslasscreations here
Plugin: Eye Candy 5-Impact-Gradient Glow
 
Elements used from kit
OCP_Element_6
OCP_Element_14
OCP_Element_18
OCP_Element_22
OCP_Element_29
OCP_Element_32
OCP_Element_34
OCP_Element_39
OCP_Element_41
OCP_Element_43
OCP_Element_47
OCP_Element_51
OCP_Element_55
OCP_Element_56
OCP_Element_60
OCP_Paper_6
 
Let's get Started
Open new raster 600x600
Copy and Paste chimney place in center
Copy and Paste greenery duplicate-image-mirror
Copy and Paste Dear Santa in center
Copy and Paste candle drag under greenery and duplicate
Copy and Paste remaining elements by sample
On presents duplicate-image-mirror
Copy and Paste Paper6 drag to bottom in layer box
Go to layers-load/save mask-load mask from disk
Select mask-right click-merge-merge down
Adjust size if needed
Add music scatter duplicate 2x arrange on background
Add name I applied Gradient Glow

Saturday, November 24, 2012

Sparkleberry - PTU

This tutorial was made and written by my own ideas any resemblance to other tutorials is purely coincidental.
 
Supplies Needed
For experienced PSP User
Scrapkit: Sparkleberry by Designs by Sarah
You can purchase her kit here
Font of choice. I'm using font called New Garden
Plugin: Eye Candy 5-Impact-Gradient Glow
 
Elements used from kit
sb_pmt_sparkleberry-bells1
sb_pmt_sparkleberry-branch1
sb_pmt_sparkleberry-branch3
sb_pmt_sparkleberry-gift tag
sb_pmt_sparkleberry-leaves1
sb_pmt_sparkleberry-leaves2
sb_pmt_sparkleberry-present1
sb_pmt_sparkleberry-print1
sb_pmt_sparkleberry-ribbon2
sb_pmt_sparkleberry-star1
 
Let's get Started
Open new raster 600x600
Copy and Paste gift tag
Copy and Paste leaves and branch arrange around sample
Copy and Paste print drag to bottom and duplicate
Copy and Paste remaining elements by sample
On star go to image-mirror apply drop shadow
Add name I applied Gradient Glow with drop shadow
Add credit info and we are done!


Friday, November 23, 2012

AB-Series-02 - PTU


This tutorial was made and written by my own ideas any resemblance to other tutorials is purely coincidental.
 
Supplies Needed
For experienced PSP User
Scrapkit: AB-Series-02 by Pimp'd Designz
You can purchase by itself or the whole series here
Font of choice.I'm using font called Respective
 
Elements used from kit
pd12-candle
pd12-feather
pd12-flower-01
pd12-flower-02
pd12-frame-01
pd12-moon
pd12-petals
pd12-pp-01
pd12-unicorn
 
Let's get started
Open new raster 600x600
Copy and  Paste frame01
Copy and Paste pp01 drag below frame
Adjust size so fits inside
Copy and Paste moon place below frame layer
Copy and Paste petals duplicate 2x
Copy and Paste flower01 duplicate-image-mirror
Repeat same step on feather
Copy and Paste candle drag under rose layer
Copy and Paste unicorn drag to top in layer box
Add name and credit then we are done!
 

Happy Holidays - PTU

This tutorial was made and written by my own ideas any resemblance to other tutorials is purely coincidental.
 
Supplies Needed
For experienced PSP User
Scrapkit: Happy Holidays by Designs by Sarah
You can purchase her kit here
Tube of choice. I'm using artwork by Jose Cano
I purchased this at MPT. Not sure where he is now but you can use any tube of choice.
Font of choice. I'm using font called Feathergraphy Decoration
Plugin: Eye Candy 5-Impact-Gradient Glow
 
Elements used from kit
sb_HappyHolidays_bulb ornament strand
sb_HappyHolidays_christmas ribbon_bow
sb_HappyHolidays_frame2
sb_HappyHolidays_pp9
 
Let's get Started
Open new raster 600x600
Copy and Paste frame2
Copy and Paste pp9 drag below frame layer
Adjust size so fits inside
Copy and Paste ornament strand go to image-rotate right
Copy and Paste ribbon bow place above frame layer
Add tube of choice place inside frame
Add name I applied Gradient Glow
Add copyright info and we are done!


Forever Friends - PTU

This tutorial was made and written by my own ideas any resemblance to other tutorials is purely coincidental.
 
Supplies Needed
For experienced PSP Users
Scrapkit: Forever Friends by SweetCravingsScraps
You can purchase her kit here
Poser used is provided in kit
Font of choice. I'm using font called KG True Colors
Plugin: Eye Candy 5-Impact-Gradient Glow
Plugin: Xero-Radiance
 
Elements used from kit
medi_snow whyt4
SCS_ForeverFriends_Appl1
SCS_ForeverFriends_Bird2
SCS_ForeverFriends_Branches
SCS_ForeverFriends_CoalPile
SCS_ForeverFriends_Dwarf1
SCS_ForverFriends_Dwarf3
SCS_ForeverFriends_Dwarf7
SCS_ForeverFriends_Field
SCS_ForeverFriends_FloatingHearts
SCS_ForeverFriends_Frame2
SCS_ForeverFriends_House
SCS_ForeverFriends_Mirror
SCS_ForeverFriends_Mushrooms
SCS_ForeverFriends_Paper6
SCS_ForeverFriends_Sign
SCS_ForeverFriends_Swirl3
SCS_ForeverFriends_Tree
SCS_ForeverFriends_Vines
 
Let's get Started
Open new raster 600x600
Copy and Paste Frame
Copy and Paste Mirror place on side of frame
Copy and Paste paper6 drag below frame layer
Adjust size so fits inside frame
Copy and Paste Poser above mirror layer
Select mirror layer use the magic wand to select inside
Go to selections-invert select poser layer hit delete on keyboard
I applied Radiance Effect on poser
Double click poser layer change opacity to 60
Copy and Paste vines drag above frame layer
Duplicate-image-mirror
Copy and Paste floating hearts drag to bottom in layer box
Duplicate 2x on 2 go to image-mirror
Copy and Paste remaining elements by sample
Add name I applied Gradient Glow
Add copyright info and we are done! 
 

Sunday, November 18, 2012

Eternal Twilight - PTU

 
This tutorial was made and written by my own ideas any resemblance to other tutorials is purely coincidental.
 
Supplies Needed
For experienced PSP User
Scrapkit: Eternal Twilight by Alika's Scraps
You can purchase her kit here
Tube of choice. I'm using freebie by Zindy
You can download here
Font of choice. I'm using font called KodchiangUPC
Plugin: Eye Candy 5-Impact-Gradient Glow
Plugin: Xero-Radiance
 
Elements used from kit
as14
as37
as58
as59
as75
as78
aspaper11
 
Let's get Started
Open new raster 600x600
Copy and Paste frame
Copy and Paste paper11 adjust size so fits inside frame
Copy and Paste scatter use eraser tool to remove outside access
Copy and Paste remaining elements by sample
Add tube of choice. I applied Radiance Effect (optional)
Add name I applied Gradient Glow with drop shadow
Add copyright info and we are done!

Thursday, November 15, 2012

Funky-Fa-La-La - PTU

This tutorial was made and written by my own ideas any resemblance to other tutorials is purely coincidental.
 
Supplies Needed
For experienced PSP User
Scrapkit: Funky-Fa-La-La by Pimp'd Designz
You can purchase her kit here
Tube of choice. I'm using artwork by LadyMishka
You can purchase here
Font of choice. I'm using font called KG True Colors
Plugin: Eye Candy 5-Impact-Gradient Glow
 
Elements used from kit
cc-candy-cane-03
cc-frame-05
cc-pp-08
cc-tree-05
 
Let's get Started
Open new raster 600x600
Copy and Paste frame5
Copy and Paste pp08 drag below frame layer
Adjust size use eraser tool to remove outside access
Copy and Paste candycane duplicate-image-mirror
Copy and Paste tree
Add tube of choice in center
Add name I applied Gradient Glow with drop shadow
Add copyright info and we are done!

Sexy Xmas Mini - PTU

This tutorial was made and written by my own ideas any resemblance to other tutorials is purely coincidental.
 
Supplies Needles
For experienced PSP User
Scrapkit: Sexy Xmas Mini by Designs by Sarah
You can purchase her kit here
Mask of choice. I'm using Mask302 by weescotslasscreations here
Font of choice. I'm using font called Scribble Box
Plugin: Eye Candy 5-Impact-Gradient Glow
 
Elements used from kit
sb_pmt_sexy-xmas_bells
sb_pmt_sexy-xmas_cluster
sb_pmt_sexy-xmas_pp2
sb_pmt_sexy-xmas_tree
 
Let's get Started
Open new raster 600x600
Copy and Paste cluster place in center
Copy and Paste tree place below cluster layer
Copy and Paste bell above cluster layer
Copy and Paste pp2 drag to bottom in layer box
Go to layers-load/save mask-load mask from disk
Select mask-right click-merge-merge group
Adjust size if needed
Add name below cluster layer apply Gradient Glow
Add credit info and we are done!
 

Naughty Mrs Claus - PTU

 
This tutorial was made and written by my own ideas any resemblance to other tutorials is purely coincidental.
 
Supplies Needed
For experienced PSP User
Scrapkit: Naughty Mrs Claus by Designs by Sarah
You can purchase her kit here
Tube of choice. I'm using artwork by Ismael Rac
You can purchase tube here
Font of choice. I'm using font called Respective
Plugin: Eye Candy 5-Impact-Gradient Glow
Plugin: Xero-Radiance
 
Elements used from kit
sb_pmt_NMC_bell1
sb_pmt_NMC_bell2
sb_pmt_NMC_branch1
sb_pmt_NMC_candy1
sb_pmt_NMC_flower1
sb_pmt_NMC_frame1
sb_pmt_NMC_pp10
sb_pmt_NMC_ribbon2
sb_pmt_NMC_shoe3
 
Let's get Started
Open new raster 600x600
Copy and Paste frame
Copy and Paste pp10 drag below frame layer
Adjust size so fits inside frame
Copy and Paste branch1 duplicate-image-mirror
Copy and Paste bell1 place in center on frame
Copy and Paste bell2 drag below bell1 duplicate-image-mirror
Copy and Paste shoe duplicate-image-mirror
Copy and Paste remaining elements
Add tube of choice place below elements in layer box
I applied Radiance Effect (optional)
Add name I applied Gradient Glow with drop shadow
Add copyright info and we are done!

Tuesday, November 13, 2012

Autumn Harvest - PTU

This tutorial was made and written by my own ideas any resemblance to other tutorials is purely coincidental.
 
Supplies Needed
For experienced PSP User
Scrapkit: Autumn Harvest by WildCherryDesigns
You can purchase here. Her store is temporarily down once back up I will update
Font of choice. I'm using font called Sverige Script Demo
Plugin: Eye Candy 5-Impact-Gradient Glow
 
Elements used from kit
WCD_AutumnHarvest-Apple Tree1
WCD_AutumnHarvest-Bird
WCD_AutumnHarvest-Bucket1
WCD_AutumnHarvest-BucketOLeaves
WCD_AutumnHarvest-BunchOLeaves
WCD_AutumnHarvest-Fence
WCD_AutumnHarvest-Girl
WCD_AutumnHarvest-Hay
WCD_AutumnHarvest-Hayrides
WCD_AutumnHarvest-Leaf1
WCD_AutumnHarvest-Leaf2
WCD_AutumnHarvest-Leaf3
WCD_AutumnHarvest-PumpkinPatch
WCD_AutumnHarvest-Rake
WCD_AutumnHarvest-Scarecrow
WCD_AutumnHarvest-Wagon
 
Let's get Started
Open new raster 600x600
Copy and Paste fence
Copy and Paste tree behind fence layer
Copy and Paste buncholeaves duplicate on fence layer
Copy and Paste remaining elements by sample
On scarecrow use eraser tool below so looks like shes behind hay
On leaf 1,2,3 arrange by sample
Add name I applied Gradient Glow
Add credit info and we are done!
 

Sunday, November 11, 2012

My December - PTU

 
This tutorial was made and written by my own ideas any resemblance to other tutorials is purely coincidental.
 
Supplies Needed
For experienced PSP User
Scrapkit: My December by Polkadotscraps
You can purchase her kit here
Font of choice. I'm using font called AngsanaUPC
Plugin: Eye Candy 5-Impact-Gradient Glow
 
Elements used from kit
PDS_MD-element1
PDS_MD-element4
PDS_MD-element12
PDS_MD-element21
PDS_MD-element23
PDS_MD-element29
PDS_MD-element31
PDS_MD-element50
PDS_MD-element54
 
Let's get Started
Open new raster 600x600
Copy and Paste fence
Copy and Paste snow place above fence layer
Copy and Paste tree drag to bottom in layer box
Copy and Paste ribbon adjust size duplicate-image-mirror
Copy and Paste leaves duplicate-image-mirror
Repeat same steps on heart vines add drop shadow
Copy and Paste remaining elements by sample
On snowflake duplicate by sample
Add name I applied Gradient Glow with drop shadow
Add credit info and we are done!

Frostbitten - PTU

This tutorial was made and written by my own ideas any resemblance to other tutorials is purely coincidental.
 
Supplies Needed
For experienced PSP User
Scrapkit: Frostbitten by Designs by Sarah
You can purchase her kit here
Tube of choice. I'm using a freebie by Zindy
You can download tube here
Font of choice. I'm using font called Lovers Quarrel
Plugin: Eye Candy 5-Impact-Gradient Glow
 
Elements used from kit
sb_pmt_frostbitten-clock
sb_pmt_frostbittin-flower1
sb_pmt_frostbitten-folded ric rac
sb_pmt_frostbitten_frame1
sb_pmt_frostbitten-gem stone branch
sb_pmt_frostbitten-icicles
sb_pmt_frostbitten-pp12
sb_pmt_frostbitten_snowflake line1
 
Let's get Started
Open new raster 600x600
Copy and Paste frame
Copy and Paste pp12 drag below frame layer
Adjust size so fits inside frame
Copy and Paste gem stone branch
Use eraser tool on lower branch so looks like its behind ribbons
Copy and Paste icicle drag below frame layer
Copy and Paste remaining elements by sample
Copy and Paste tube of choice drag under folded ric rac
Add name I applied Gradient Glow with drop shadow
Add copyright info and we are done!
 

Wednesday, November 7, 2012

Have Yourself A Merry Little Christmas - PTU

This tutorial was made and written by my own ideas any resemblance to other tutorials is purely coincidental.
 
Supplies Needed
For experienced PSP Users
Scrapkit: Have Yourself A Merry Little Christmas by Pimp'd Designz
You can purchase her kit here
Tube of choice. I'm using artwork by Keith Garvey
You can now purchase his work here
Font of choice. I'm using font called KG ways to say goodbye
Plugin: Eye Candy 5-Impact-Gradient Glow
Plugin: Xero-Radiance
 
Elements used from kit
pd12-candycane-01
pd12-candycane-02
pd12-flower-01
pd12-frame-02
pd12-ornament-01
pd12-ornament-02
pd12-pp-06
pd12-ribbon-03
pd12-snow
 
Let's get Started
Open new raster 600x600
Copy and Paste frame then duplicate (optional)
Copy and Paste pp06 drag to bottom in layer box
Adjust size then use eraser tool to remove outside access
Copy and Paste snow drag above paper layer
Copy and Paste remaining elements by sample
On candycane01and bow go to image-mirror
Use eraser tool on bow so its behind candycane layer by sample
On ornaments arrange by sample
Add tube of choice. I applied Radiance (optional)
Add name I applied Gradient Glow
Add copyright info and we are done!


Monday, November 5, 2012

Chilly Delight - PTU

This tutorial was made and written by my own ideas any resemblance to other tutorials is purely coincidental.
 
Supplies Needed
For experienced PSP User
Scrapkit: Chilly Delight by Alika's Scraps
You can purchase her kit here
Font of choice. I'm using font called KG True Colors
 
Elements used from kit
as_paper_01
as16
as17
as21
as25
as35
as50
as52
as53
 
Let's get started
Open new raster 600x600
Copy and Paste globe
Copy and Paste paper01 drag below globe
Adjust size then use eraser tool to remove outside access
Copy and Paste remaining elements by sample
On garland go to image-rotate right
Add name drag below glow layer
Add credit info and we are done!
 

Autumn Kissed - PTU

This tutorial was made and written by my own ideas any resemblance to other tutorials is purely coincidental.
 
Supplies Needed
For experienced PSP User
Scrapkit: Autumn Kissed by CreativeScrapsbyCrys
You can purchase her kit here
Font of choice. I'm using font called New Garden
Mask of choice. I'm using Mask363 by weescotslasscreations here
 
Elements used from kit
AK_Element_2
AK_Element_15
AK_Element_16
AK_Element_23
AK_Element_28
AK_Element_34
AK_Element_36
AK_Element_39
AK_Element_40
AK_Element_41
AK_Element_52
AK_Paper_4
 
Let's get Started
Open new raster 600x600
Copy and Paste pond
Copy and Paste flowers drag under pond layer
Copy and Paste bench
Copy and Paste vine under bench layer
Copy and Paste remaining elements by sample
On the lights duplicate-image-mirror
On rocks duplicate
Copy and Paste paper4 drag to bottom in layer box
Go to layers-load/save mask-load mask from disk
Select mask-right click-merge-merge group
Adjust size if needed
Add name and credit info then we are done!
 

Friday, November 2, 2012

Wild One - PTU

This tutorial was made and written by my own ideas any resemblance to other tutorials is purely coincidental.
 
Supplies Needed
For experienced PSP User
Scrapkit: WildOne by Rissa's Designs
You can purchase her kit here
Font of choice. I'm using font called iNked god
Plugin: Eye Candy 5-Impact-Gradient Glow
 
Elements used from kit
RD_Barbed Heart3
RD_Car
RD_City Scape2
RD_Claws
RD_Cupcake2
RD_Flames1
RD_Music Note Pop1
RD_Music Note Pop2
RD_Nailed Heart2
RD_Silhouette1
RD_Silhouette2
RD_Sparkles1
 
Let's get Started
Open new raster 600x600
Copy and Paste cityscape
Copy and Paste flame place above city scape
Copy and Paste silhouettes drag under flame in layer box
Copy and Paste remaining elements by sample
Add name I applied Gradient Glow
Add credit info and we are done!
 

One Good Scare - PTU

 
This tutorial was made and written by my own ideas any resemblance to other tutorials is purely coincidental.
 
Supplies Needed
For experienced PSP User
Scrapkit: One Good Scare by CreativeScrapsbyCrys
You can purchase her kit here
Font of choice. I'm using font called Allura
Plugin: Eye Candy 5-Impact-Gradient Glow
 
Elements used from kit
OGS_Element_5
OGS_Element_7
OGS_Element_14
OGS_Element_17
OGS_Element_19
OGS_Element_21
OGS_Element_34
OGS_Element_36
OGS_Element_39
OGS_Element_54
 
Let's get Started
Open new raster 600x600
Copy and Paste house
Copy and Paste tree drag below house
Duplicate-image-mirror
Copy and Paste grass duplicate-image-mirror
Copy and Paste moon go to image-mirror
Copy and Paste bats drag to bottom in layer box
Copy and Paste remaining elements by sample
Add name I applied Gradient Glow
Add credit info and we are done!
 

Thursday, November 1, 2012

FTU Blogtrain Inspiration

 
This tutorial was made and written by my own ideas any resemblance to any other tutorials is purely coincidental.
 
Supplies Needed
For experienced PSP User
Scrapkit: I'm using a freebie collab by ladies at pimpmytagswithscraps
You can download parts here
Font of choice. I'm using font called Vani
Plugin: Eye Candy 5-Impact-Gradient Glow
 
Elements used from kits
as16
as17
InspirationClusterSchnegge
dcorbitt_inspiration_inspire
dcorbitt_inspiration_pp4
sb_pmt_inspiration_arrow1
sb_pmt_inspiration_flower2
sb_pmt_inspiration_ribbon1
sb_pmt_inspiration_scribble1
sb_pmt_inspiration_splat
pd12-ribbon-04
pd12-staple
Butterflies_Inspiration_schnegge
Stars_Inspiration_schnegge
 
Let's get Started
Copy and Paste Cluster adjust size to liking
Copy and Paste pp4 drag below frame
Use eraser to remove outside access
Copy and Paste scribble duplicate 3x on 3 go to image-mirror
Copy and Paste splat duplicate
Copy and Paste remaining elements by sample
On butterflies duplicate-image-mirror add drop shadow
Add name I applied Gradient Glow
Add credit info and we are done!